
Back To


Please Be Patient
The thumbnails may take some time to load.
Click on any picture to see a larger version
![]()
![]()
|
In the previous article (below) we showed you how we made a custom bridge for a Gibson guitar that needed an upgrade to get rid of the tunamatic insert that Gibson used on many guitars of that period. We upgraded it to a modern style drop in saddle. I neglected to take pictures of the saddle slot being cut for the bridge - I thought you might like to see how we do that. Recently we had another Gibson guitar in house with the same repair being done, |
||
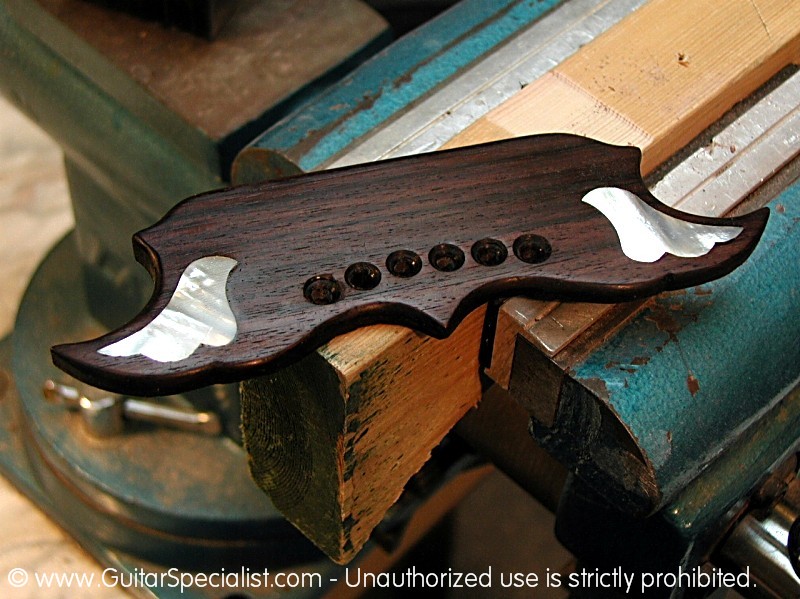
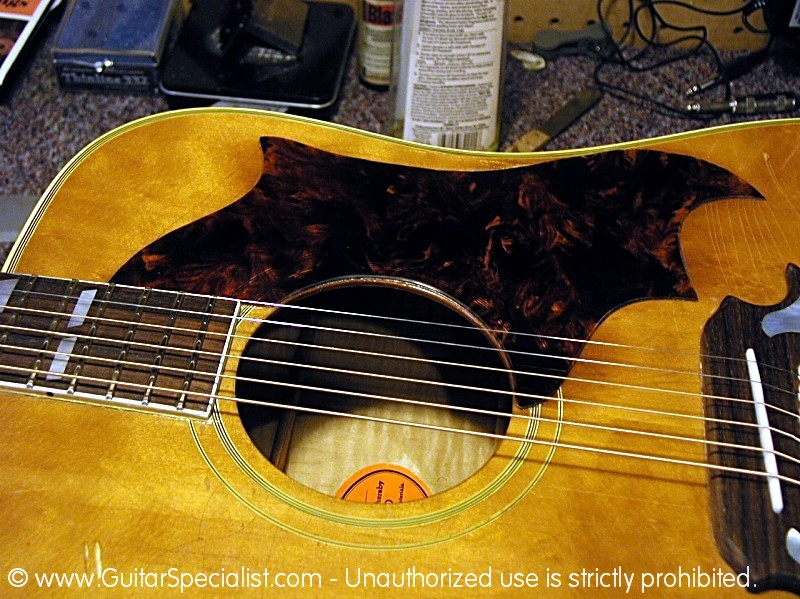
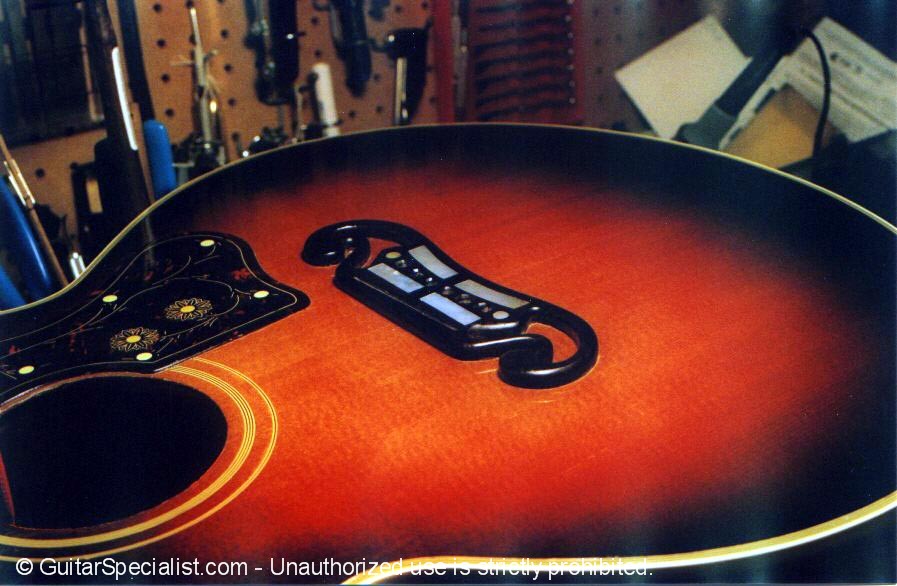
 In this case - we have already made the bridge. If you would like to see us making a bridge from scratch - see the article below. Our replacement bridge looks a lot lighter than the original - after we do the finish sanding and oil up the bridge, it will darken up quite a bit. |
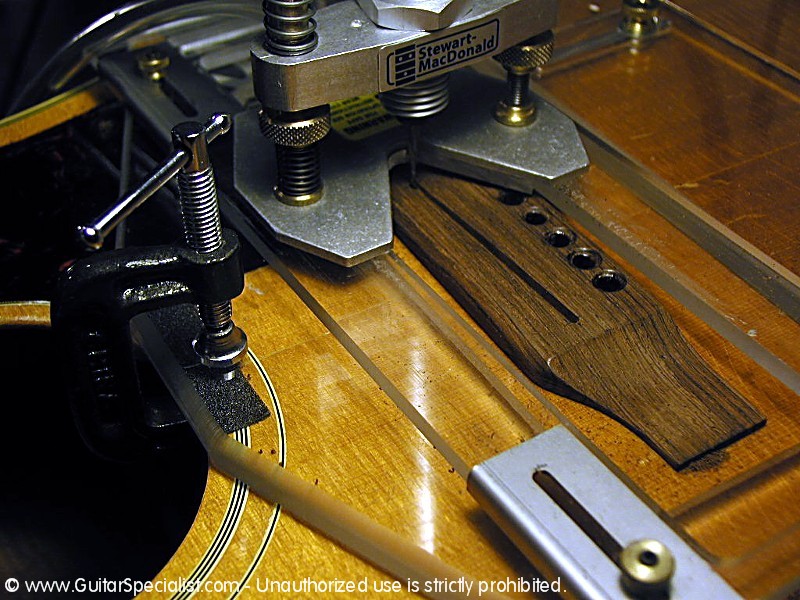
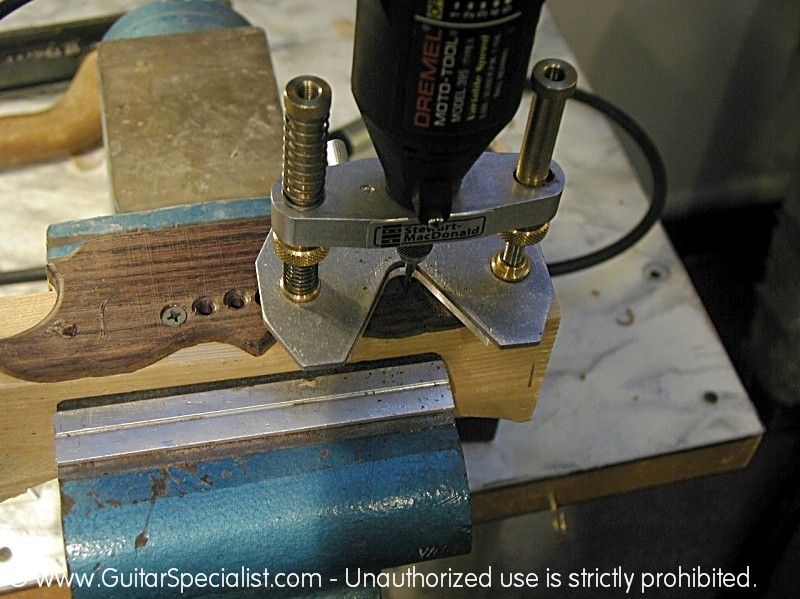
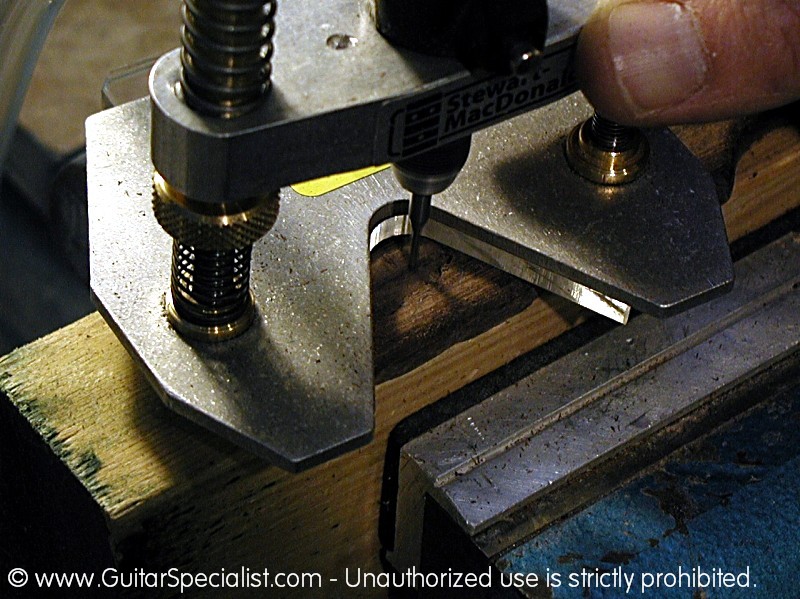
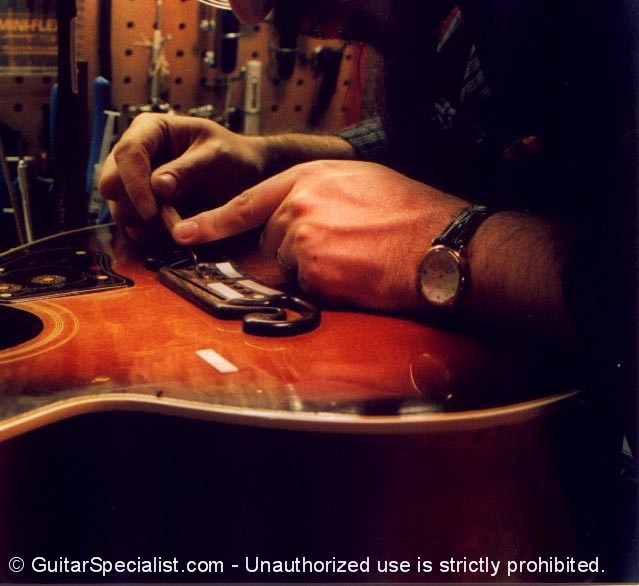
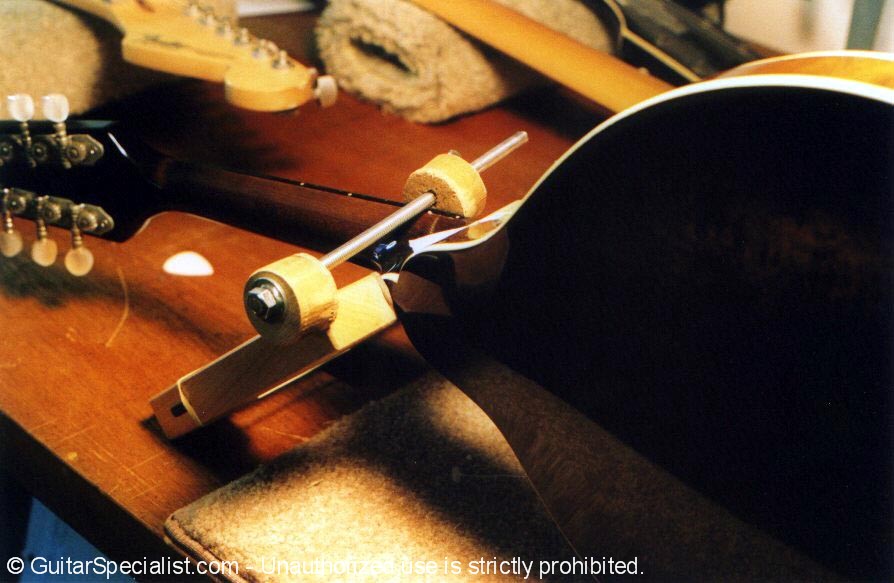
 Here is our saddle slot routing jig. Years ago we had one that we made ourselves. This one is commercially made and quite frankly - works much better than ours did. It's adjustability is what makes it a great jig. |
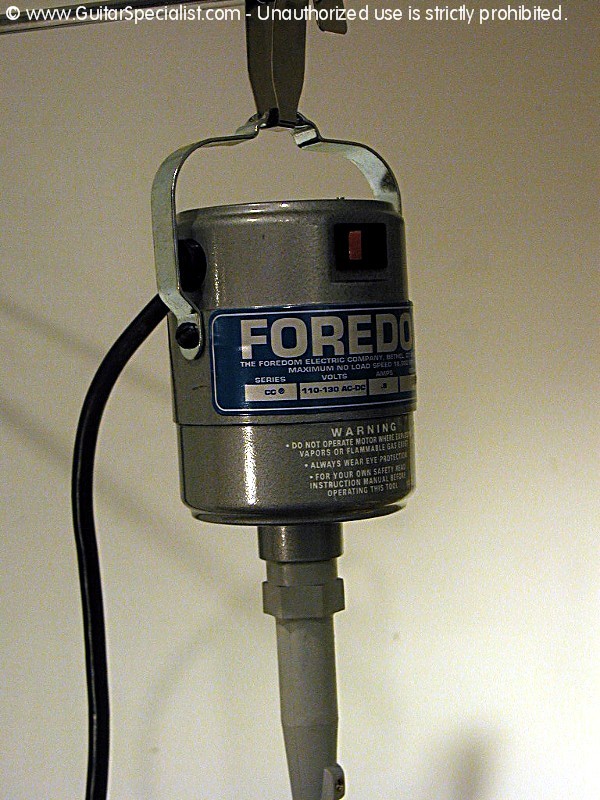
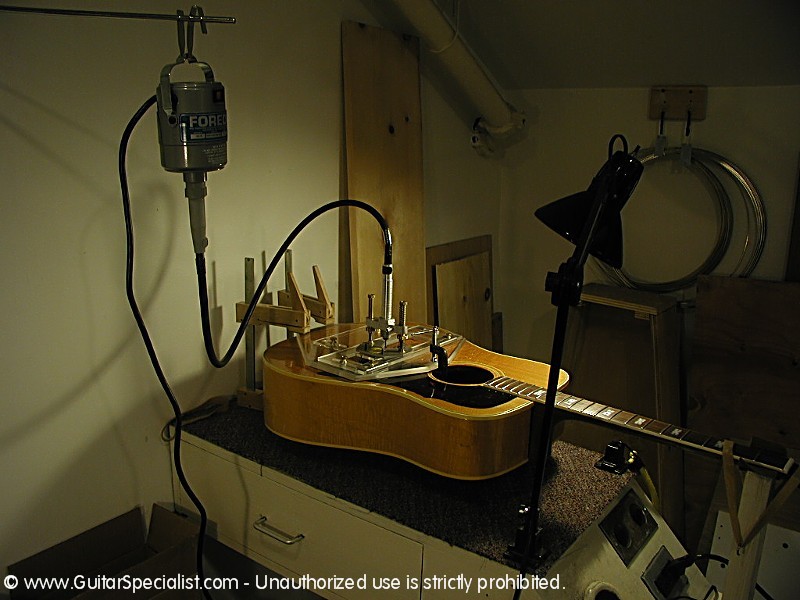 Here is the whole setup - the Foredom tool, precision router base and the saddle slot jig. When you think about it - that's a lot of tools to make one cut - but there is no better way - and the cut of the slot is critical to an "in tune" guitar. |
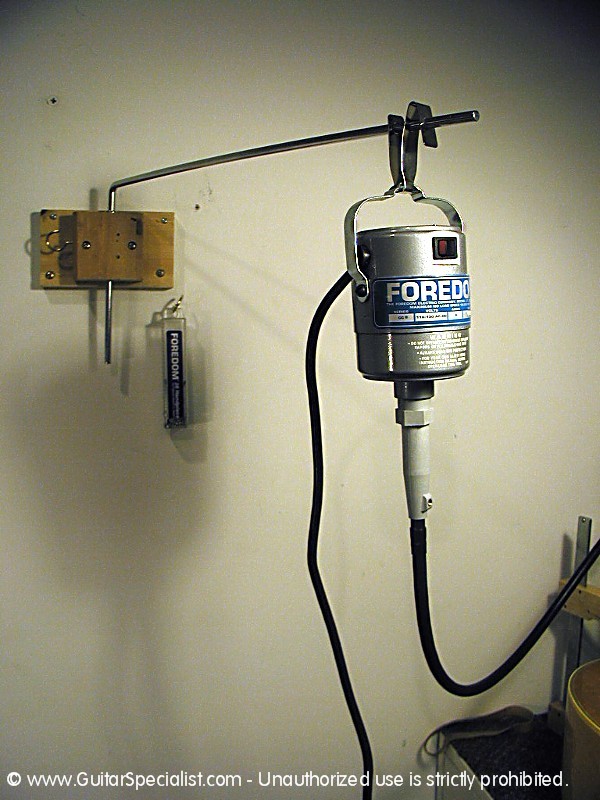 |
Here are a couple of shot of the Foredom
tool. we used to use a Dremel for this operation and upgraded to the
Foredom years ago. I can't tell you how much more of a pleasure it is
to use the right tool for the job. Not that a Dremel doesn't work - but the Foredom works so much better. |
 |
 Our saddle slot location has been measured and plotted. Here is the key to success. Measure twice - cut once. |
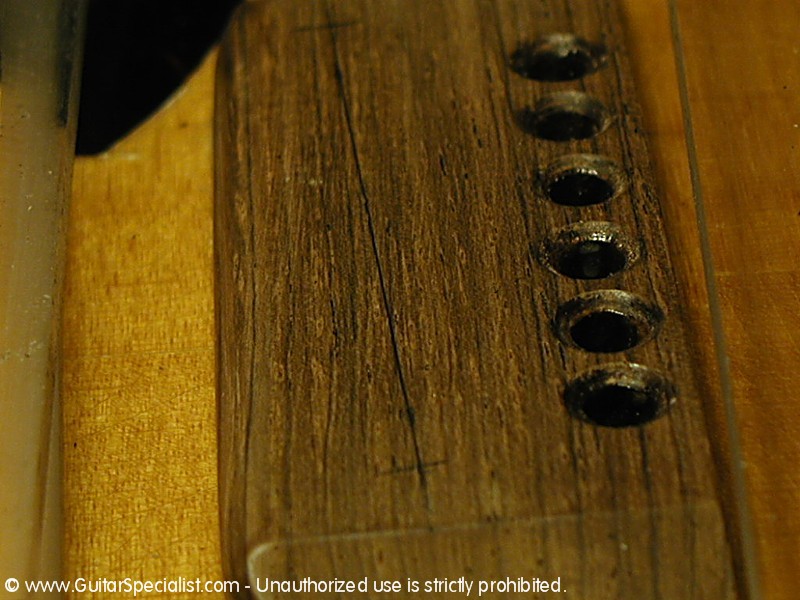 Actually, measure three or four times. That's what I do. The saddle slot is plotted for location as well as length. |
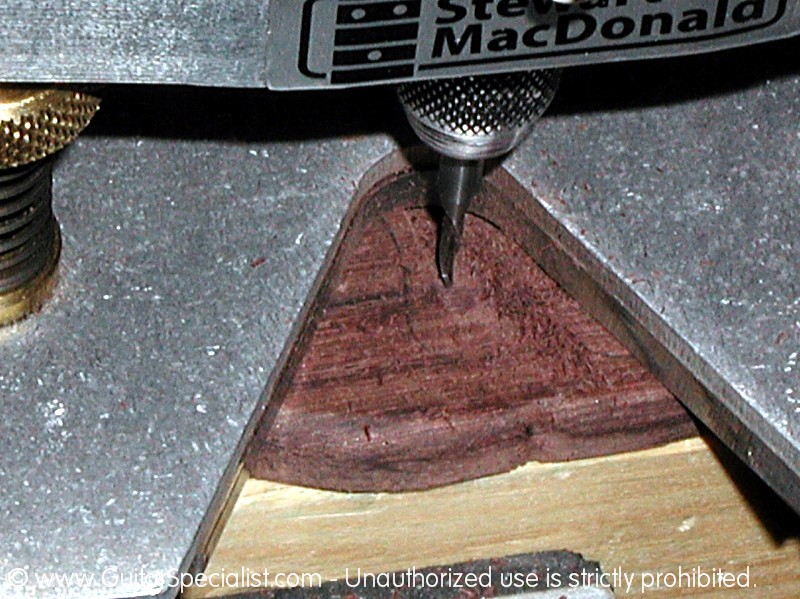
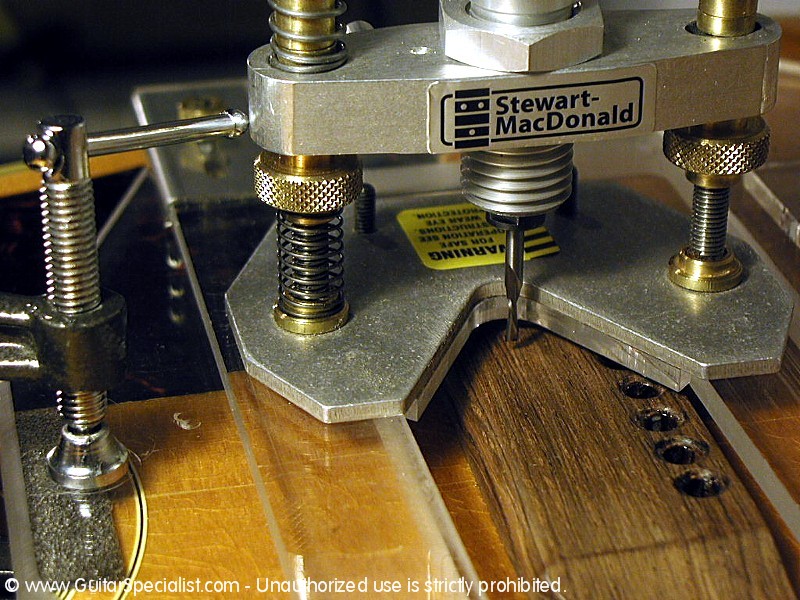 Next we insert our Foredom loaded with a reverse spiral flute down-cut router bit. How's that for a mouthful. |
 It is sized for the size of the slot and come in several different widths. 1/8 and 3/32 are the most common for guitar saddle slots. |
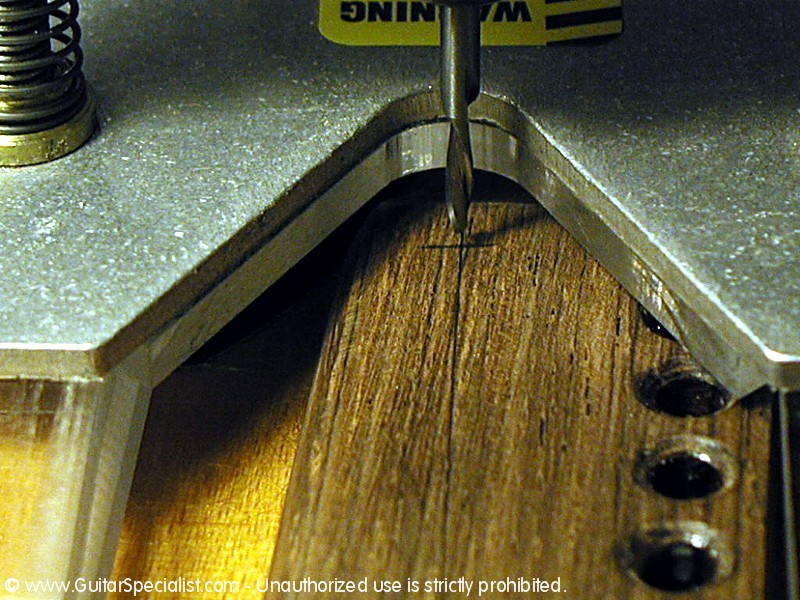 We carefully line up the cutting bit with our plotted line and take several dry passes before lowering the bit to make the first cut. Constantly re-adjusting the jig as needed to make any minor changes. |
 Once I am comfortable with the placement of the bit - I lower the cutter on the routing base and make the first cut - hold your breath - here goes. |
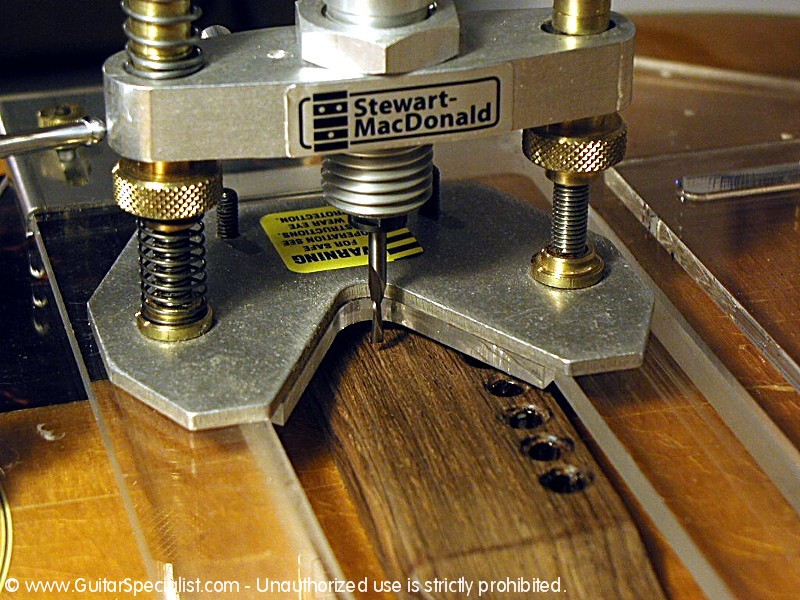
 Actually - there are never any surprises. The jig, the precision base and the foredom tool pretty much remove all doubt in getting a clean, precise cut. |
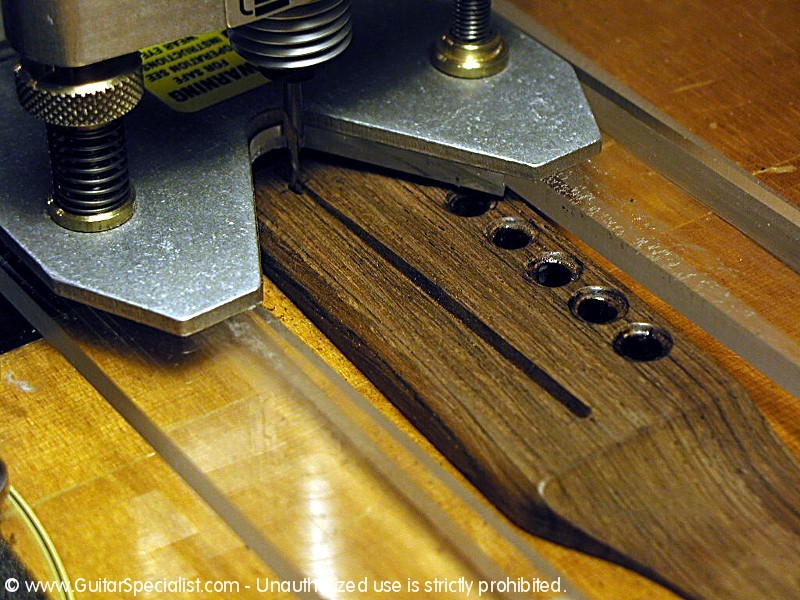
 I like to make several passes - gradually lowering the cutter every pass. This cuts down on the chances that the wood will chatter. Giving me a more consistent slot. |
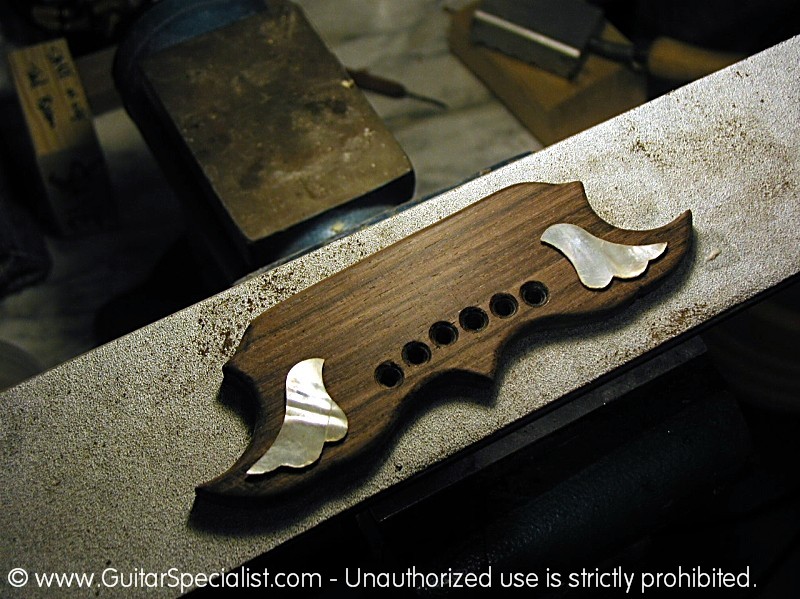
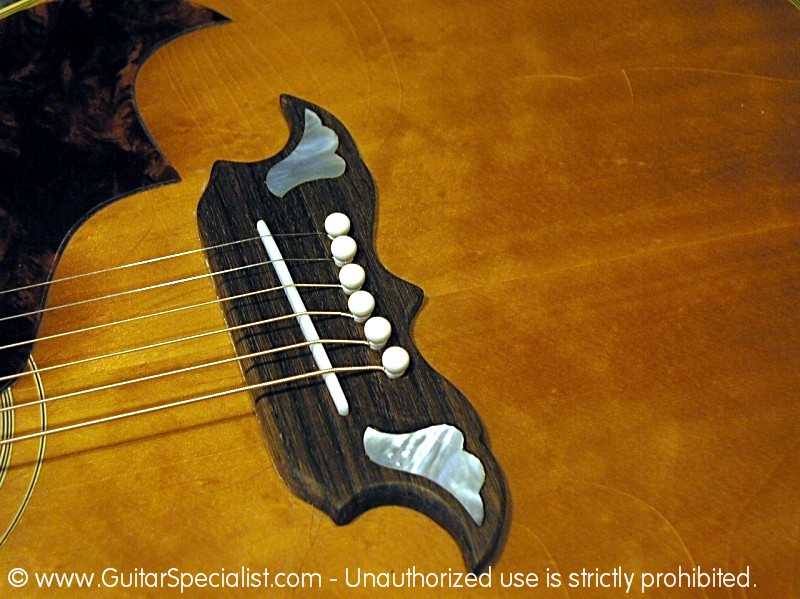
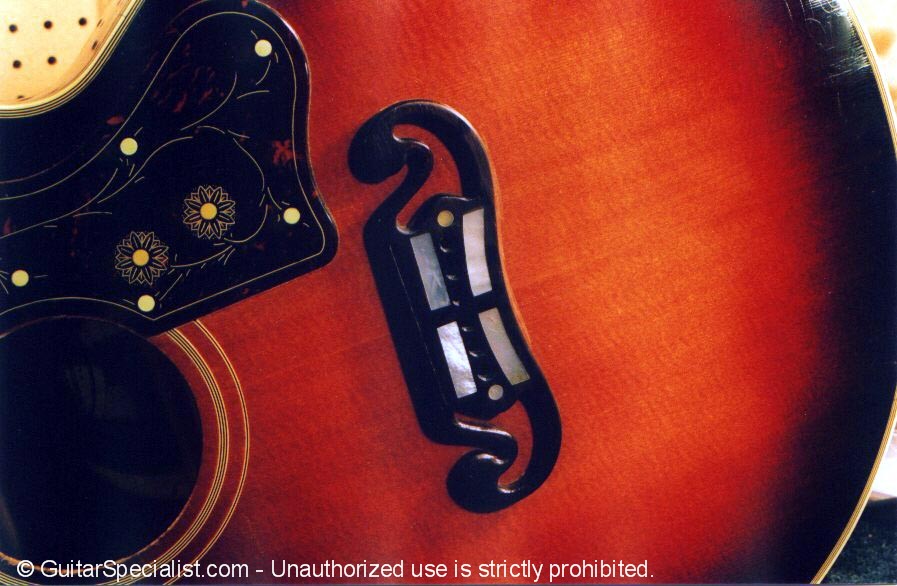
 There - were done. You can exhale now. The slot is in the right location for good intonation and a good depth for our saddle. |
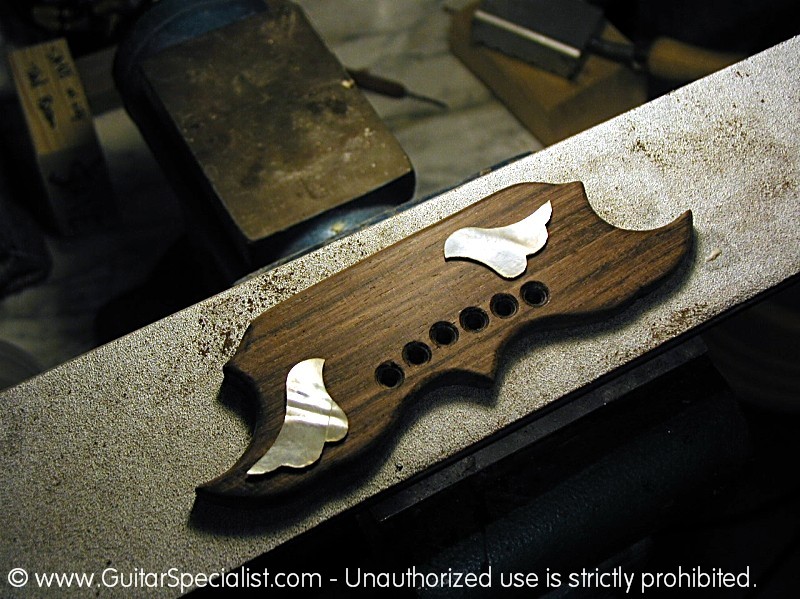
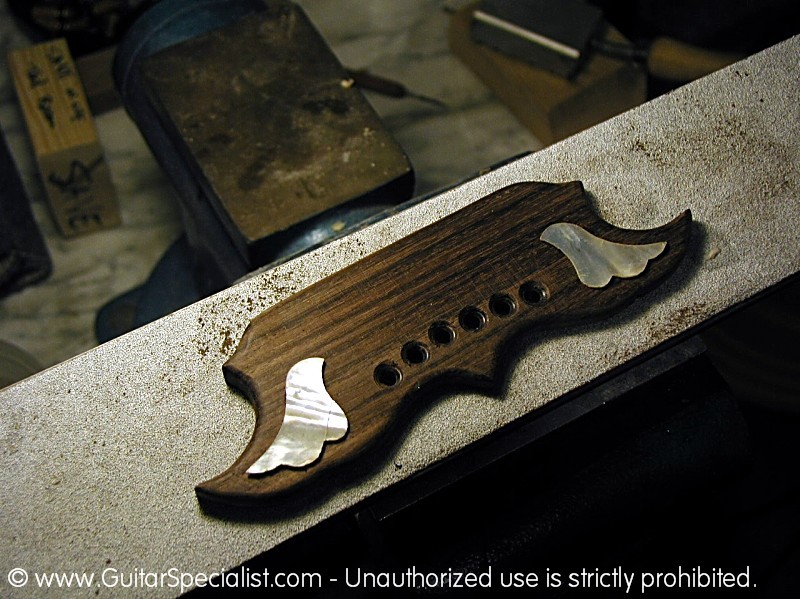
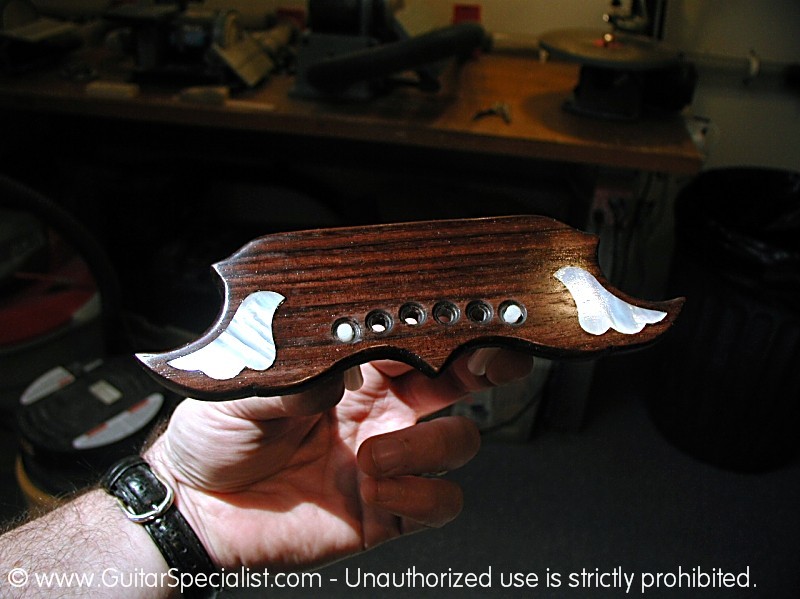
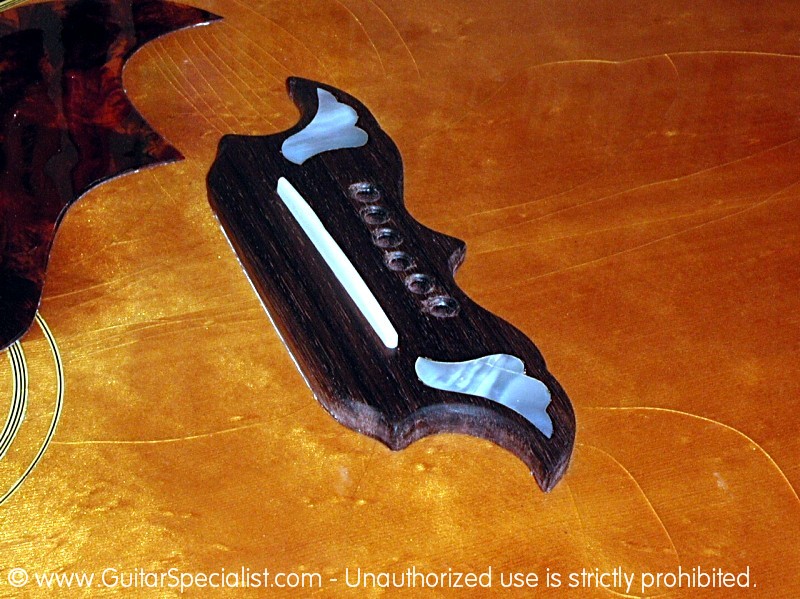
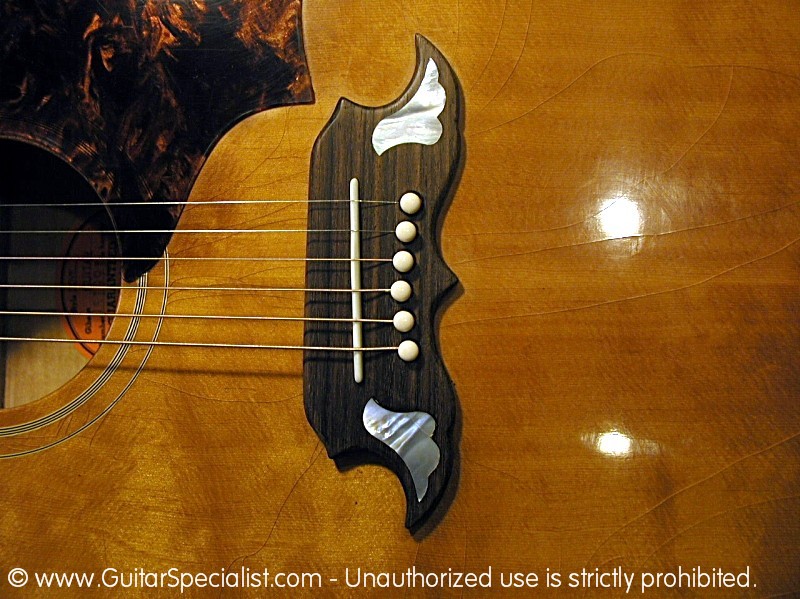
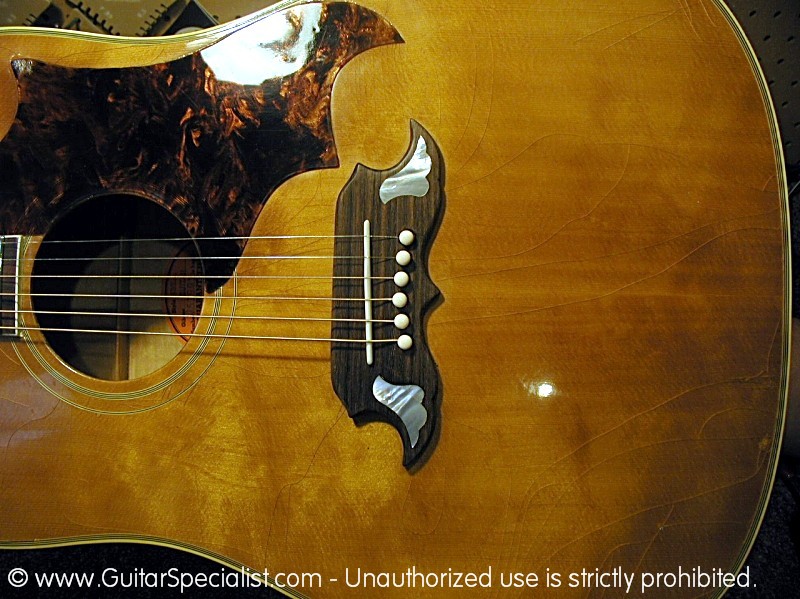
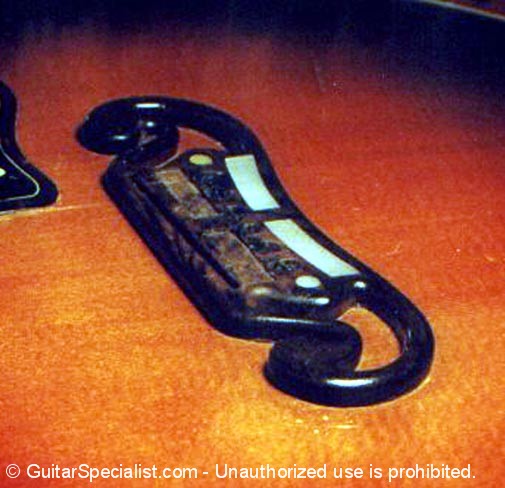
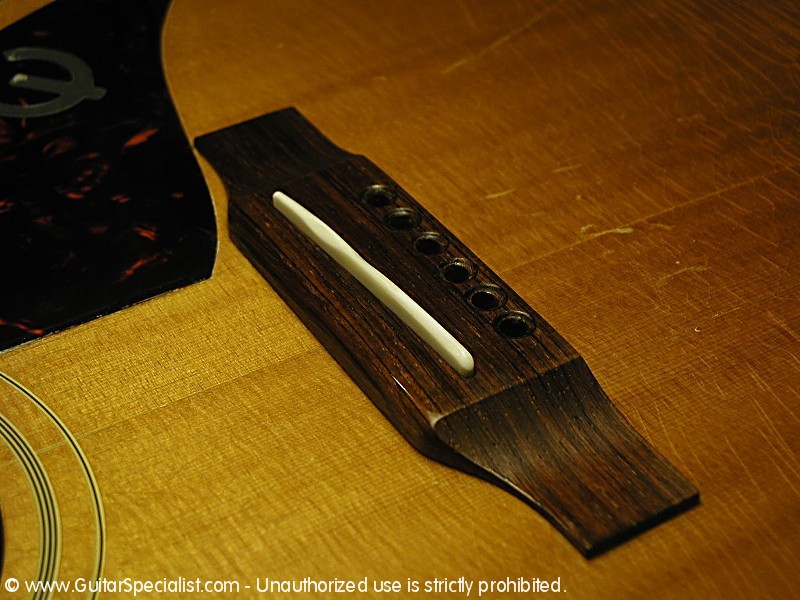 Here is a shot of the bridge with it's new compensated saddle. You can see how the bridge darkened up with the finish sanding and an treatment of lemon oil. |
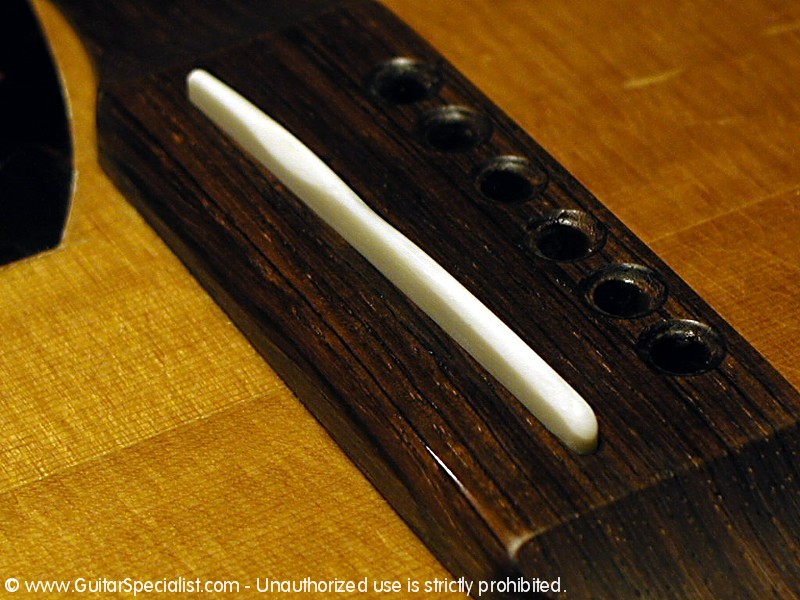 The saddle is compensated for proper intonation. We strung the guitar and used a strobe to make the calculations. I'll show you that another time. |
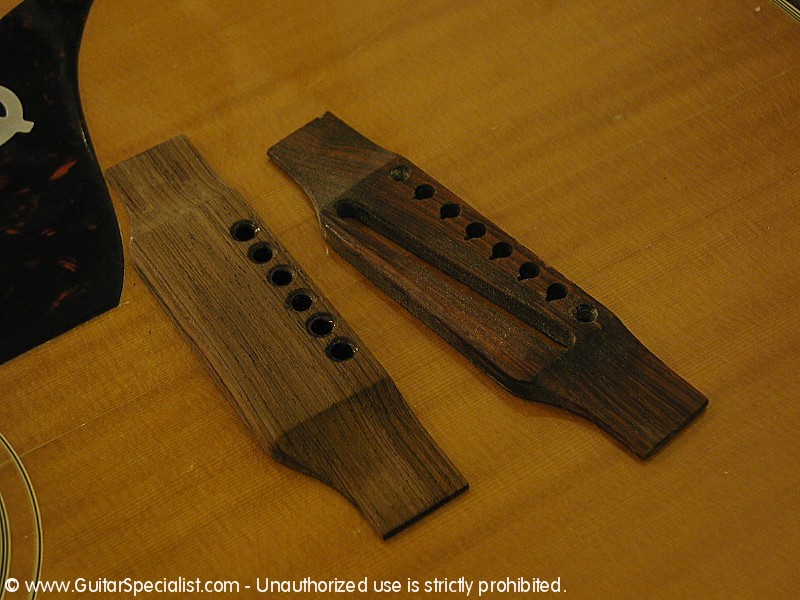
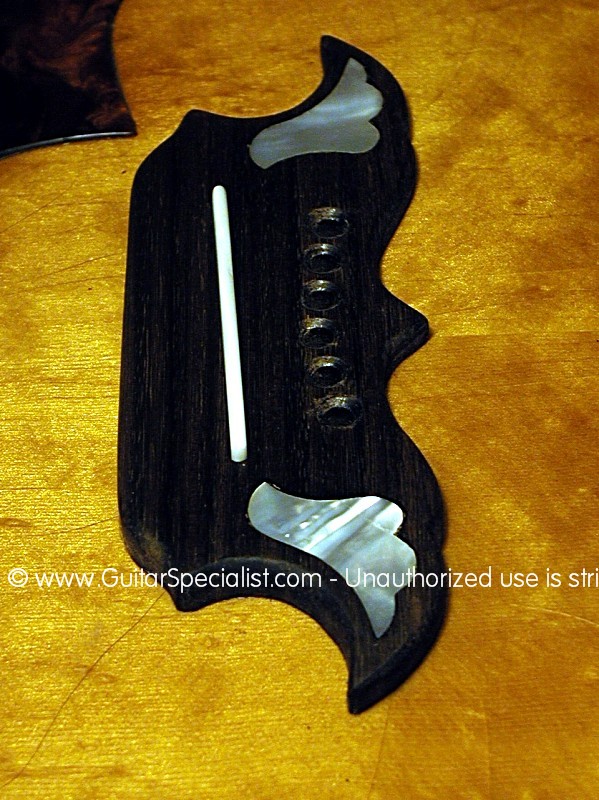
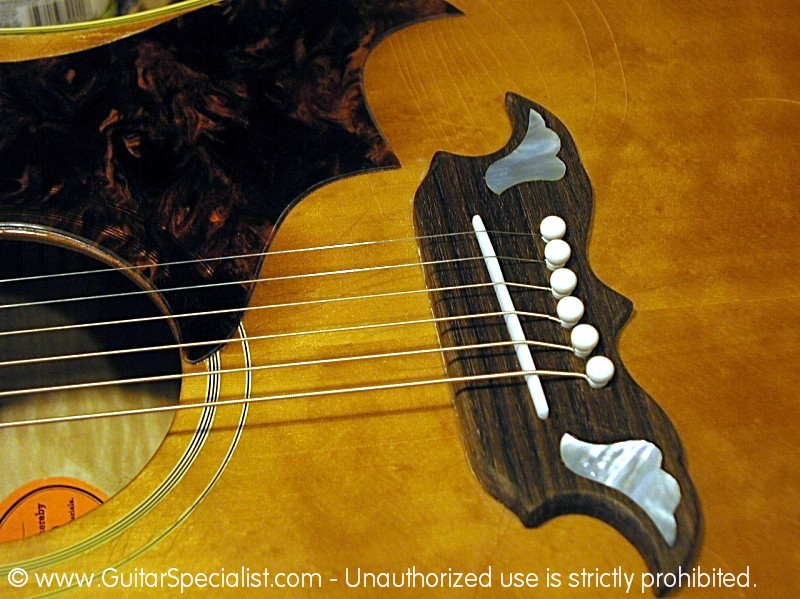
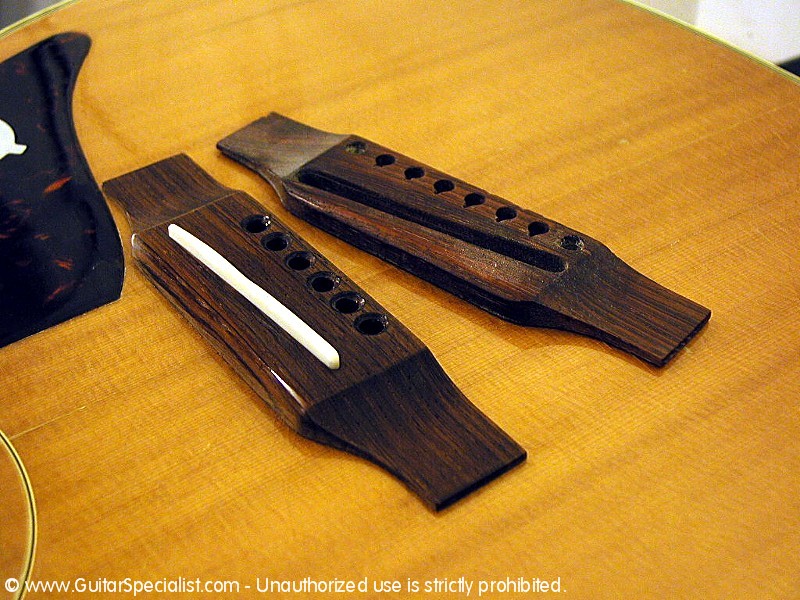 Here we can compare the new (modern" bridge to the old one. It will be a great improvement in tone and sustain. |
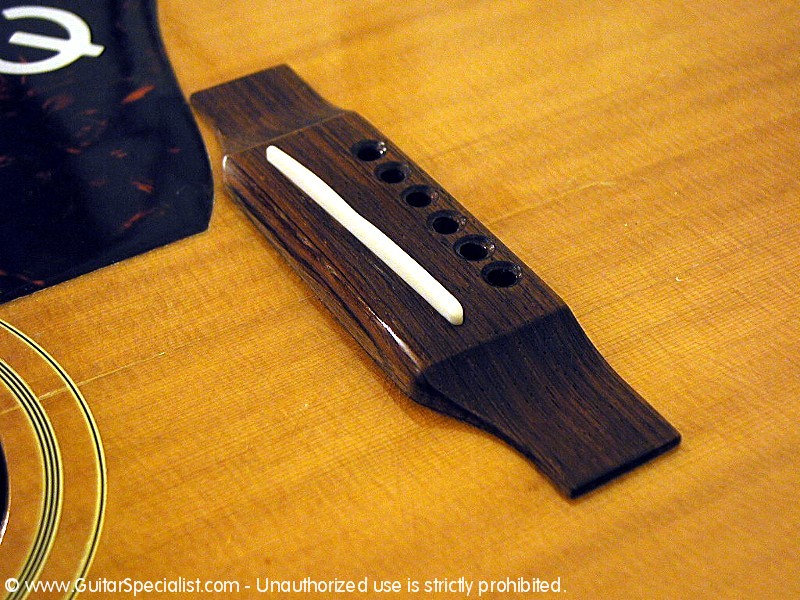 A picture of beauty! |
||
![]()
|
Recently a Gibson Dove came in for a great deal of work. Lots of loose braces, missing pickguard, fretwork and a bridge that had been shaved too low I guess during a previous attempted repair. Here we are going to show you what we
elected to do with the bridge. |
||
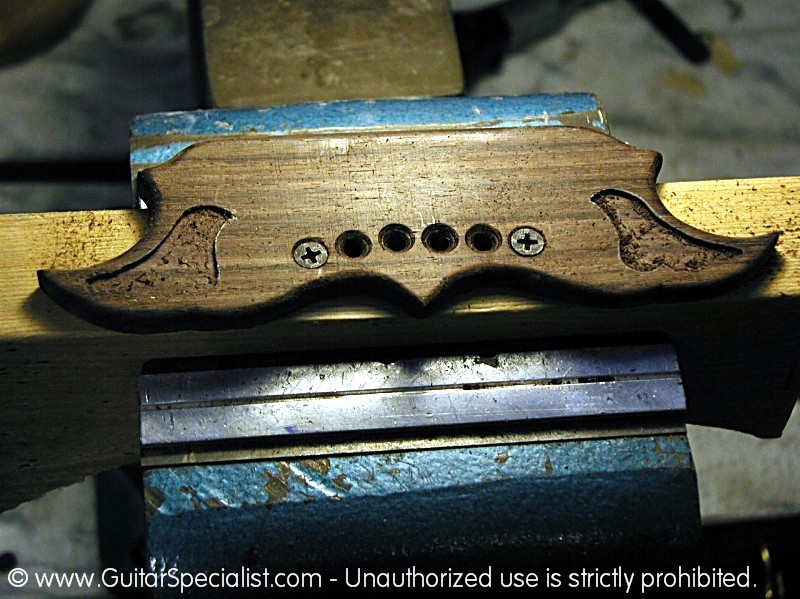
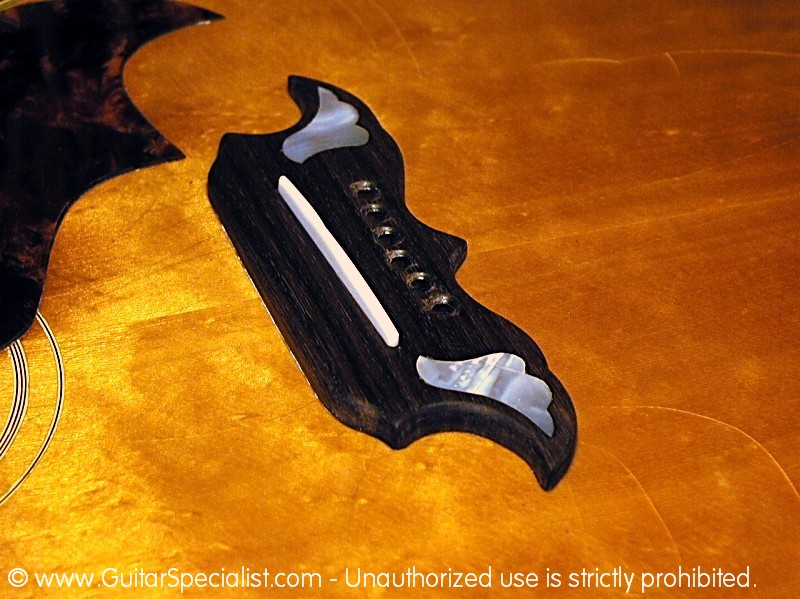
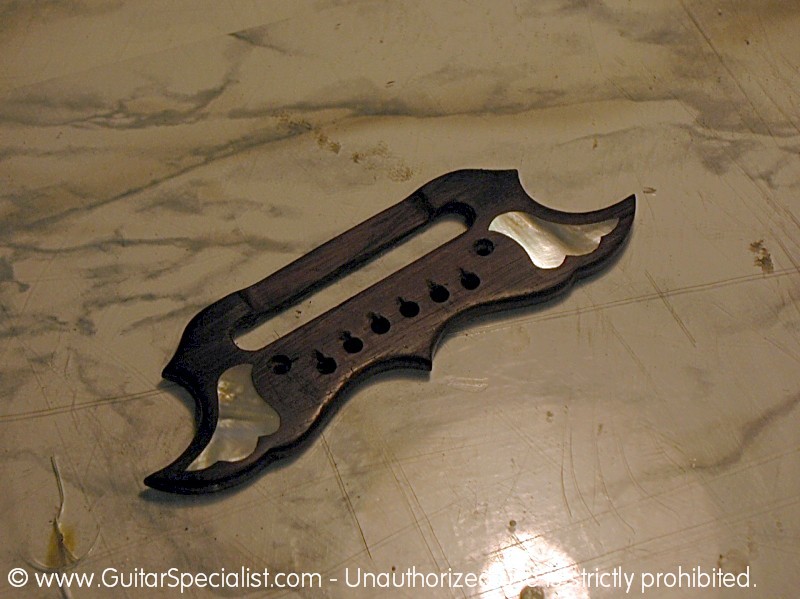 The original bridge was typical for this period Gibson with the huge cutout for the adjustable tunamatic saddle. |
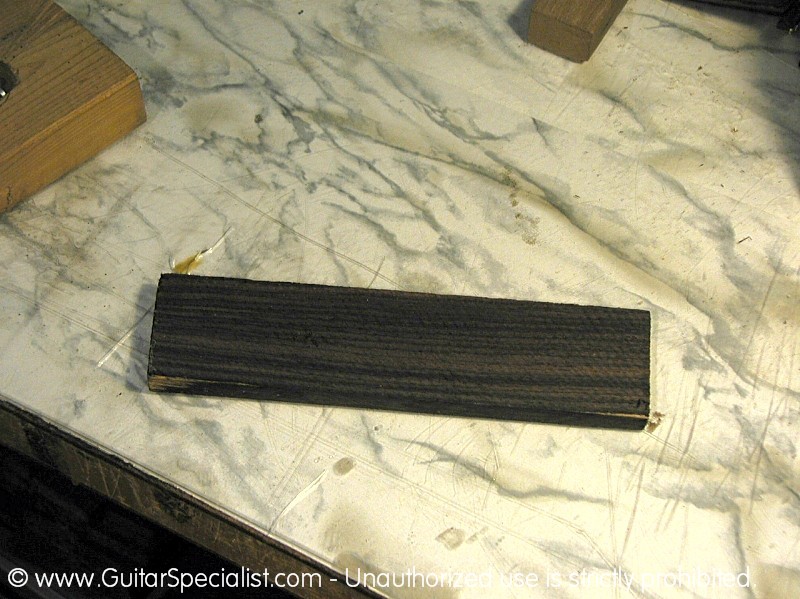 Well, this is where we start - we picked out a bridge blank with the color and grain orientation we liked. |
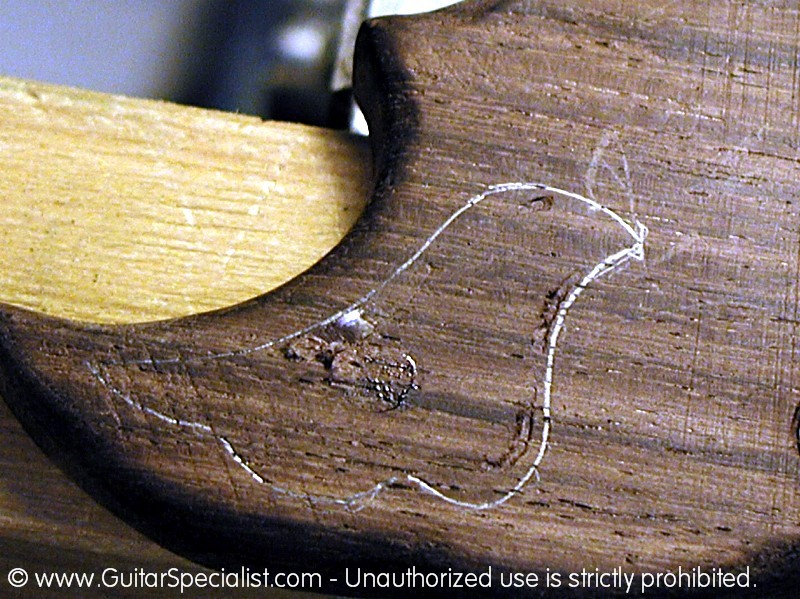
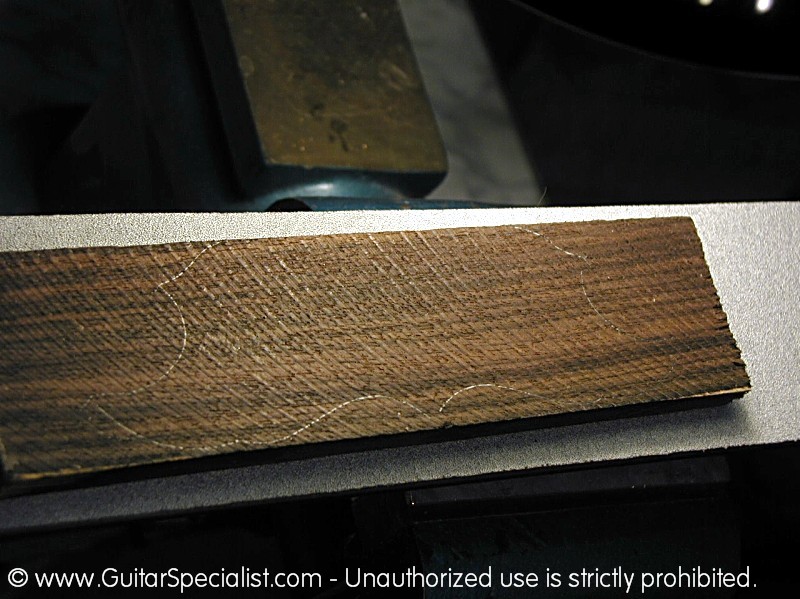 The first step of course is to trace the shape of the original bridge onto the Rosewood blank, |
 Skipping ahead a few steps - here we can see the new bridge roughly shaped with the pin holes located and drilled undersized. |
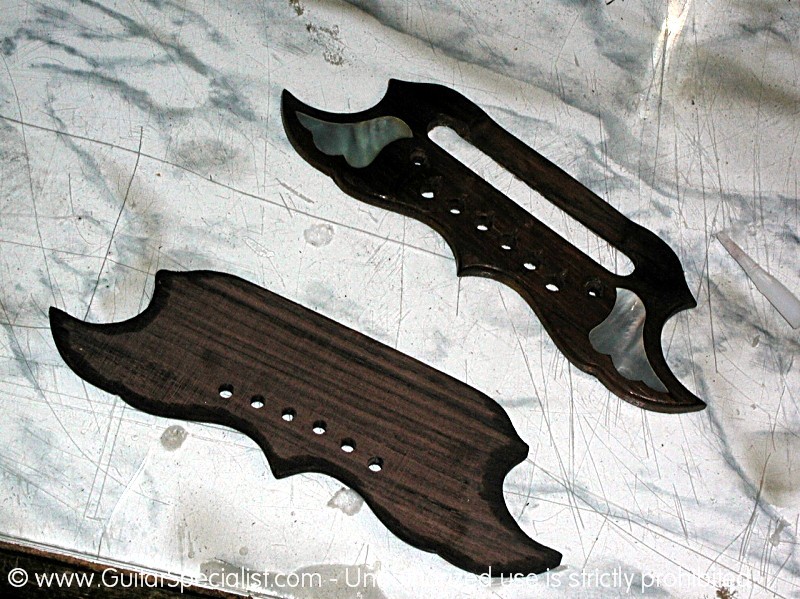
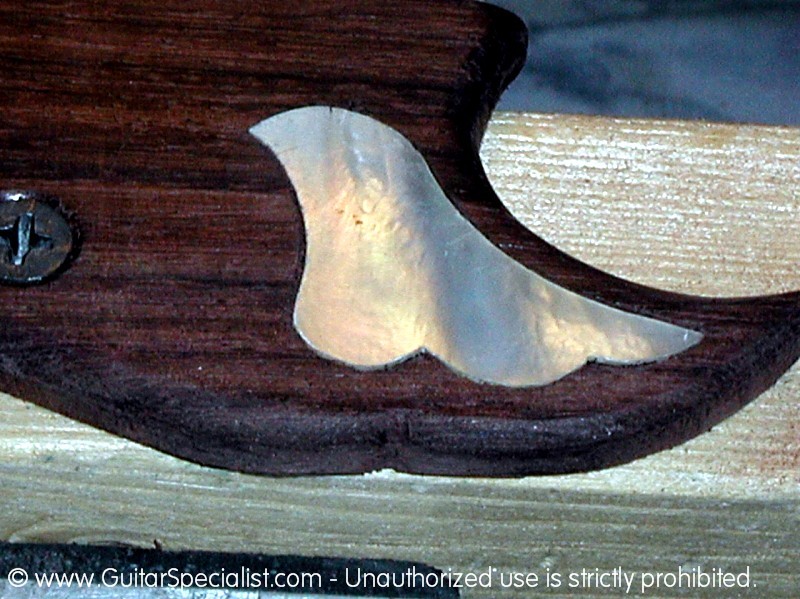
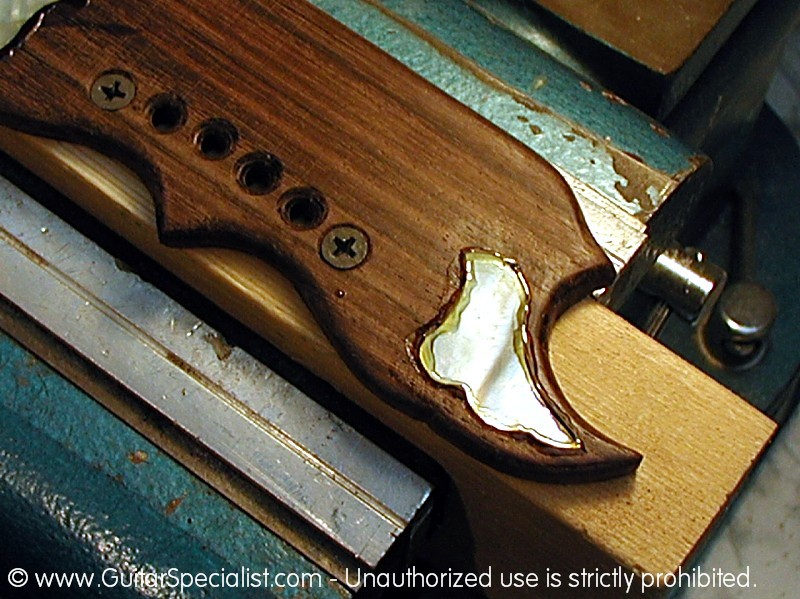
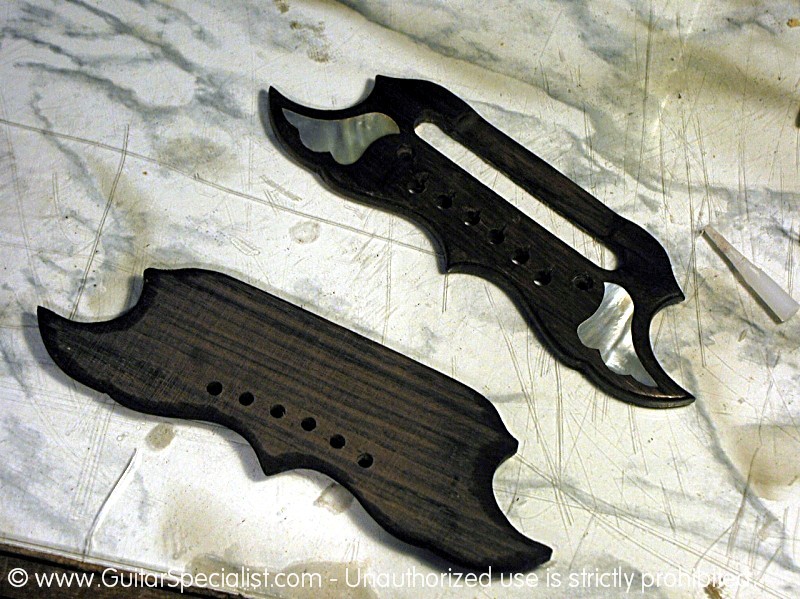 In an effort to save the customer some money - we mutually decided that we would transfer the inlays from the old bridge to the new one. |
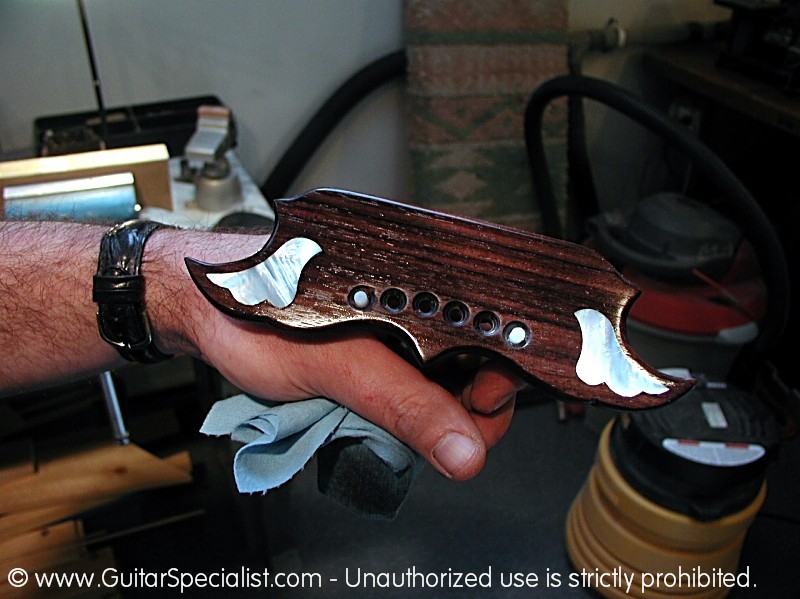
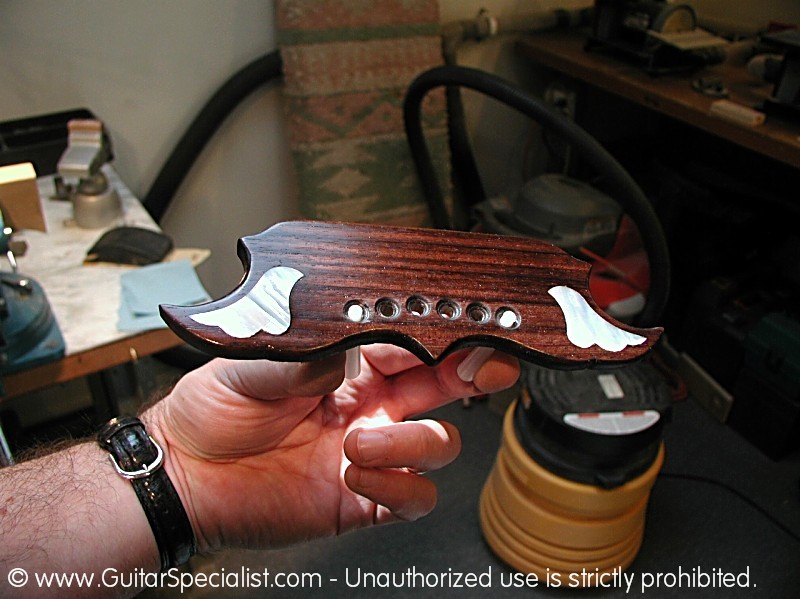
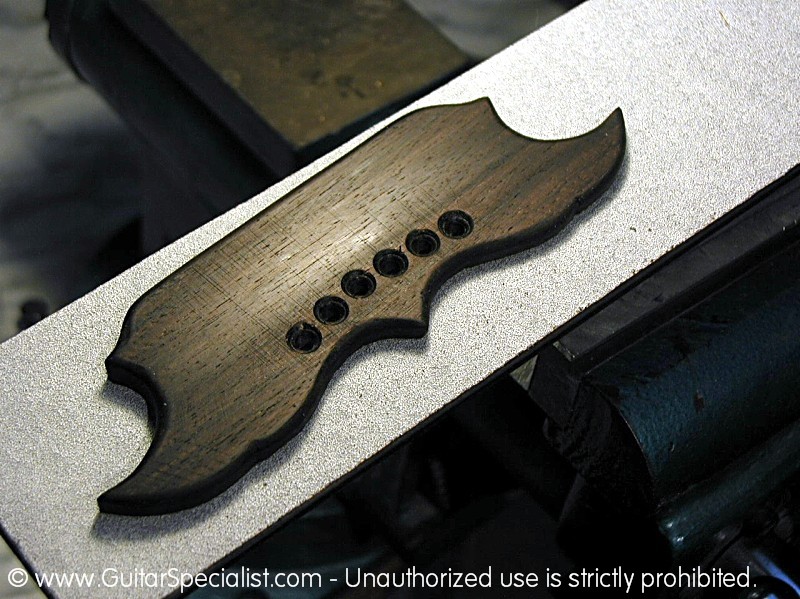 Here is a shot of the final shape of the bridge - The pin holes have been countersunk and the edges have been rounded. Still needs some sanding though. |
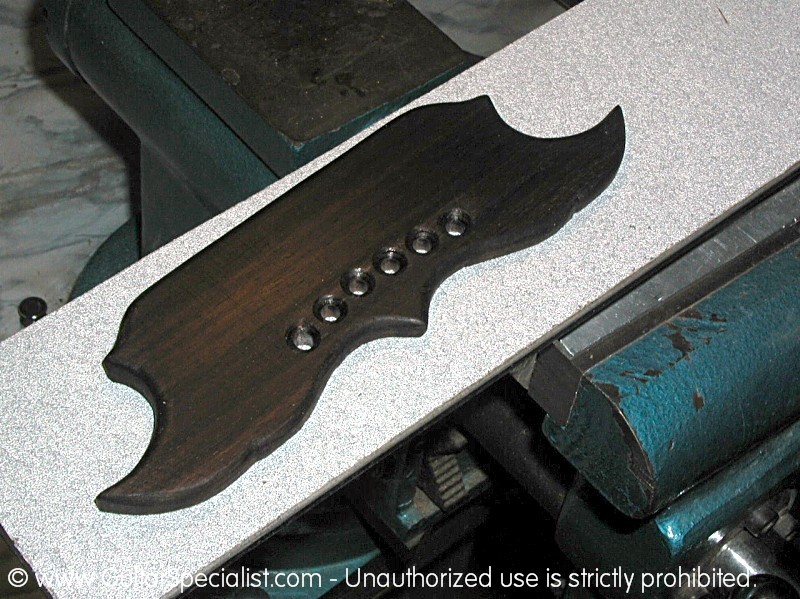 After a bit of sanding and some lemon oil - things are beginning to look good. |
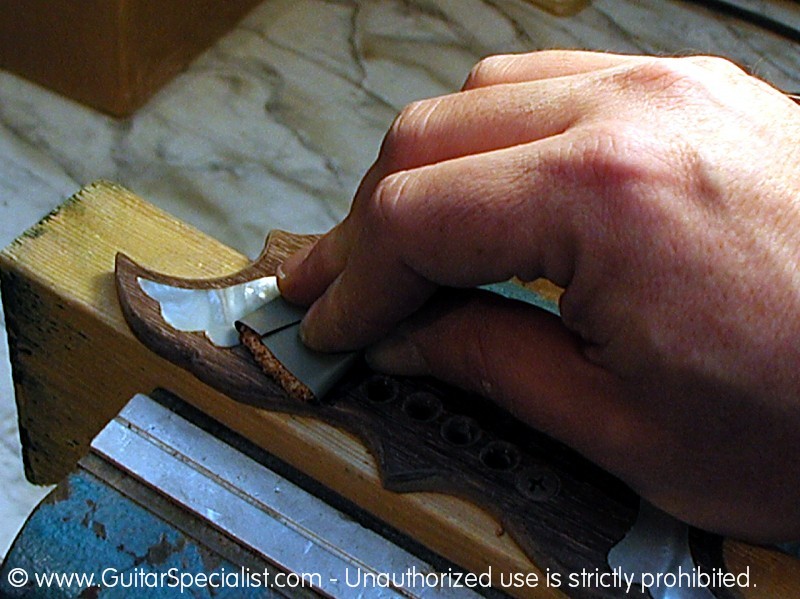
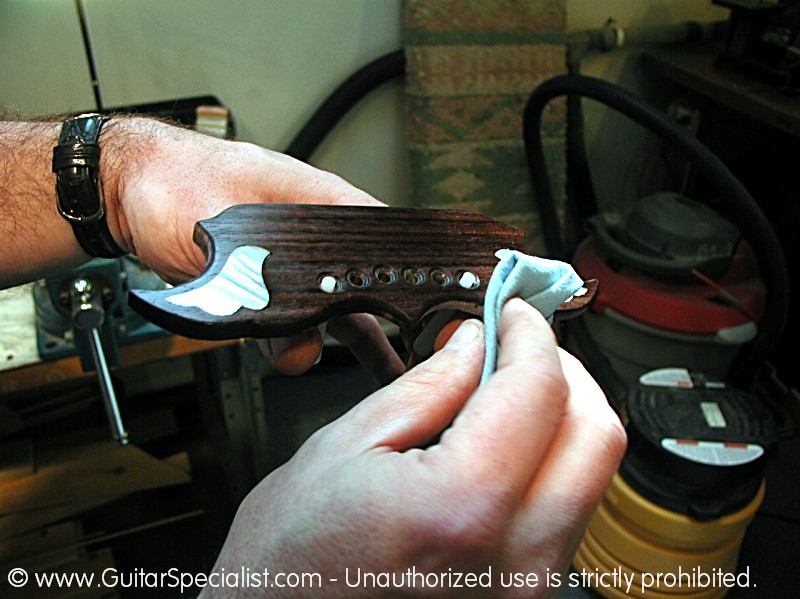
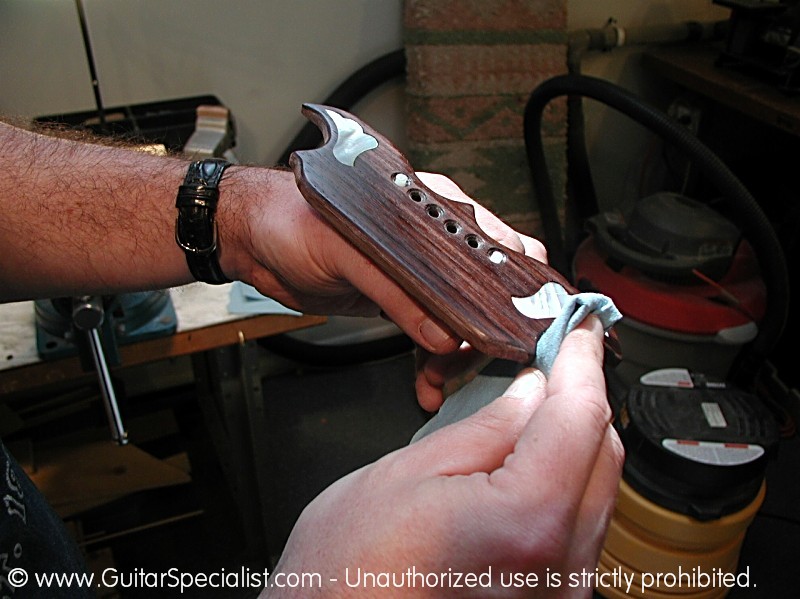
 Now onto transferring those inlays. We begin by heating the inlay with an iron and a wet cloth. This is so we cam break the glue joint between the inlay and the bridge. |
 The iron will heat the inlay and the wet cloth protects the inlay as well as providing some steam. Besides - I kind of like the sizzling sound that it makes. |
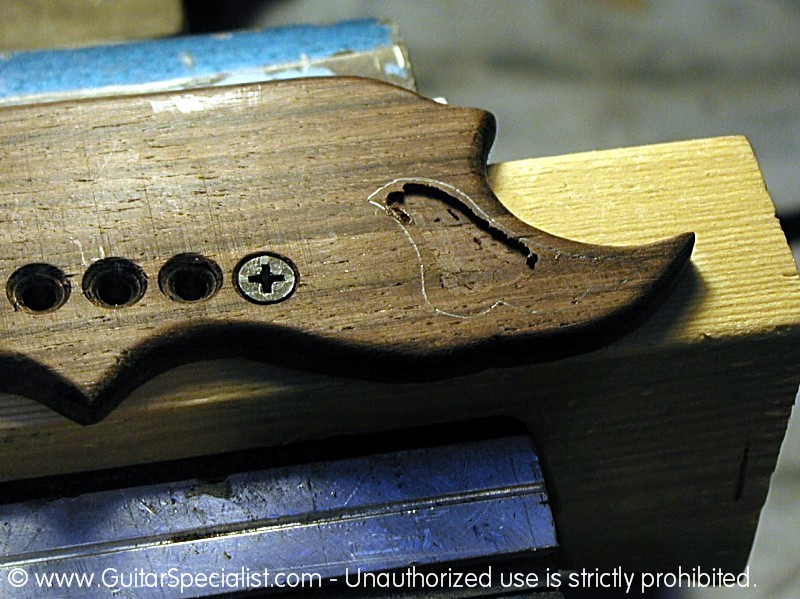
 I begin poking and prodding around the inlay with a very small dog-leg chisel. By the way - you can see how the bridge is clamped in place to allow me to work on the bridge without it moving around. |
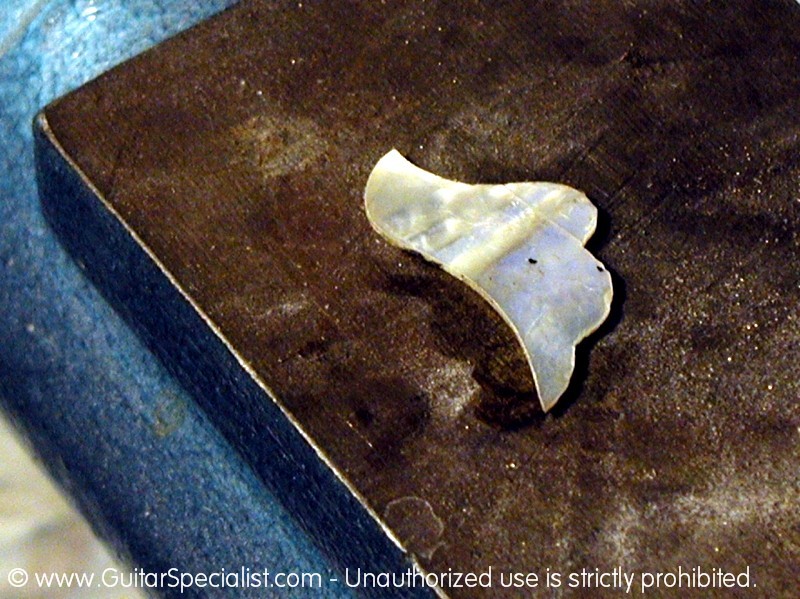 After a few minutes and enough heat/steam, the inlay comes out in one piece with very little damage. |
 Here is a shot of the chisel getting under the second inlay. |
 The trick here is to be patient enough to allow the inlay to come out when it is ready. and not force it - so it doesn't crack in half. |
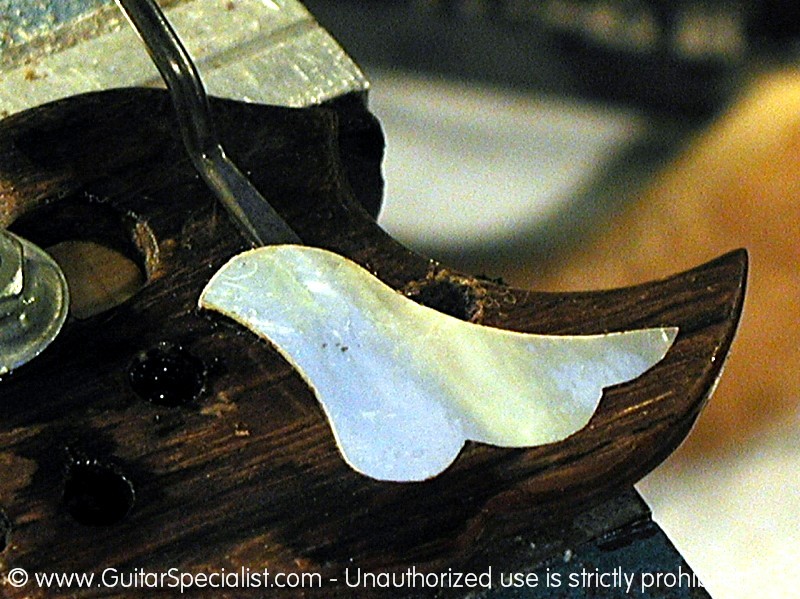
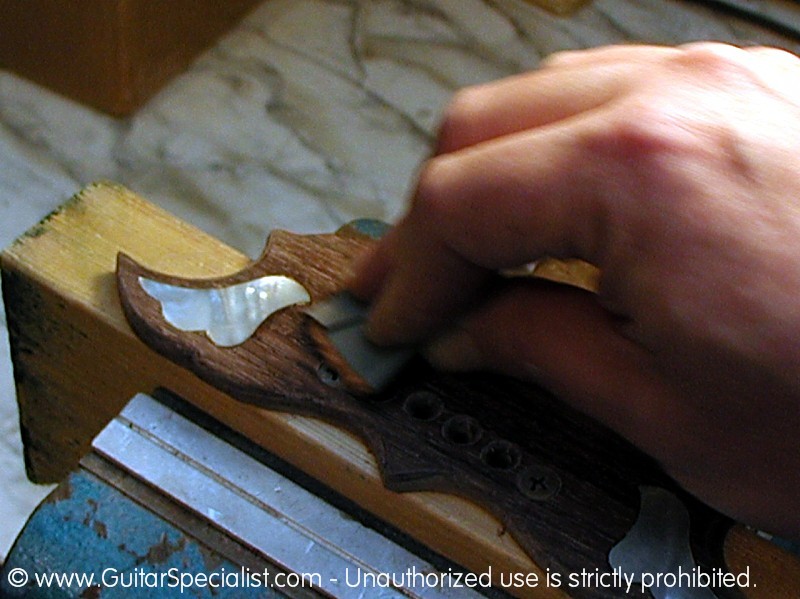
 Both inlays are out and I have placed them on the new bridge just to see how things will look. |
 Whenever I do inlay work like this - I try to place the inlays where I thing they will look right - then I walk away and go do something else before I come back and see in something needs to be adjusted. |
 After I am confident in my choice of location - I will need to route the inlay cavity to accept the inlays |
 The inlay will be held in place by a tiny drop of cyanoacrylate glue |
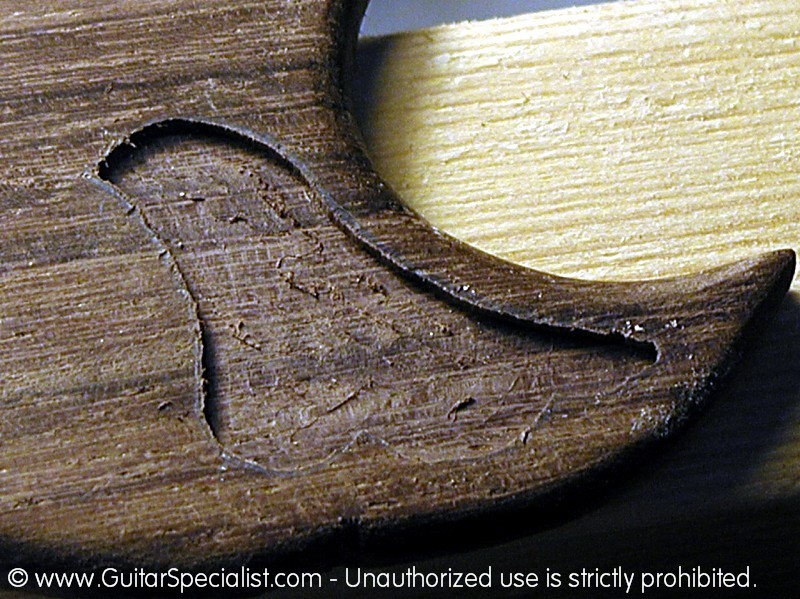
 Then I can trace the inlay with a pencil. Sometimes a scribe will be needed to trace the inlay. In this case a pencil will do the trick since we are not dealing with a very ornate inlay and - |
 - the pencil line is visible enough to see the outline of the inlay cavity. You can see the residue of the glue used to hold the inlay in place. |
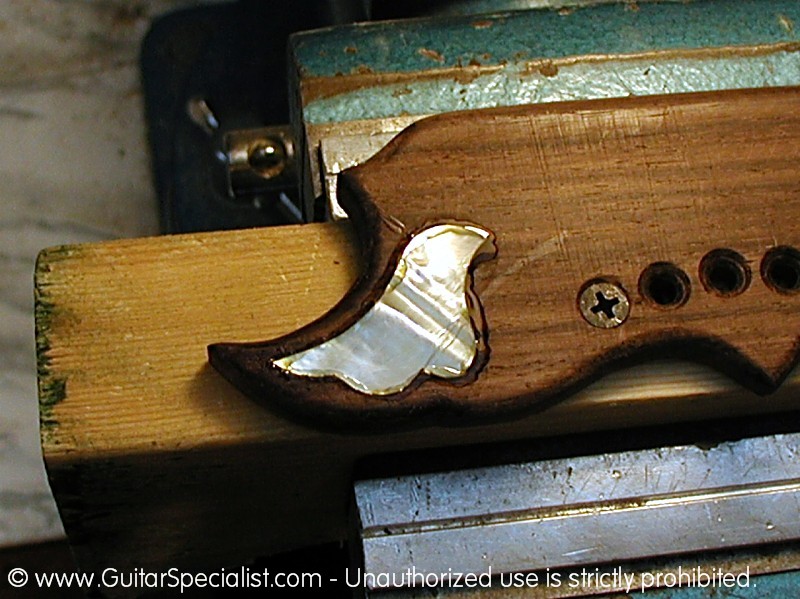
 Using a Dremel tool n a precision routing base, we begin taking material off from the inside out . |
 The depth of the cutting bit is set to exactly the thickness of the inlay. After installation - I don't want to have to make these inlays any thinner that they are. |
 Here we can see my progress in routing the cavity. |
 Continuing to take of material - slowly but surely. - the anticipation is killing you - isn't it? |
 Here we have the inlay cut precisely to the pencil line - the depth should be perfect to accept the inlay so it fits flush with the surrounding wood. |
 Now onto the other side - I'll spare you the drama of the step by step routing pictures. |
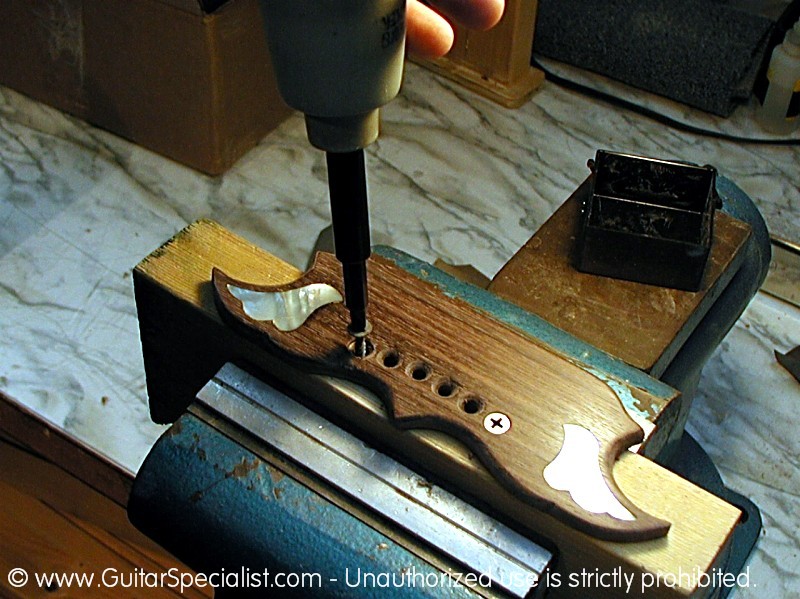
 Both inlay cavities are cut. |
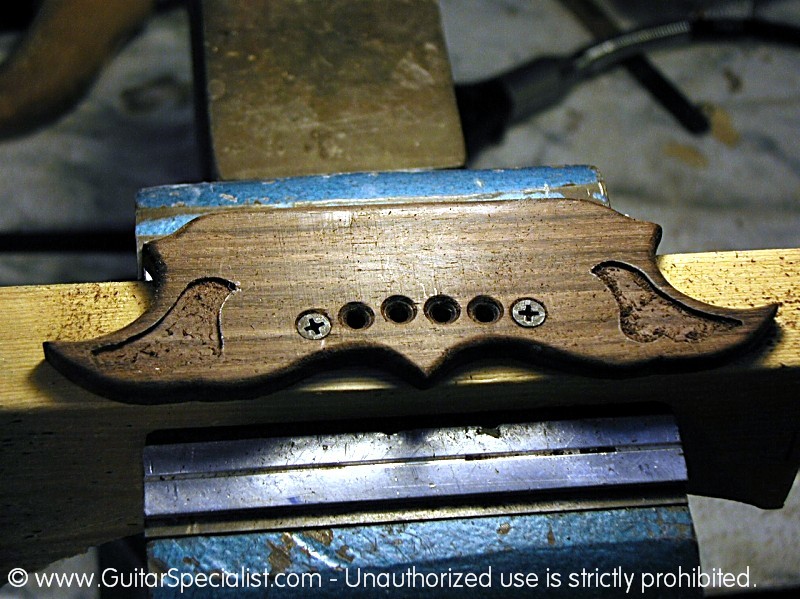 By the way - notice to two deck screw holding down the bridge - the pin holes were countersunk early in order to accept our screws. |
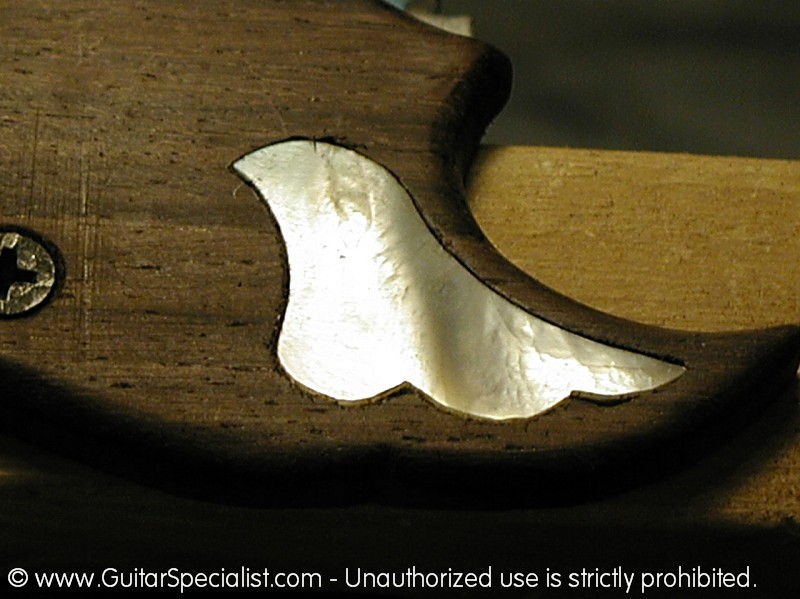 The inlay fits quite nicely without much of a gap |
 Here is a closer look. |
 Both inlays are in and ready to be glued in place. |
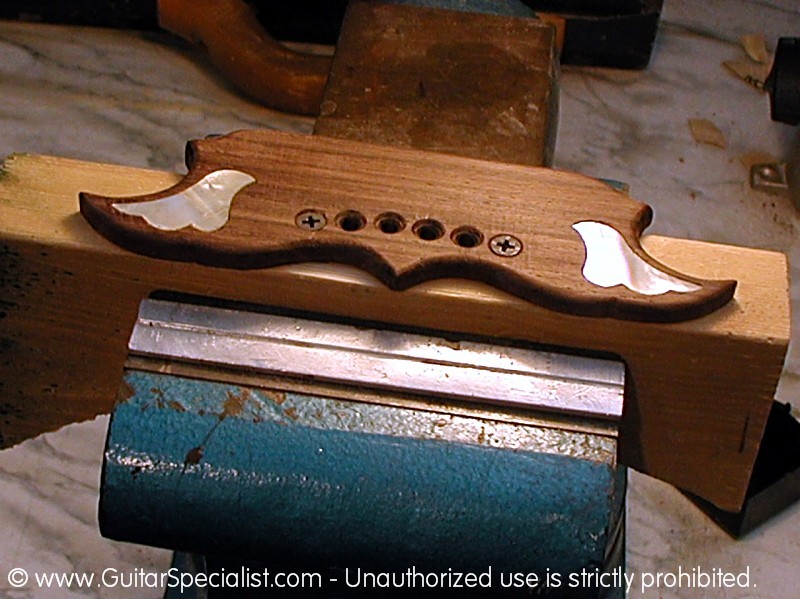 You can see that the inlays are fairly level with the surrounding wood. |
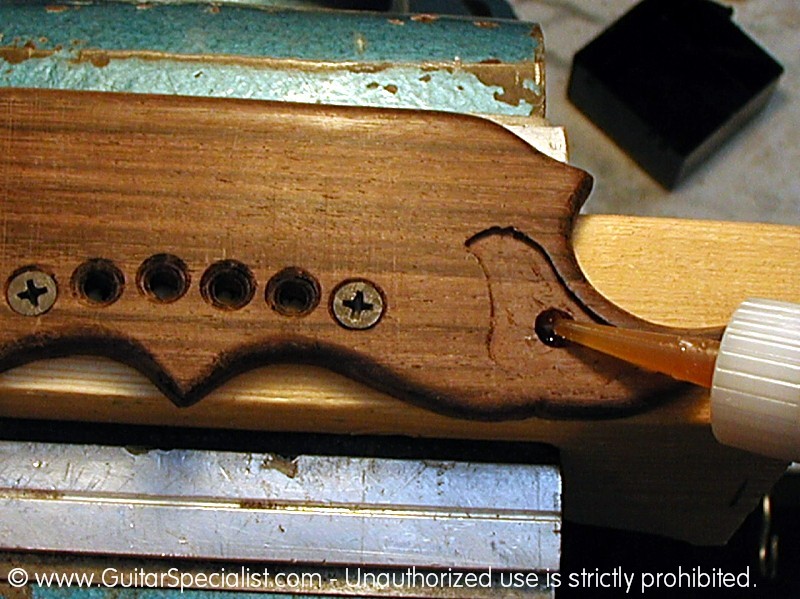 A bit of brown tinted cyanoacrylate glue will hold things nicely. |
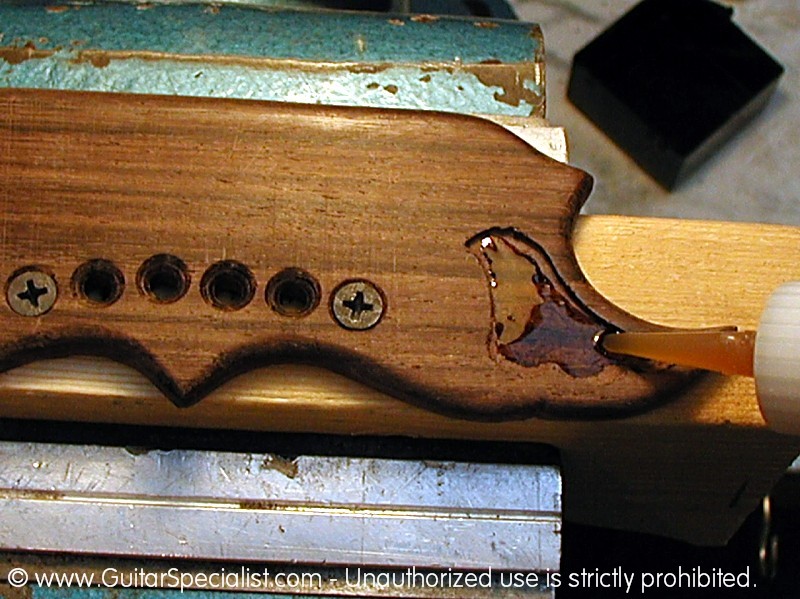 Usually inlays would be glued in with a black tinted glue to fill the gaps around and inlay |
 Since I had very little gap surrounding the inlay, I figure that brown glue will blend better with the natural color of the wood. |
 You can see the glue ooze up around the inlay. |
 This will create it's own seal; so the edges of the inlay are smooth |
 After the glue is dry we have to level off the glue and do some final sanding |
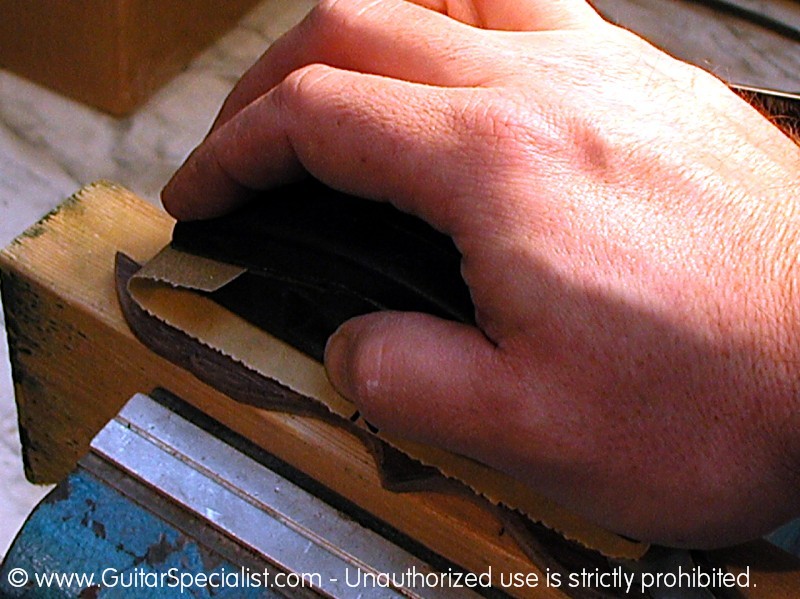 Here I am starting with some 180 grit paper with a sanding block to do the majority of material removal |
 Quickly switching to 220 Grit |
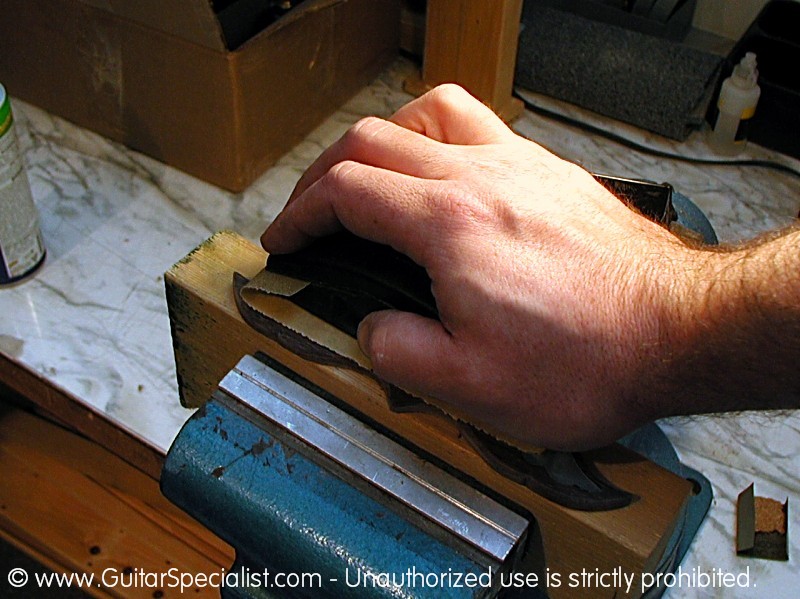
 Then I'll switch to some finer grits backed by some cork |
 More sanding with even finer grits .. |
 ..you guessed it - even more sanding |
 Finally we are done sanding and have the results we want. |
 Time to remove the screws and see what we've got. |
 After we clean this bridge up - the only thing left is to glue it onto the guitar - locate and cut the saddle slot and make a saddle. |
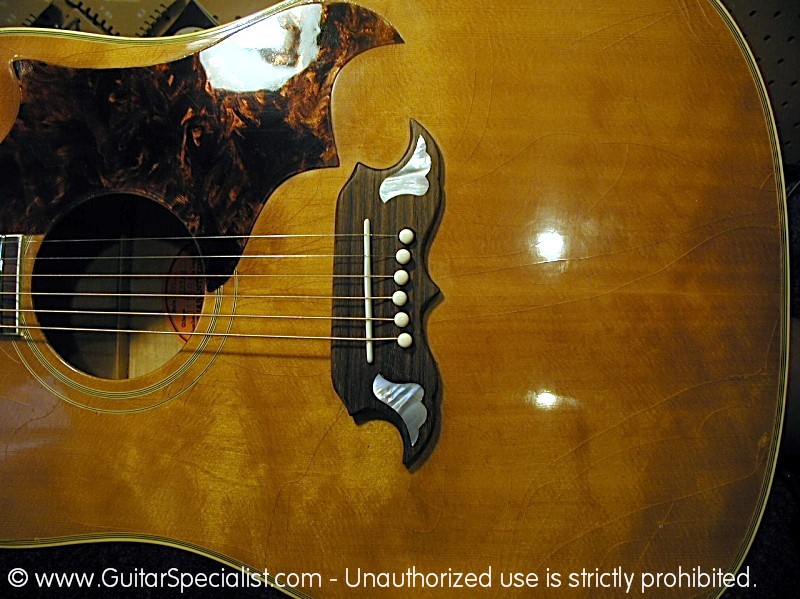
 Here is the sanded bridge - still looks a bit rough - huh? |
 First we clean things up a bit with some Naphtha - things are starting to improve. |
 Then we start rubbing in some lemon oil to see the final product. |
 And some more oil ... |
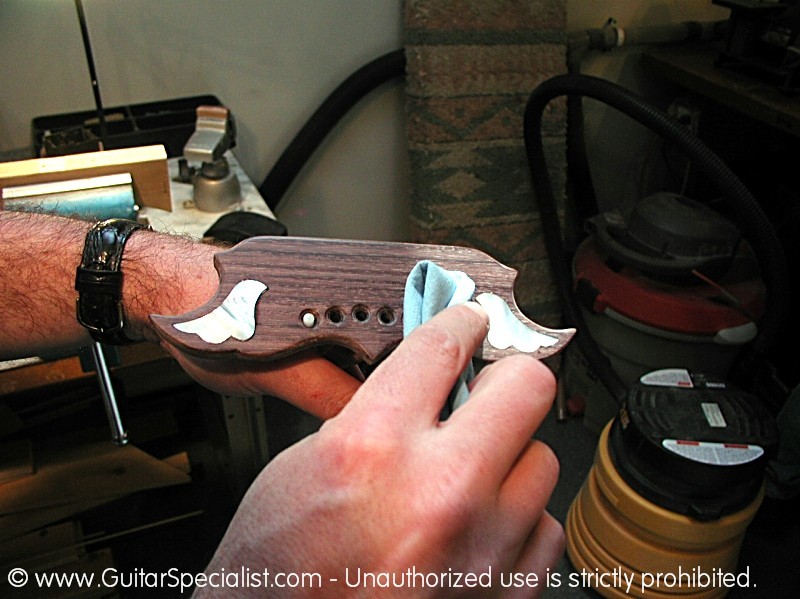
 Once the bridge is saturated this is what we've got |
 I'll give it some time to soak up the oil and probably rub on some more later. |
 Once I think I have enough oil on the bridge and it looks like I want it I'll set it aside to really dry well. |
 Here is what it looks like when it is finally dry. A thing a beauty. |
 Fast forward here - I was a bit pressed for time to complete this job so I neglected to show you the steps where we cut the saddle slot. |
| Not to worry - I have several more bridges in house to make - I'll show you how we cut the saddle slot in a future article. |
 |
Here is the bridge glued onto the guitar with a compensated saddle - ready for strings. |
 A pretty good match to the original - in size shape and color. The only thing missing is that horrible tunamatic and all the related hardware. |
 This should improve the tone of this guitar quite a bit. |
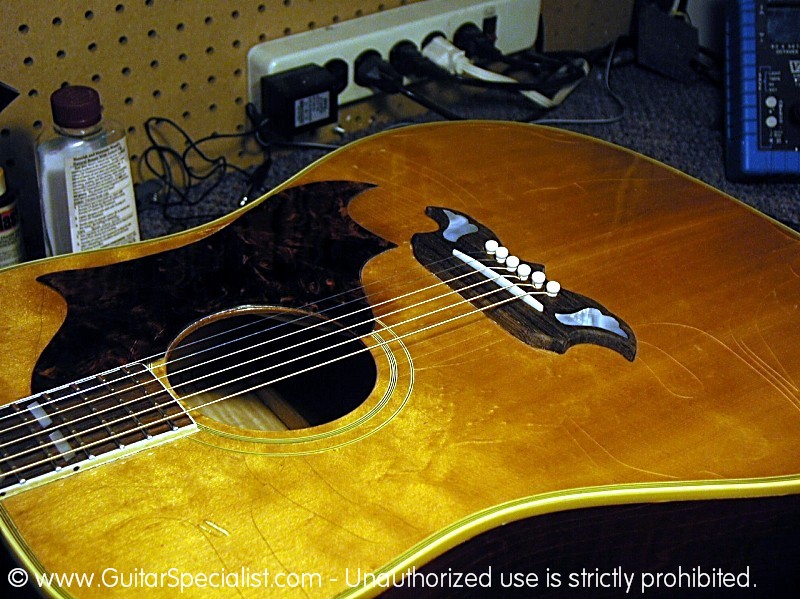 After all, the strings are now vibrating on a bone saddle that is in direct contact with the bridge - It's all about the transfer of energy. |
 Here is a shot from overhead |
 The plain white bridge pins complete the tuxedo look - and is appropriate for what originally came on the guitar. |
 We also replaced the pickguard, the original had disintegrated as many cellulose guards tend to do. |
 A Gibson dove originally came with a very ornate pickguard with lots of engraving and inlays |
 Our customer was very budget conscious concerning the repair, so we elected to go with a plain guard made from Tor-Tise. |
 At any time in the future he can decide to complete the work on the pickguard. For now it looks period correct - just a bit plain. |
![]()
Here we have a Gibson J-200 from the
forties I believe. A world class acoustic guitar
by any standard. This particular guitar had practically all the braces loose or unseated,
the bridge had been hacked away at by someone who tried to increase the string tension
on the saddle and it needed a re-fret. For now I'll show you the brace & bridge work
 Braces Are injected with glue through a syringe and then clamped up from outside and inside the instrument. You can see the turnbuckle jacks applying outward pressure if you look in the soundhole. |
 Here's another view of the cam clamps applying inward pressure to the turnbuckle jacks. |
 The bridge had been badly damaged due to a misguided attempt at getting better string pressure on the saddle. Someone had cut string grooves right up through the inlays on the bridge. Here they are removed so I can do the woodworking. |
 First I'll take care of the crack near the pickguard. It is so slight that it really only needs a little glue and a small spruce cleat underneath for support. |
 As you can see, the bridge needs a fair amount of attention and cleaning up. |
 After the wood is filled & cleaned up, I can work on the inlay channels & glue them into place. |
 Now it looks like it did when it left the factory.
|
||
 Clean as a whistle. |
![]()
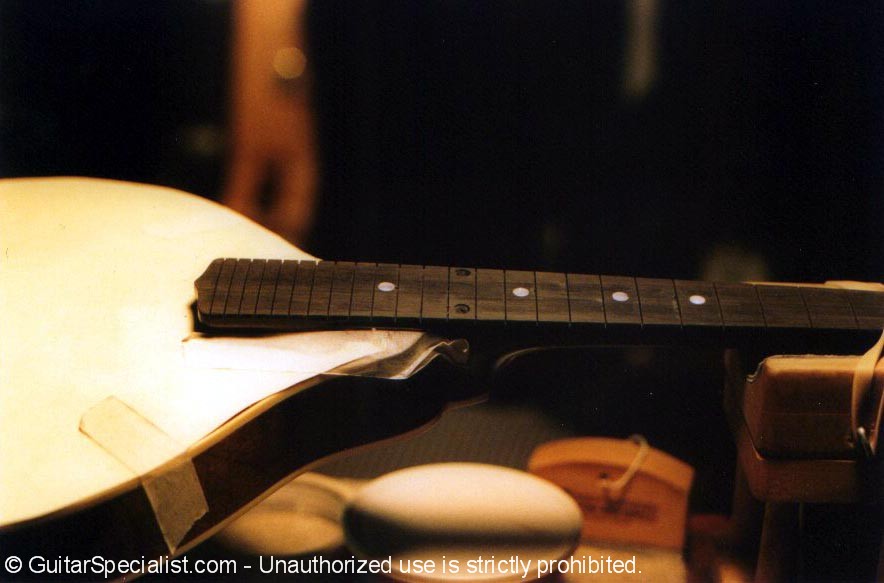
A mandolin came in for a refret
recently - the owner had complained about problems he had
staying in tune. Upon inspection, I found that the fingerboard was actually disconnected
from the
neck for about a four inch section surrounding the heel joint, probably due to a weak glue
joint
or exposure to heat or high humidity. Structurally, the rest of the instrument was fine,
so it probably
had more to do with the glue joint. I really didn't want to remove the fingerboard from
the neck completely,
so I yanked the frets out and proceeded as follows:
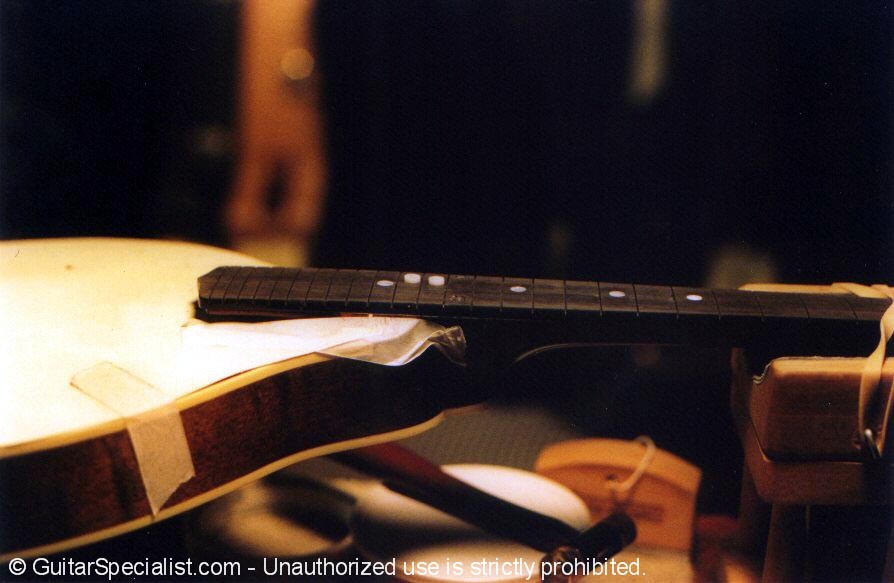
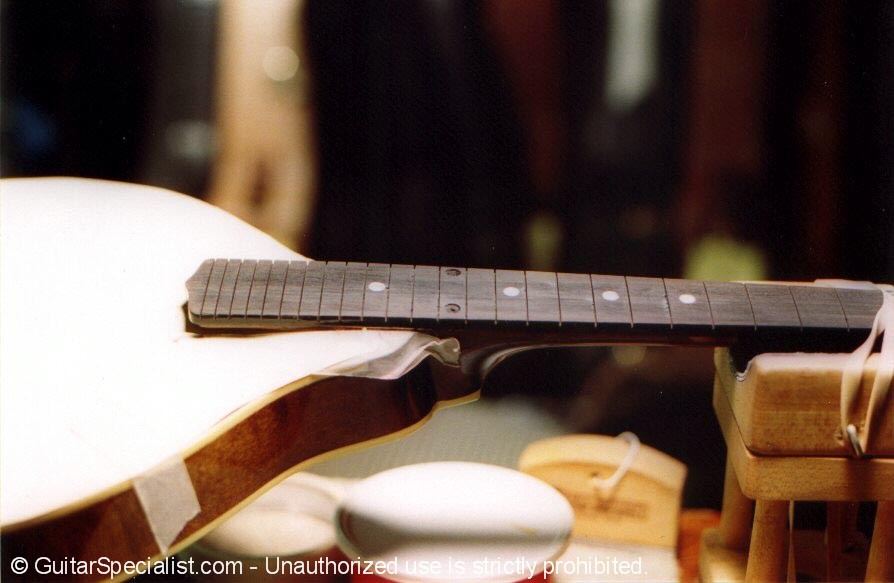 I removed the dot inlays that were in the center of the area and drilled down through the board to reach the seam. |
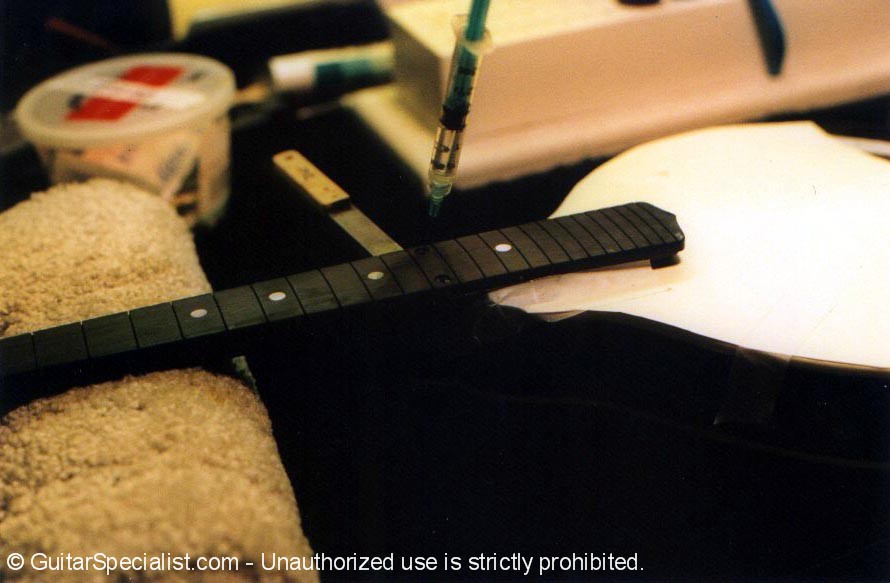 I sank a syringe down the hole & injected glue into the seam until I saw it come out the side of the seam. |
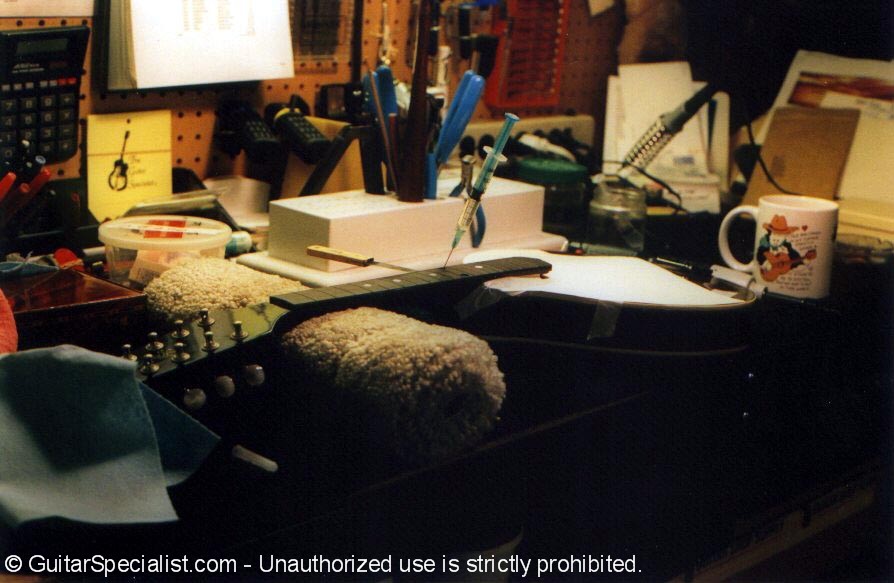 Here I'm using water to saturate the wood. It'll help the glue soak into the pores of the wood better. |
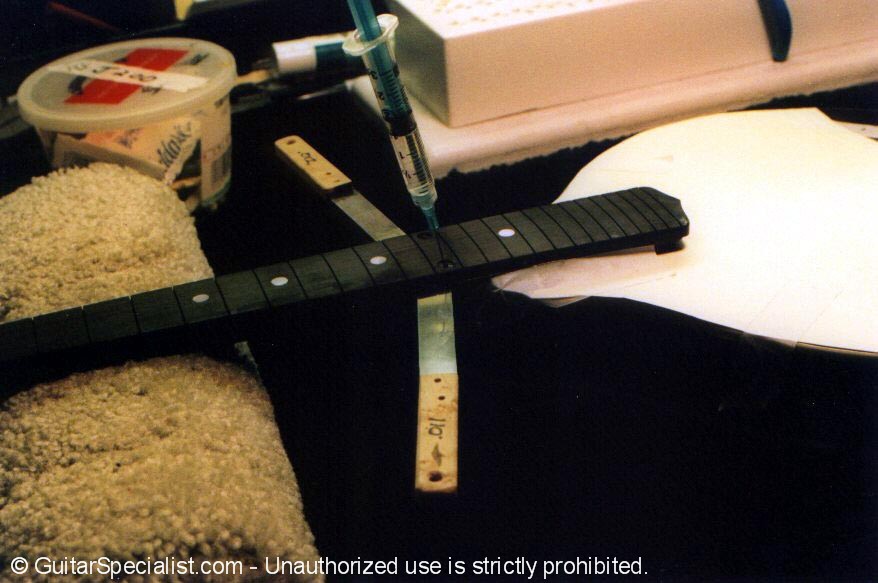 I had to do this on both sides to get good coverage. |
 Then I clamped it up & cleaned up the glue squeeze out. |
 Now it's time to take care of those inlays. |
 Cut some new dots to size... |
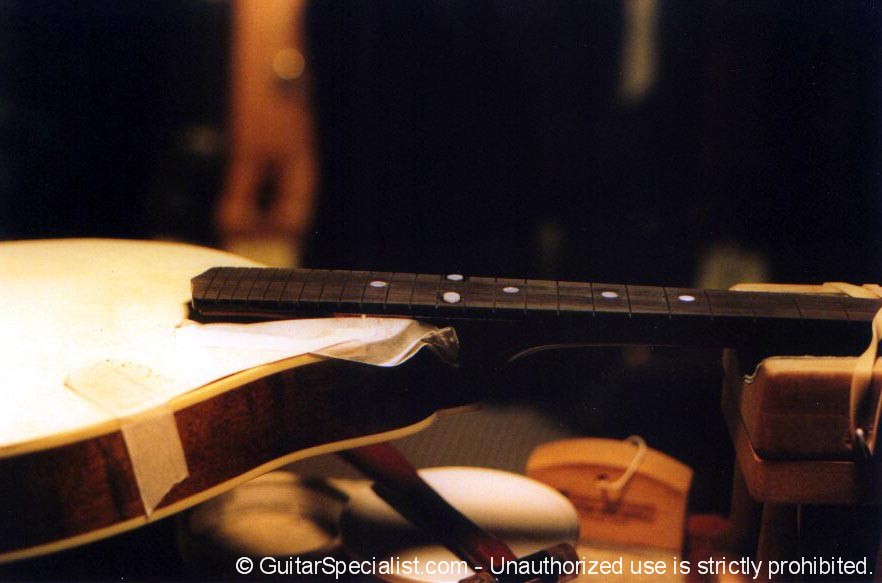 ... glue them in place... |
 ... level them off.... |
 Clean up the board.... |
 Now we're ready for the frets. |
![]()
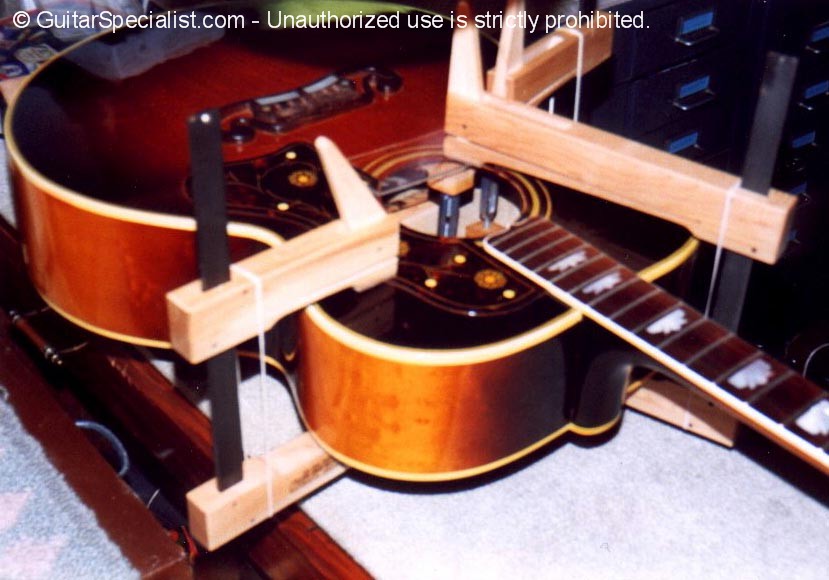
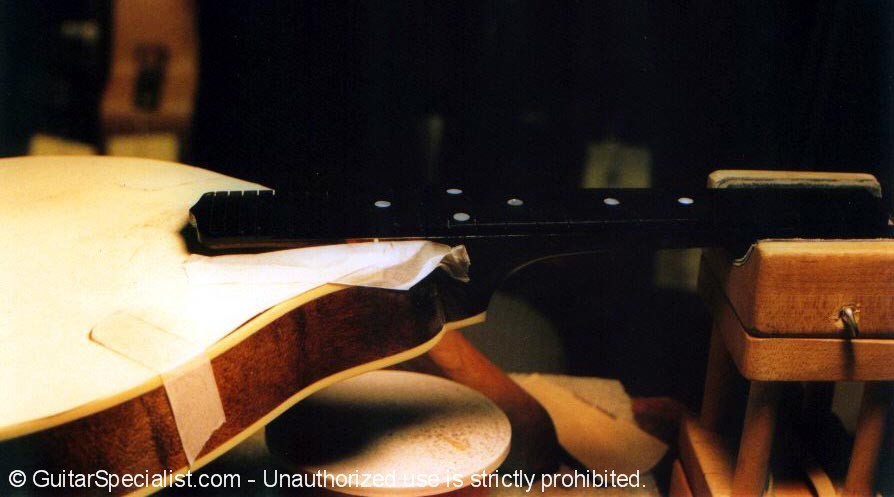
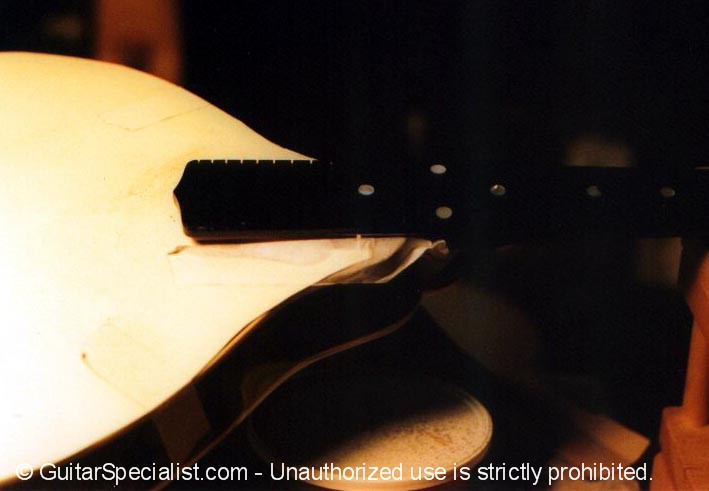
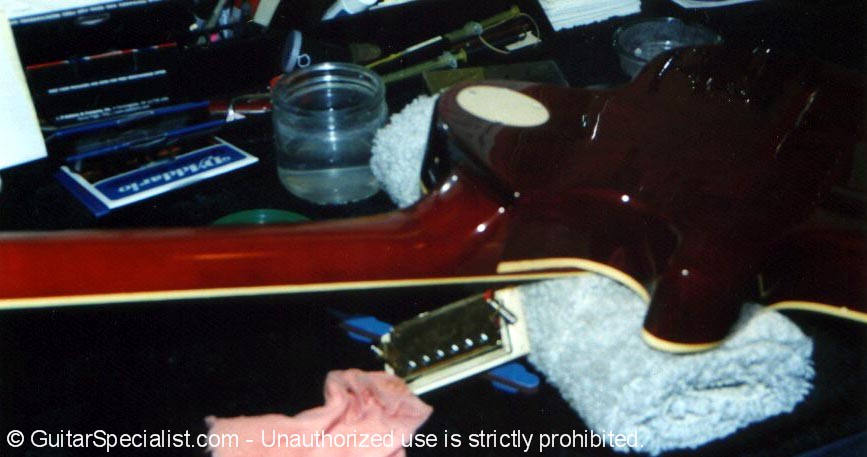
 Here we have an Epiphone Les Paul model. This is what happens when you walk into a wall while you're still wearing your guitar.
|
 As you can see, the crack is not only in the neck, but extends into the body as well. Tricky but not un-repairable. |
|
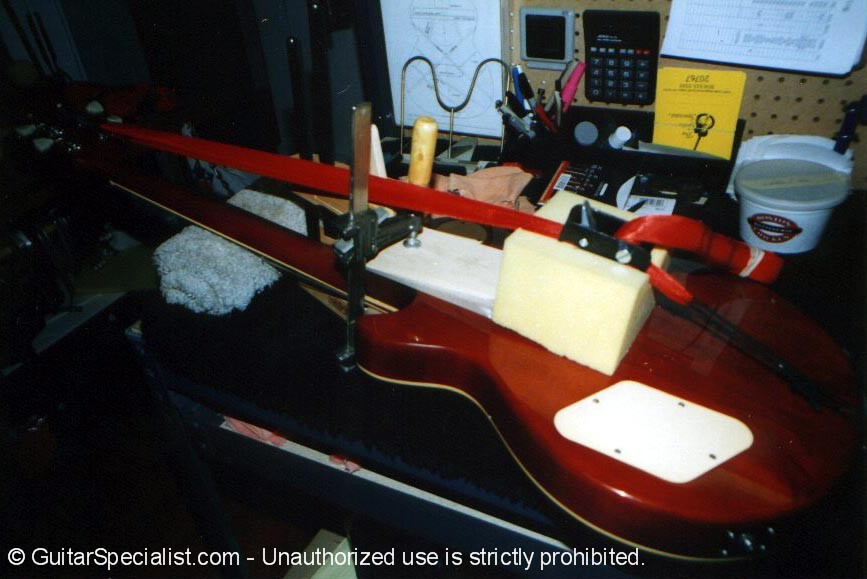 The clamping setup is not dissimilar to that of a neck reset. Just a few extra clamps to close the body crack at the same time. |
 After a little bit of touch up and finish work.... |
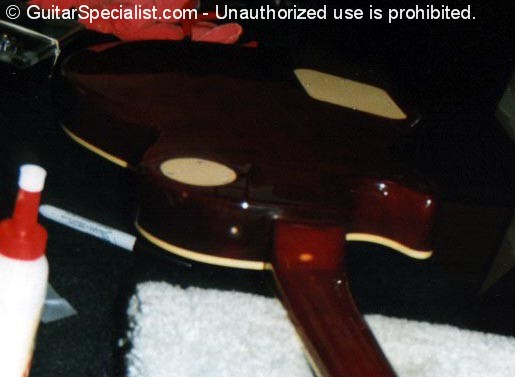 ... it's hard to tell that it ever happened. |
 Good as new & ready to rock & roll. Just stay away from the walls. |
![]()
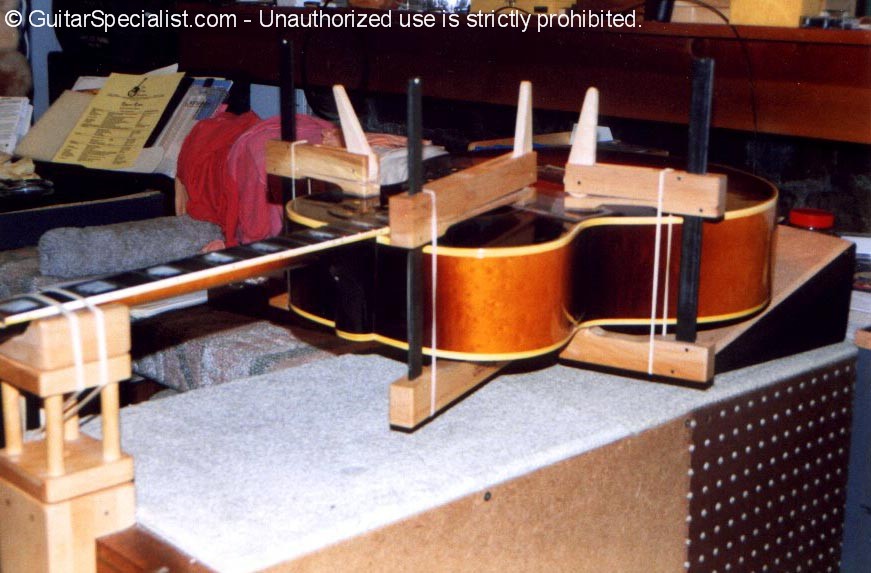
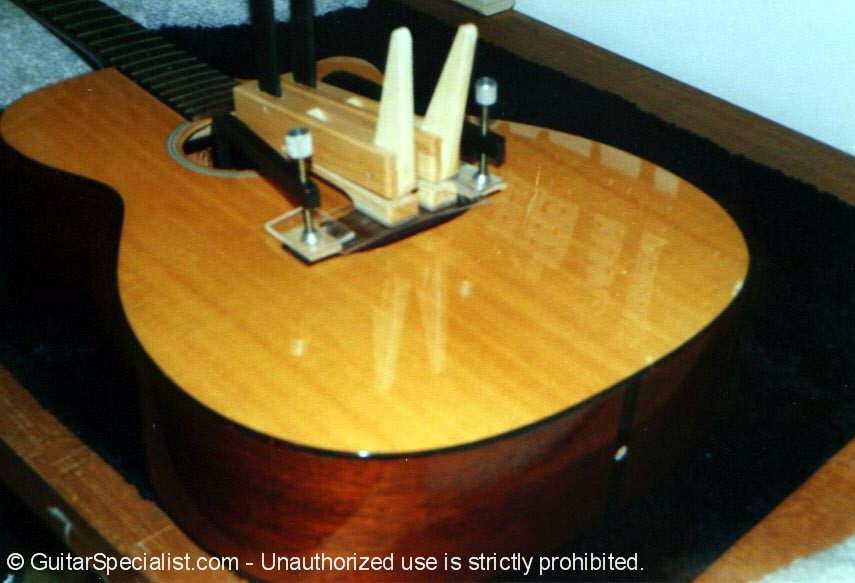 Here's a Martin that someone left in the trunk of their car. The bridge needed to be glued back on ... |
 ... and the main X-brace had become unseated. |
 Nothing remarkable about these jobs other than to show you what a typical clamping set up looks like. |
|
Oh ! - and to mention that the trunk of your car might not be the best place on the planet to store your guitar. |
![]()
|
(914) 401-9052 |
|
|
|
� Copyright 1998 - 2019 and beyond |