
Back To


Please Be Patient
The thumbnails may take some time to load.
Click on any picture to see a larger version
![]()
| When Joe does what he likes to call loud gigs, Like touring with "Blue Beck" or Lew Soloff's Food Group, he typically uses a solid body guitar to avoid feedback. But he prefers the size, feel and sound of a hollowbody instrument. |
 |
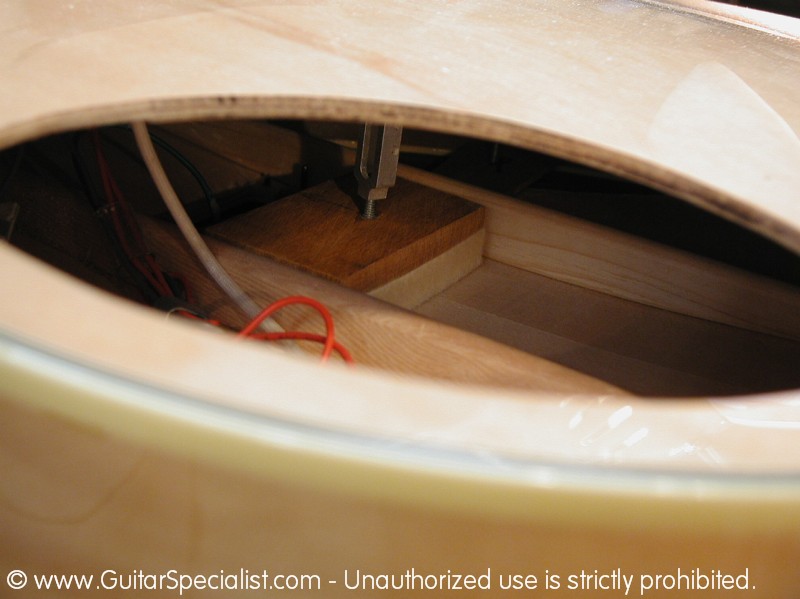
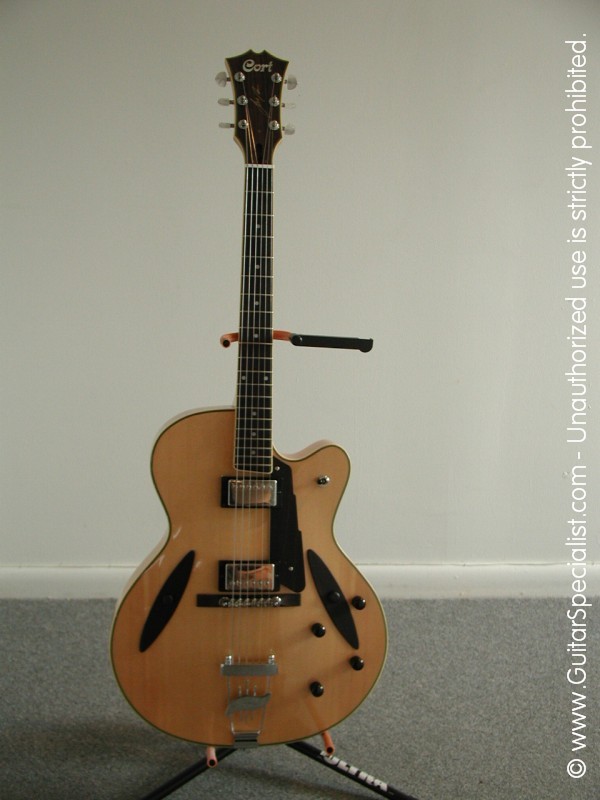
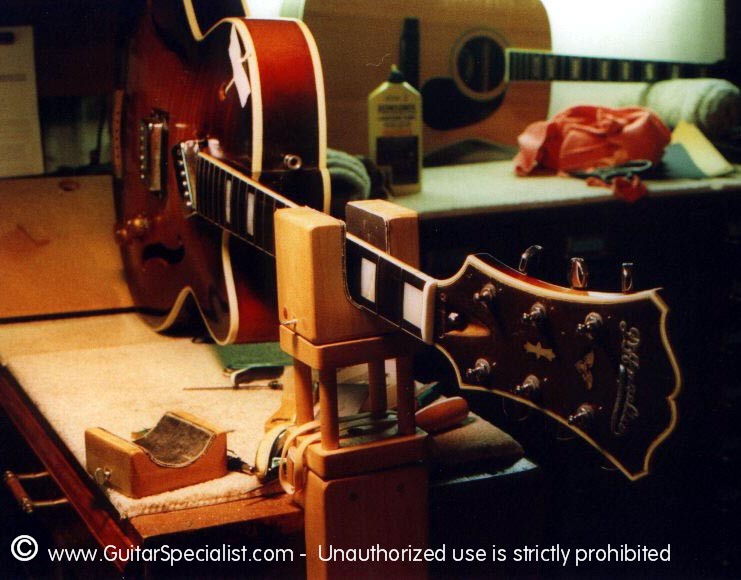
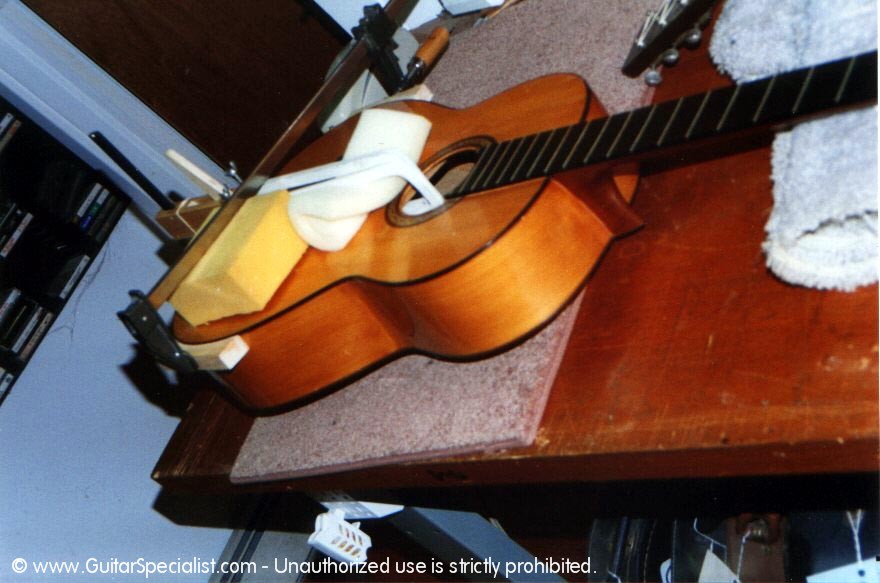
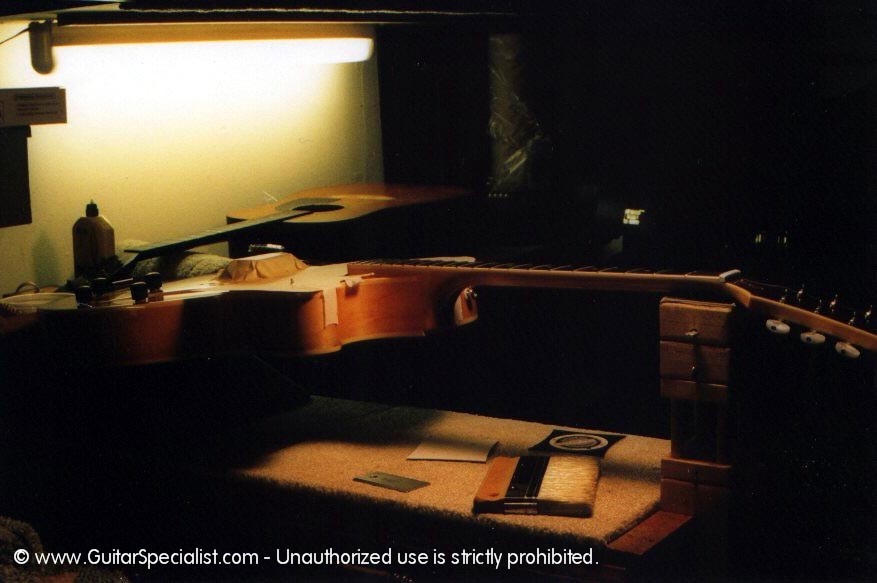
Joe dropped off a production model of his signature guitar - a Cort Beck 6. an instructed me to come up with a way of eliminating the feedback at high volumes. Putting in a huge block was out of the question due to the weight. Here is what we came up with. |
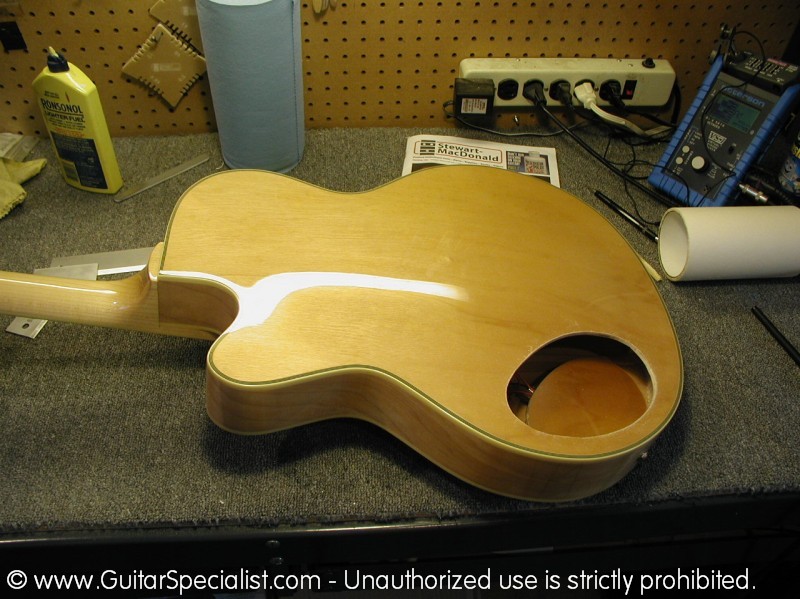 I asked Joe if he would mind us cutting a hole in the back of the guitar. |
 He said "You can cut it in half for all I care - just get it to stop howling" |
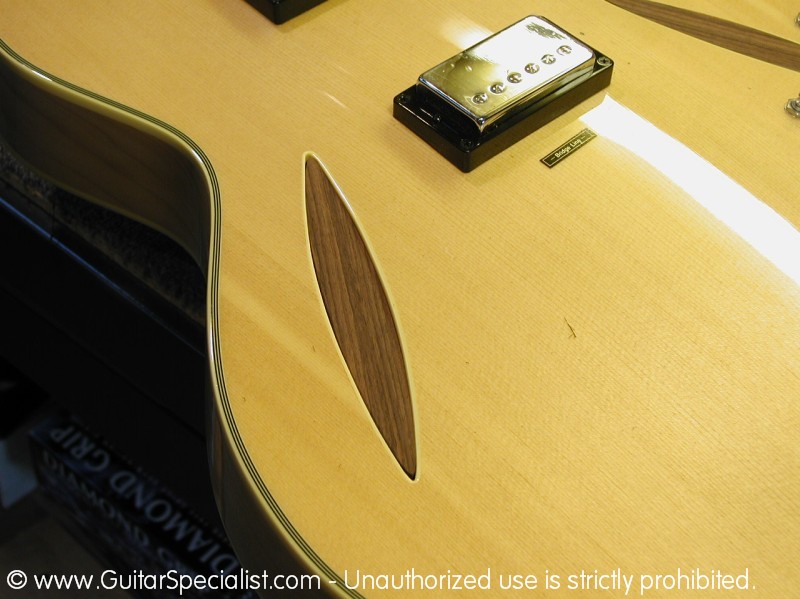
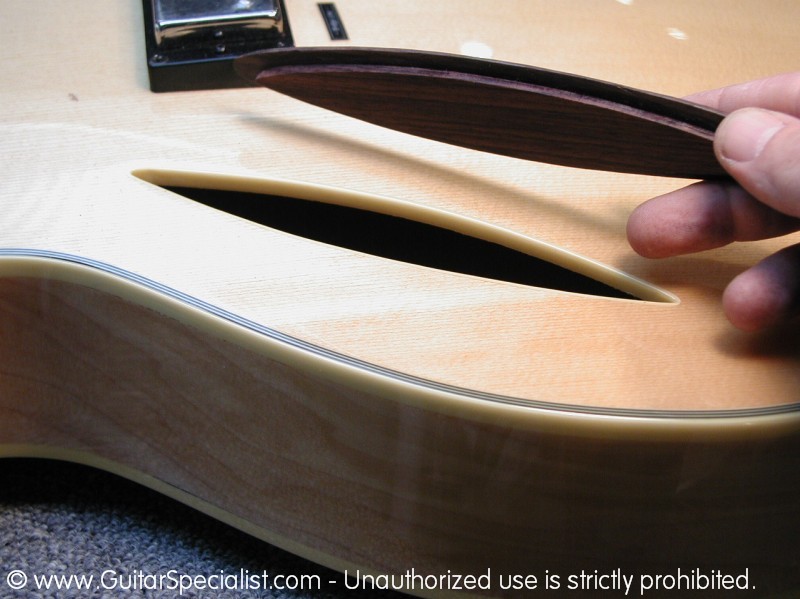
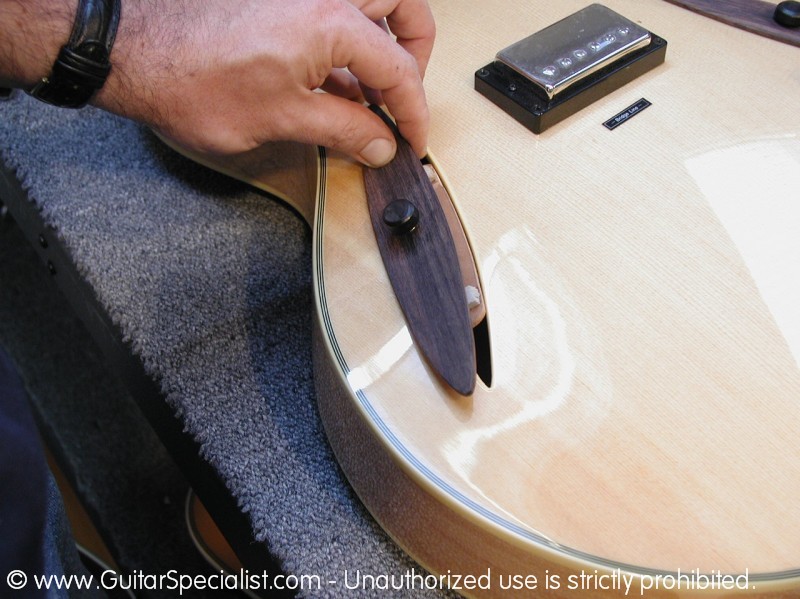
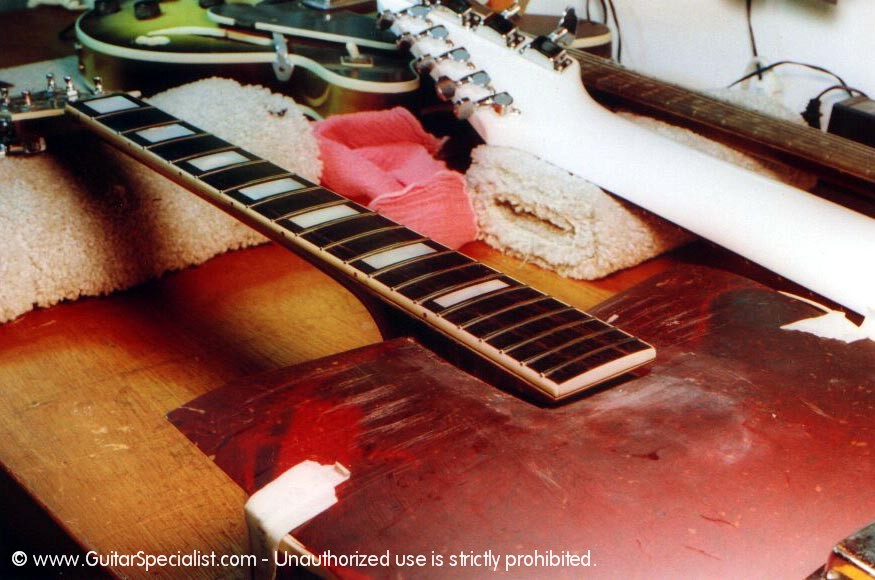
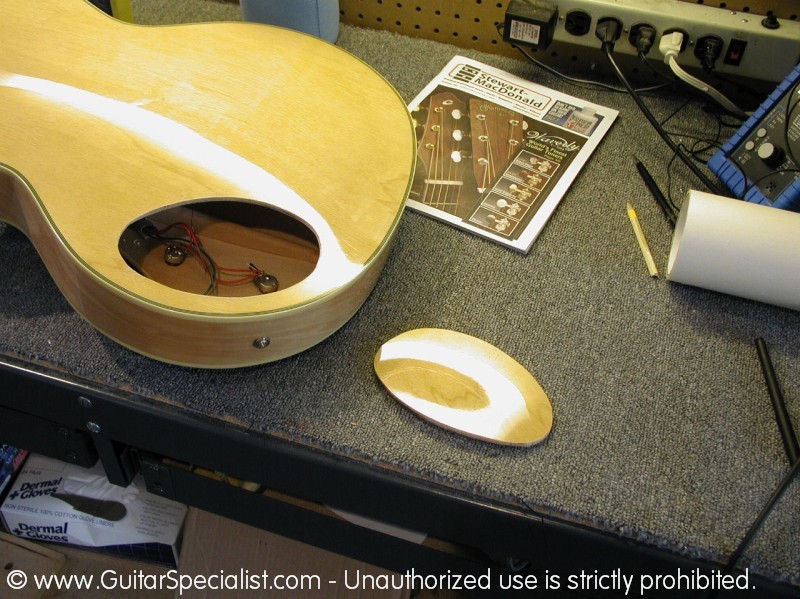 In these three pictures, you can see to hole we put in the back of the guitar, you'll see why we did hat later |
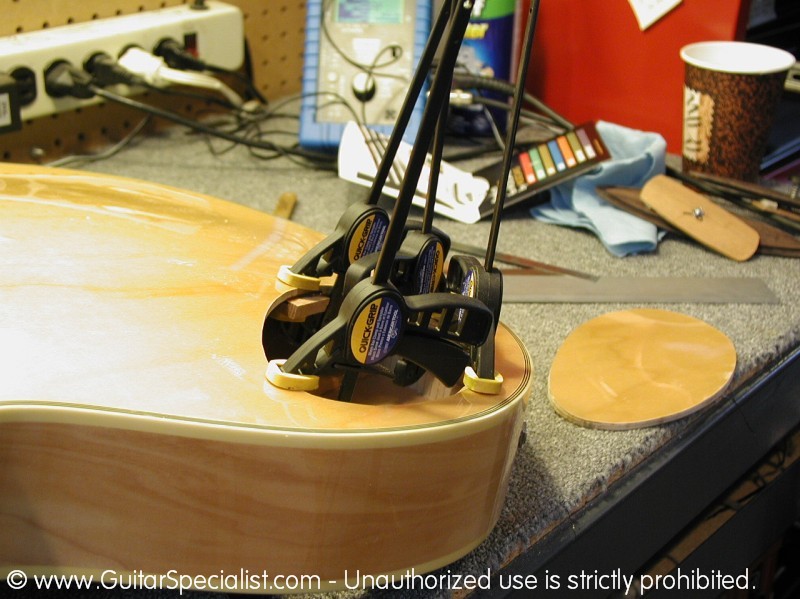
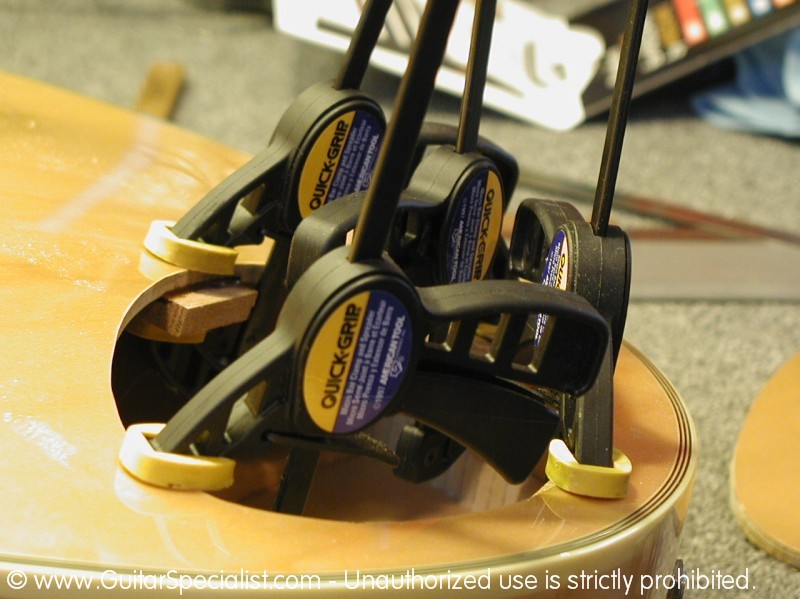
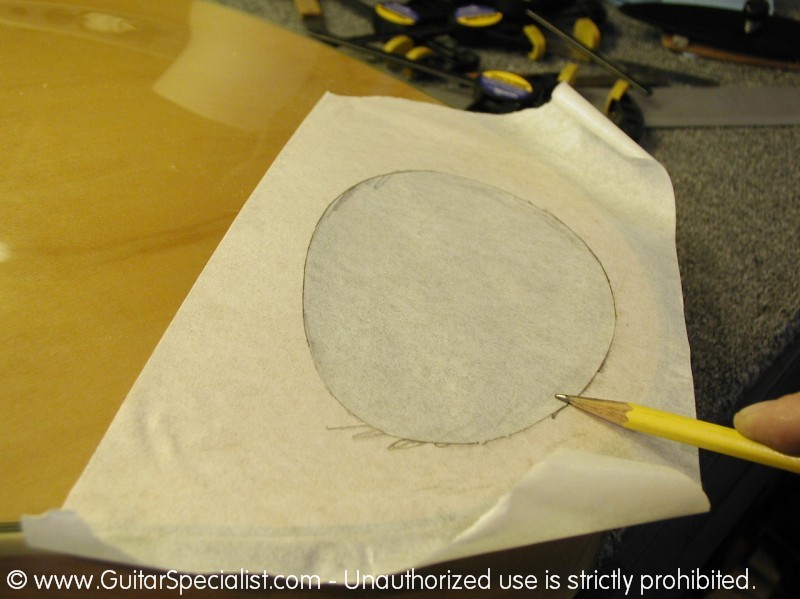
 Next we moved to the front of the guitar and traced the sound holes. |
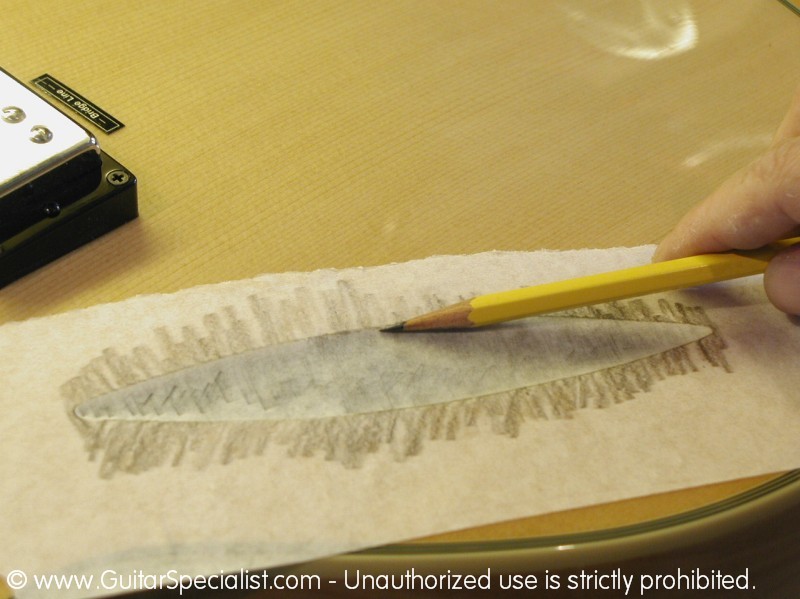 I used something called pre-mask tape. It has a very low tack and is very thin - perfect for this job. |
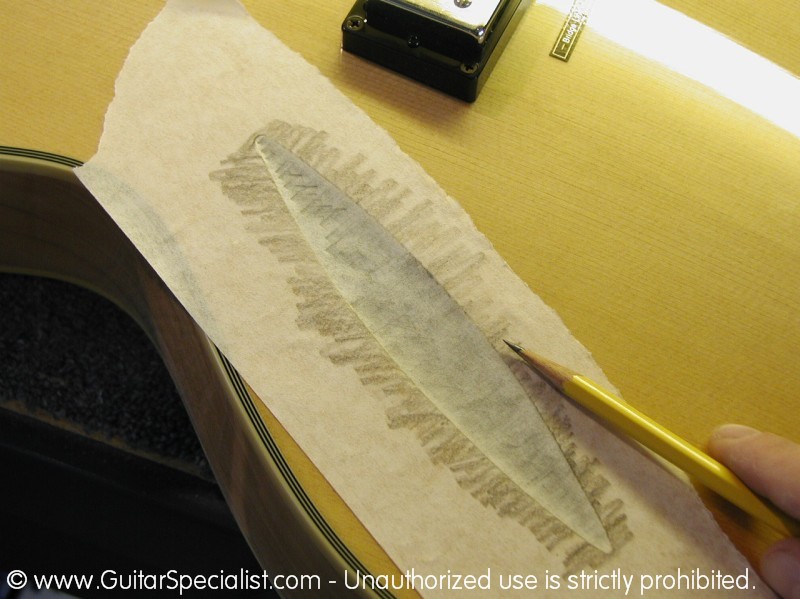 I am essentially taking a rubbing of the cat's eye holes. We had to do both of them since they are not exactly uniform. |
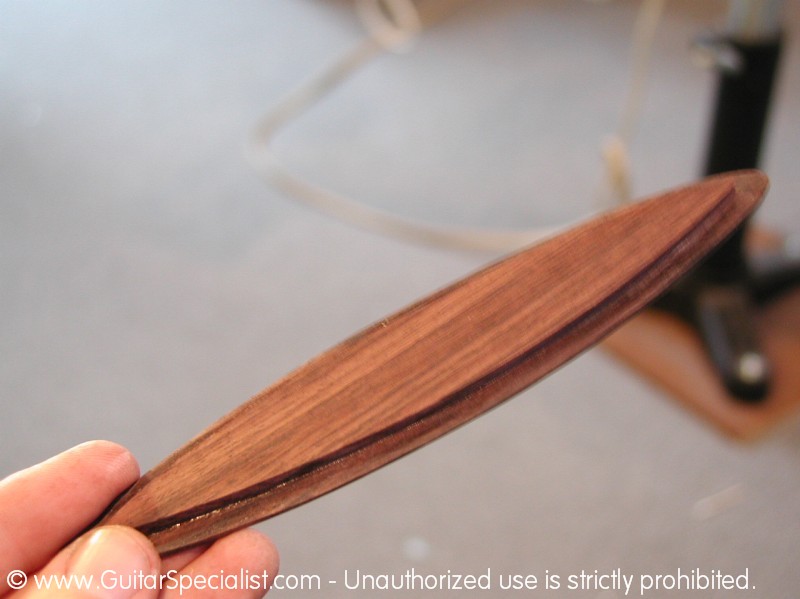
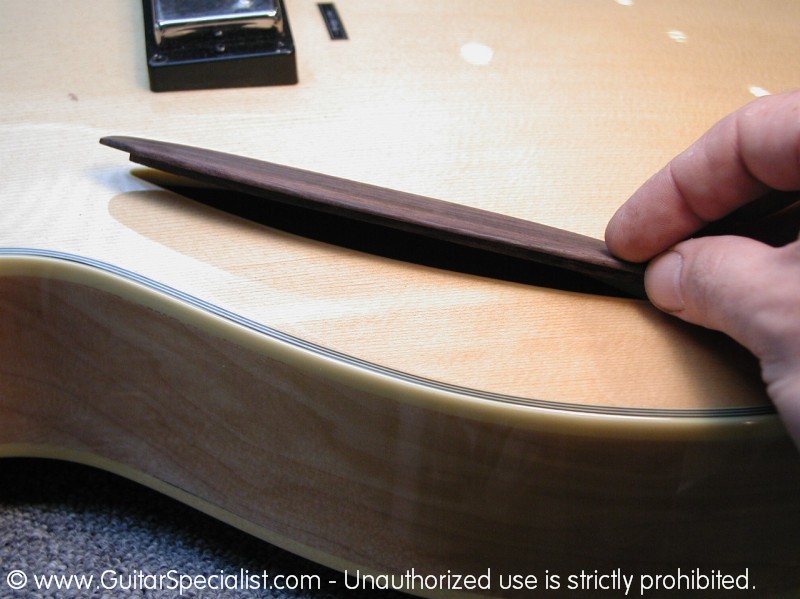
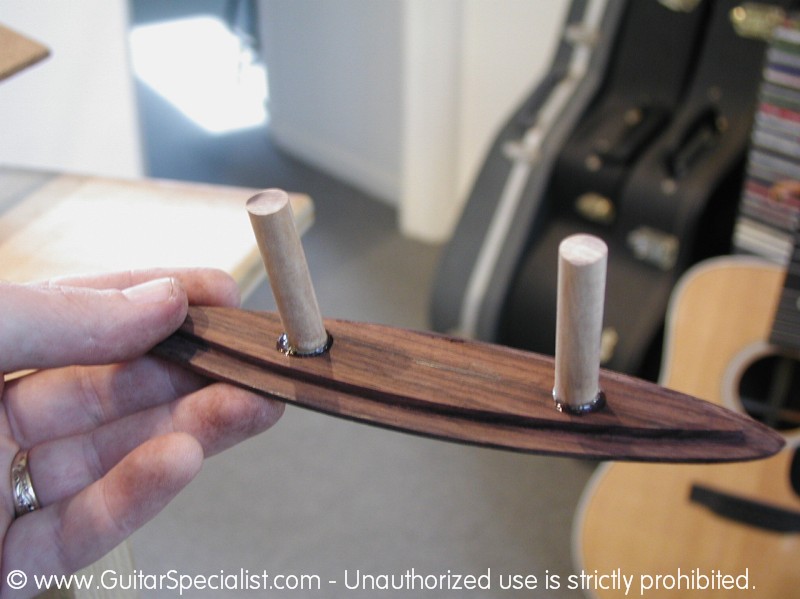
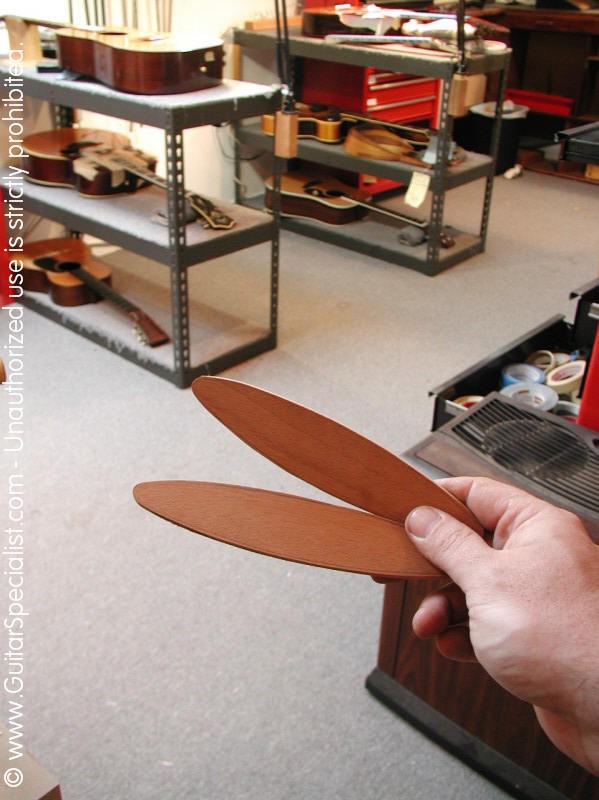
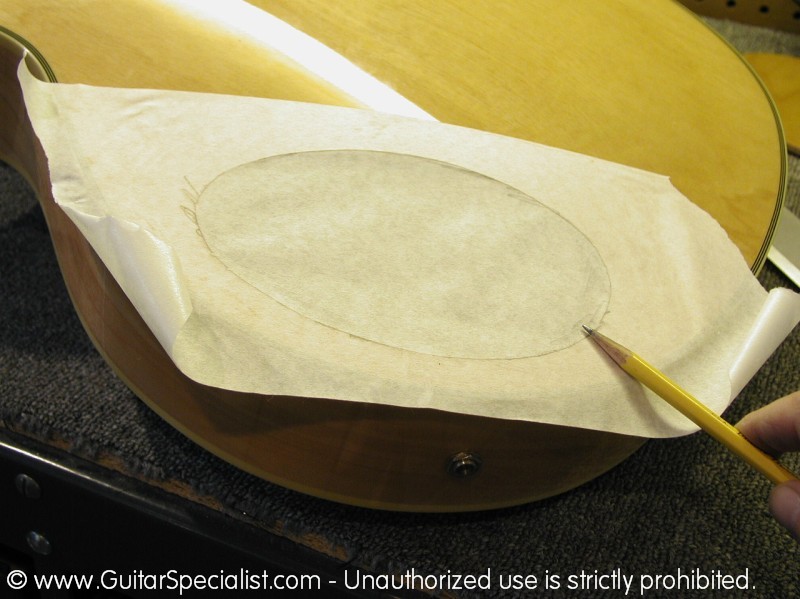
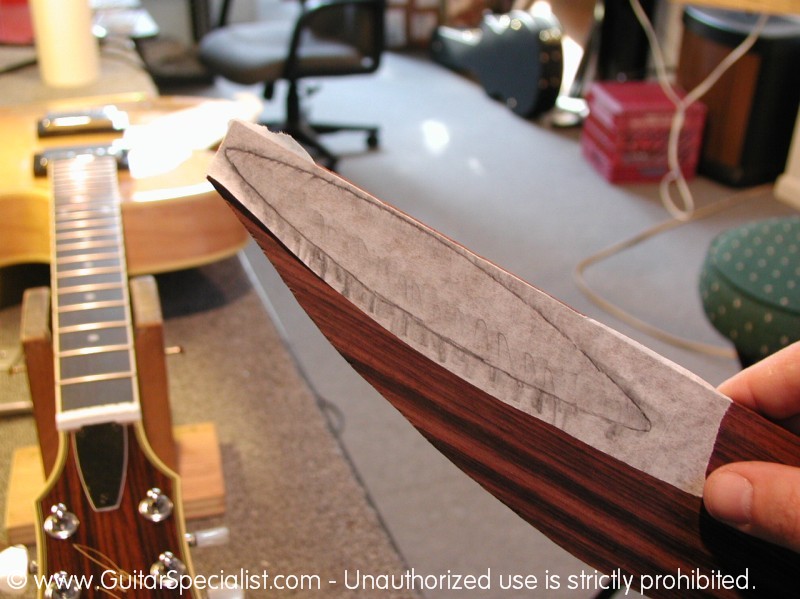 We then transferred our rubbing to a nice looking piece of rosewood. |
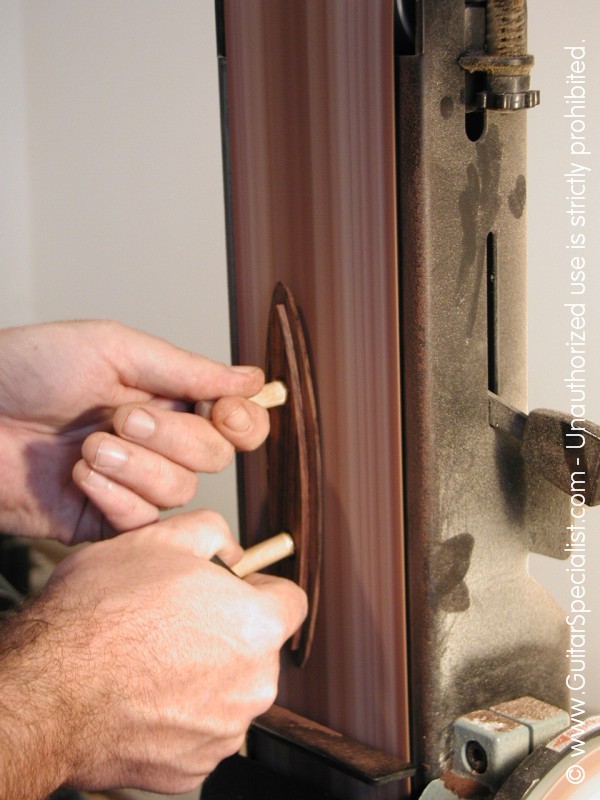
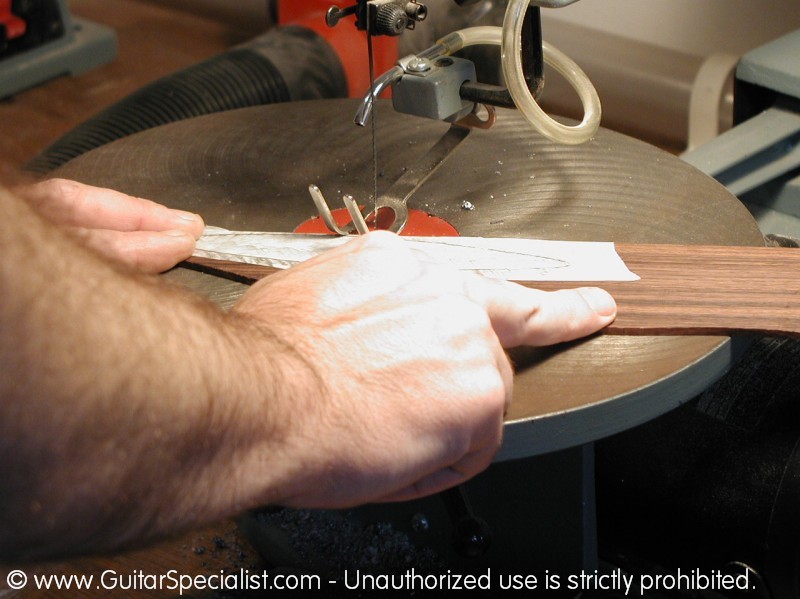 Using the tracing as a guide we cut out the shape of the cat's eye on the scroll saw. |
 If you look close, I am not cutting right on the line - more like just outside of it. |
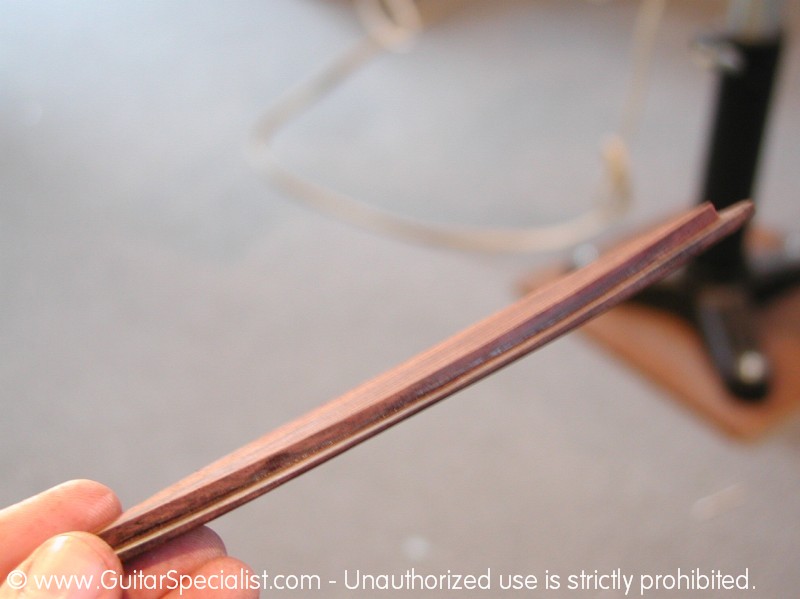
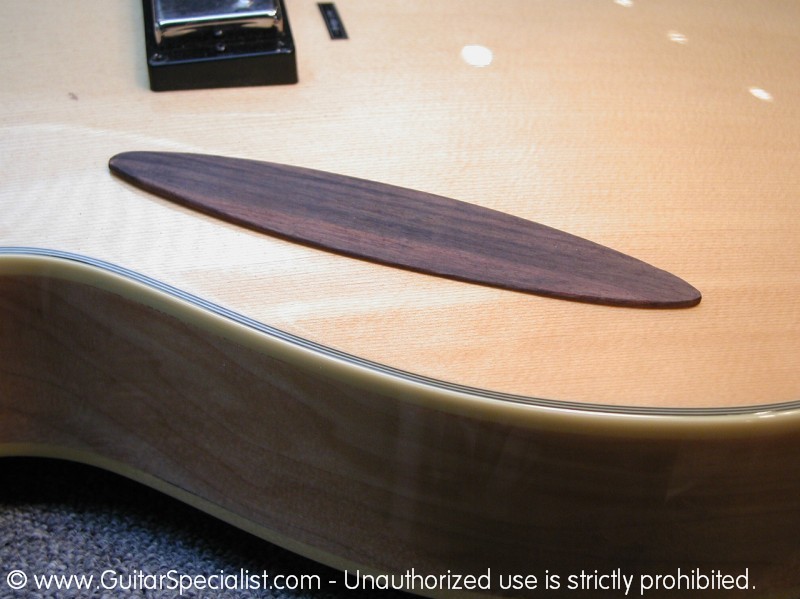
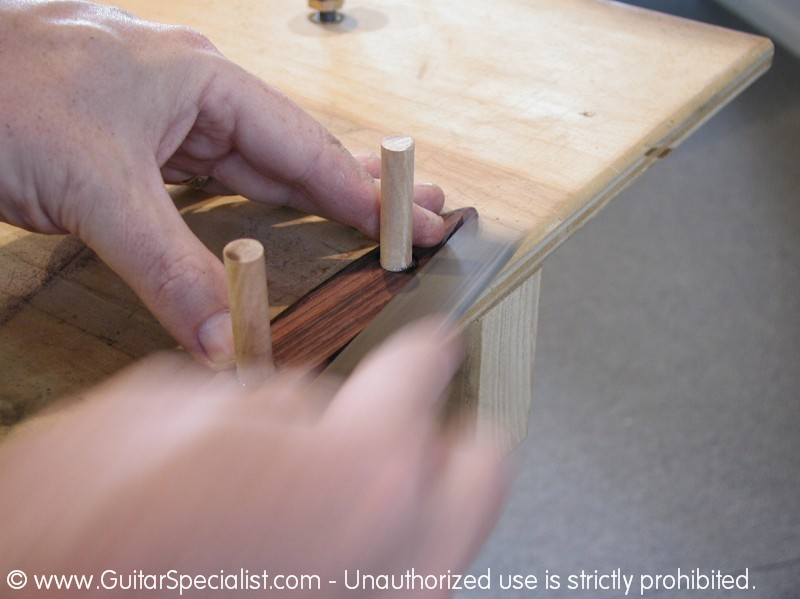
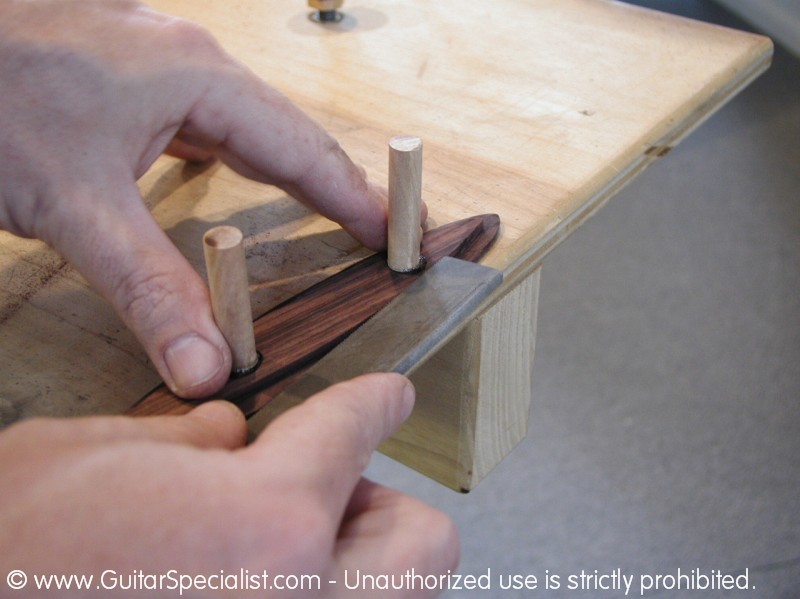
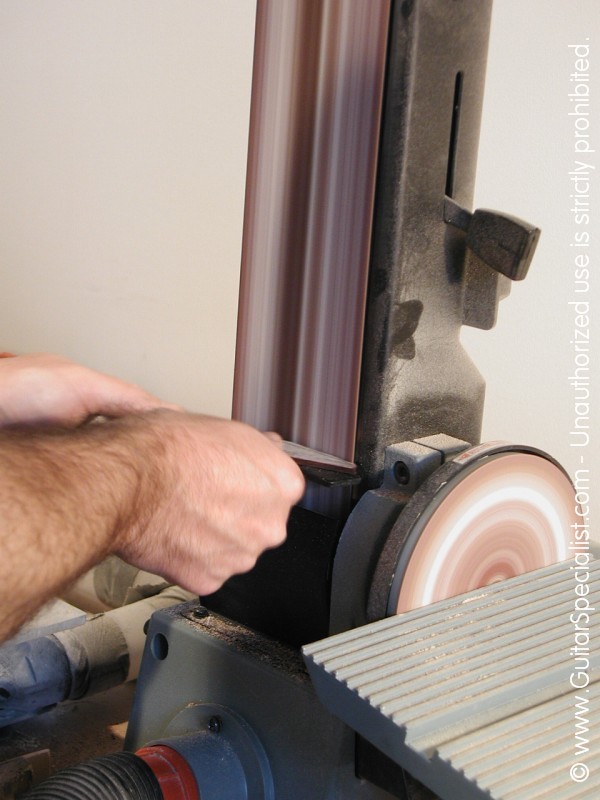 Next we step over to the large belt sander |
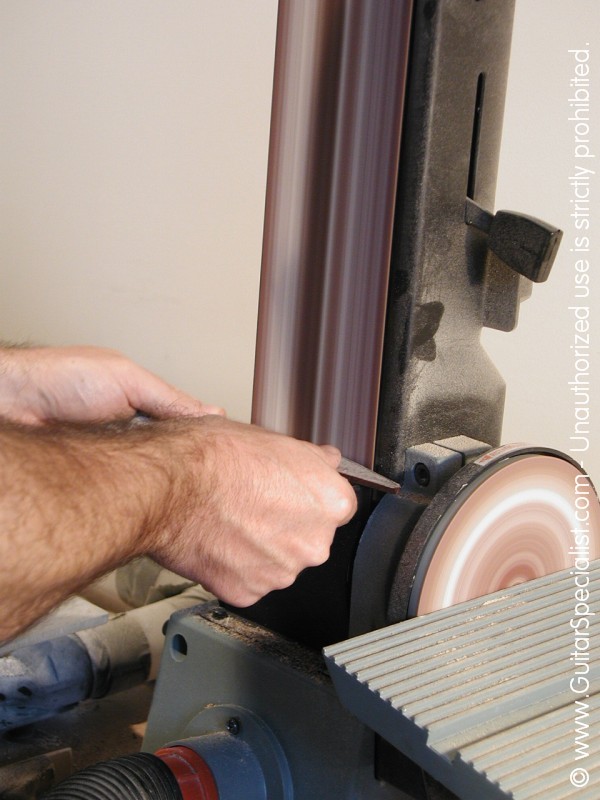 Here I am sanding right down to the line - I want a nice tight fit in the holes so I make sure that I don't take off too much. |
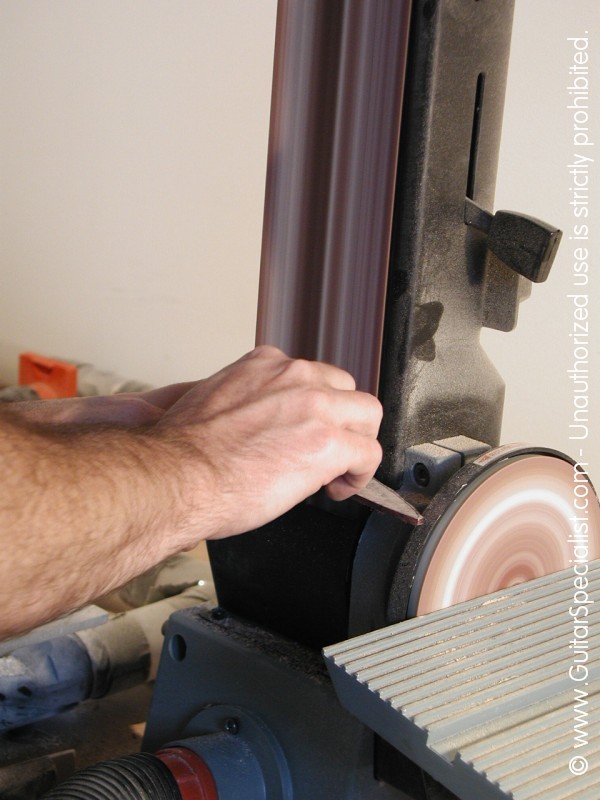 I also want a nice smooth finish with no jagged edges. |
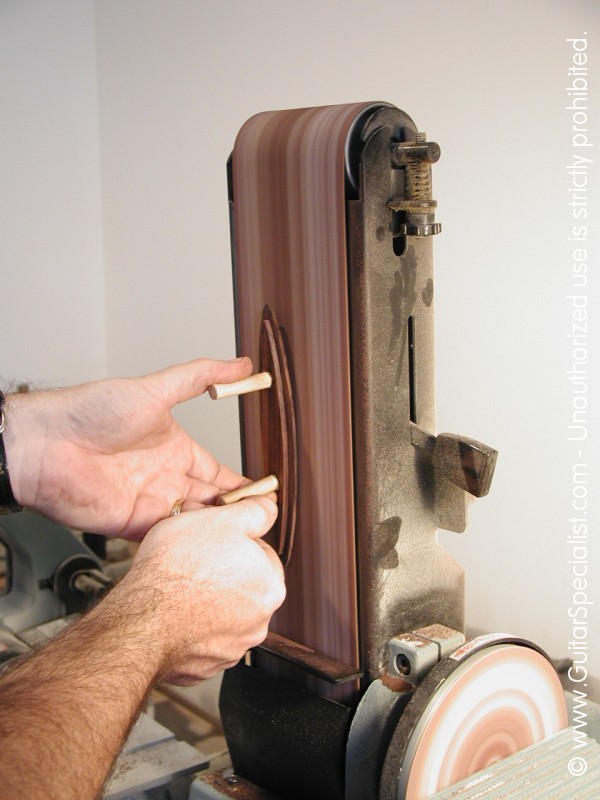
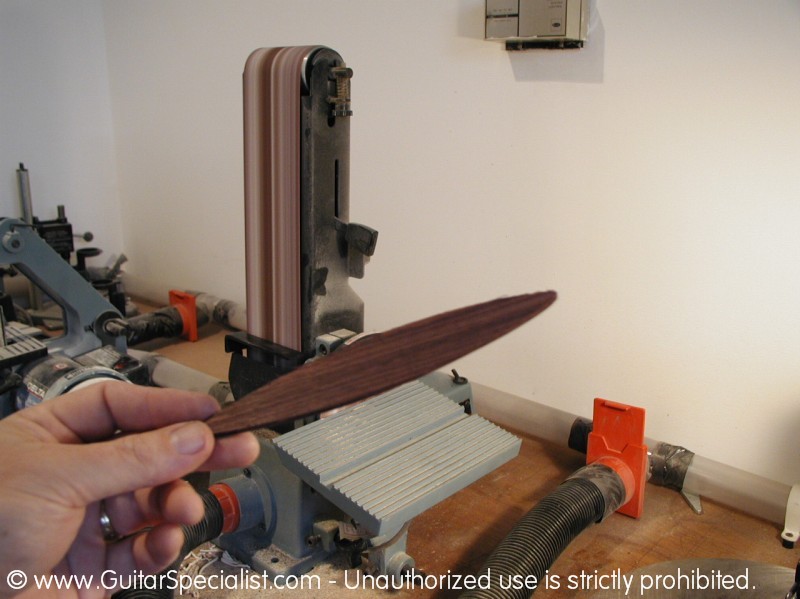 The finished part - let's see how it fits ... |
 A nice snug fit ... |
 just enough to hold it from falling through the hole but not so tight we can't pull it out. |
| Joe asked us to make anything we do to be removable in case he wanted to go back to a fully hollow instrument. So merely gluing the inserts in was out of the question. So here is what we came up with. | ||
 Here is the guitar wit the inserts in place. In order to make the inserts removable without having to have a tool to take them out - we needed a cover. |
 to make it look good we needed to have it match the contour of the top of the guitar. So we used the guitar as a sanding block |
 I glued a couple of dowels to the piece of wood to make handling it easier. With some self stick sandpaper on the guitar, he part matched the shape of the top in very little time. |
 Next we glued the inserts to our new covers |
 Only to cover needs to match the contour of the top - however the inserts took the contour of the cover ... |
 It's nice when things work out that way. |
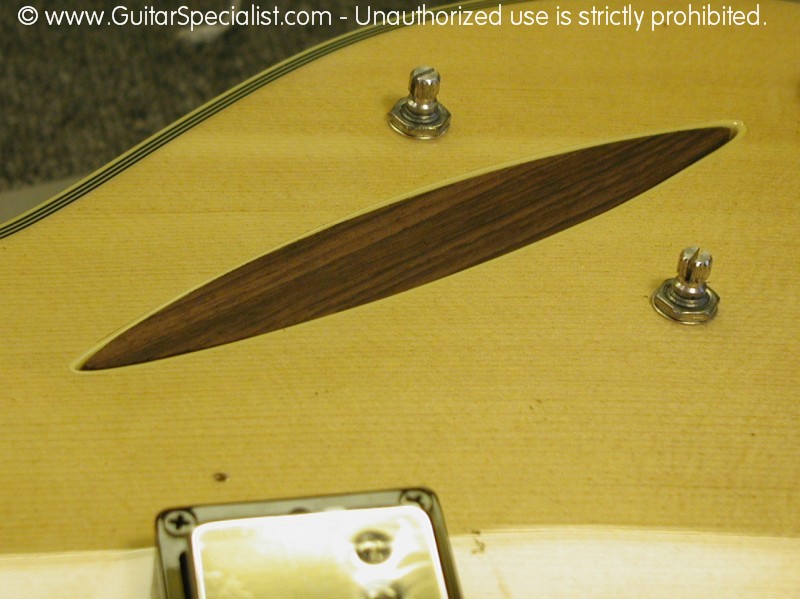
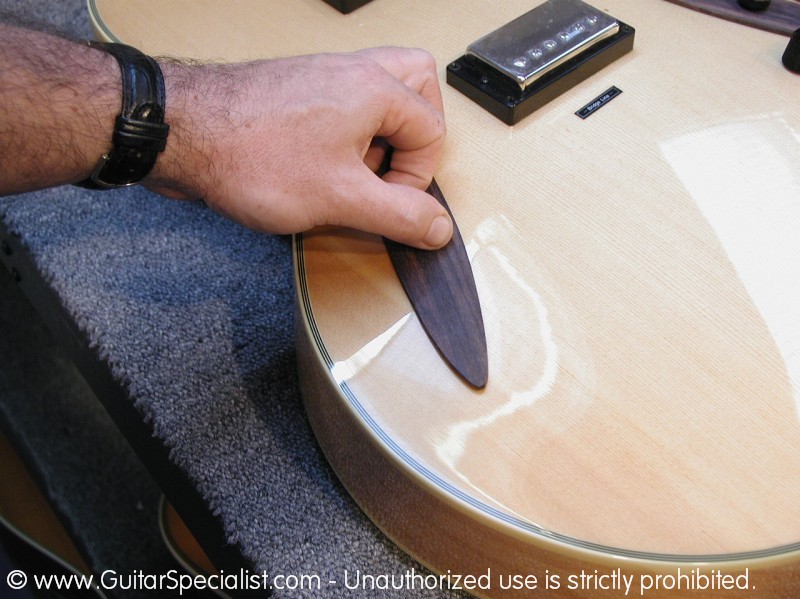
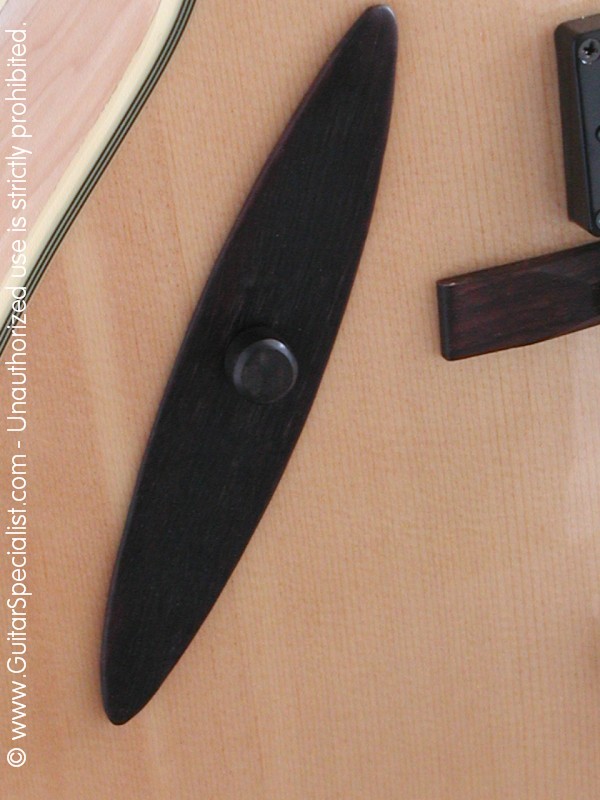
 The new insert fits into the cat's eye very nicely |
 it merely slips into place and drops right into the hole and it matches the contour of the face quite nicely |
 I was tempted to call this done - but I know that this guitar is going to to a great deal of touring |
 For a guitar that wasn't going to be handled aggressively - the friction fit of these inserts would hold nicely |
Since I know that's not the case we are going to have to come up with a way of securing them to keep them from falling out - what we came up with does more than that - it actually helps stifle the top even more. |
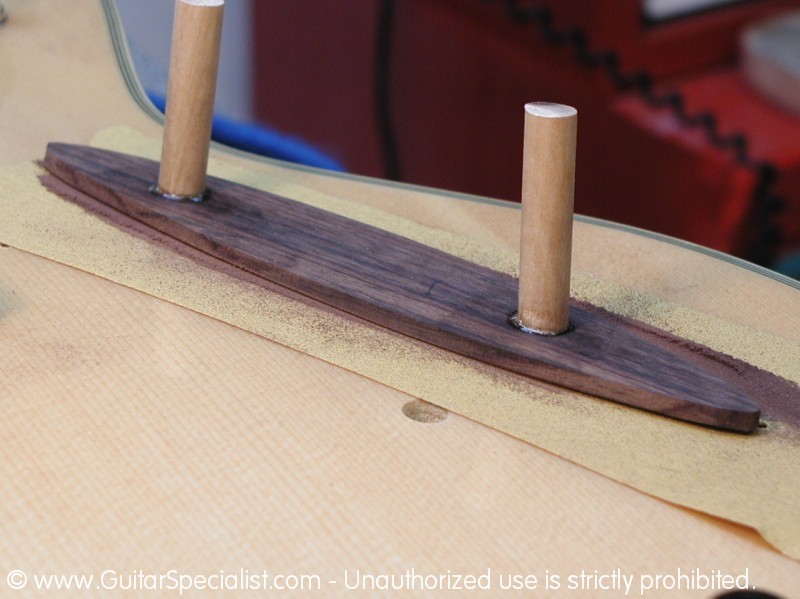 More on that a bit later - right now we have one more insert to complete. Here is a good look at the two dowels I quickly glued to the cover for easy handling. |
 After shaping the cover to the face of the guitar, I glued the insert to the cover and then glued the dowels to the under side of the whole part. |
 Using the dowels wasn't completely necessary but it did make handling the whole piece a lot easier so it was worth the little extra effort |
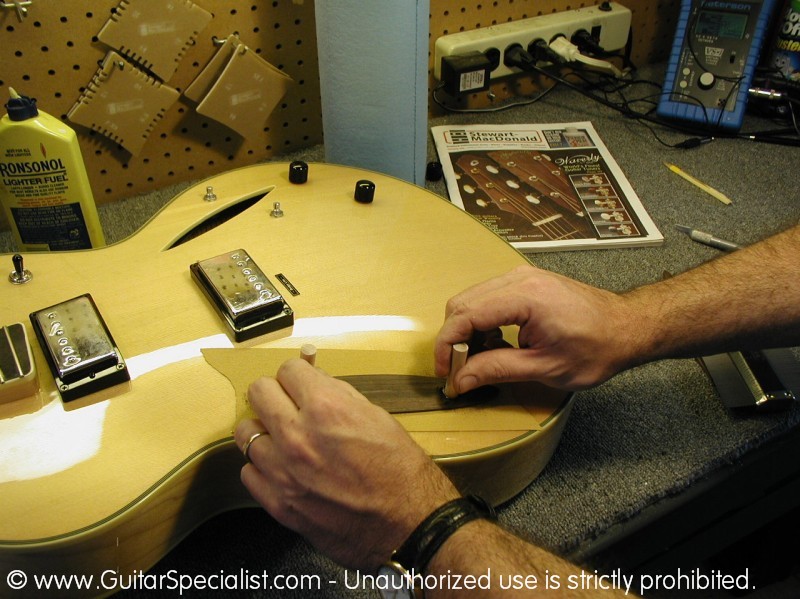
 The second insert needed a bit more shaping - so we trued it up with a nut ledge file. |
 The dowels made working at the belt sander much more comfortable |
 With much less risk of catching a finger or losing control of the part. |
 Here we have a couple of pieces of wood shaped to match the cat's eyes, these will be the backing to mount the covers to the sound holes. We actually decided to change the shape of these for easier mounting - you'll notice that in a bit. |
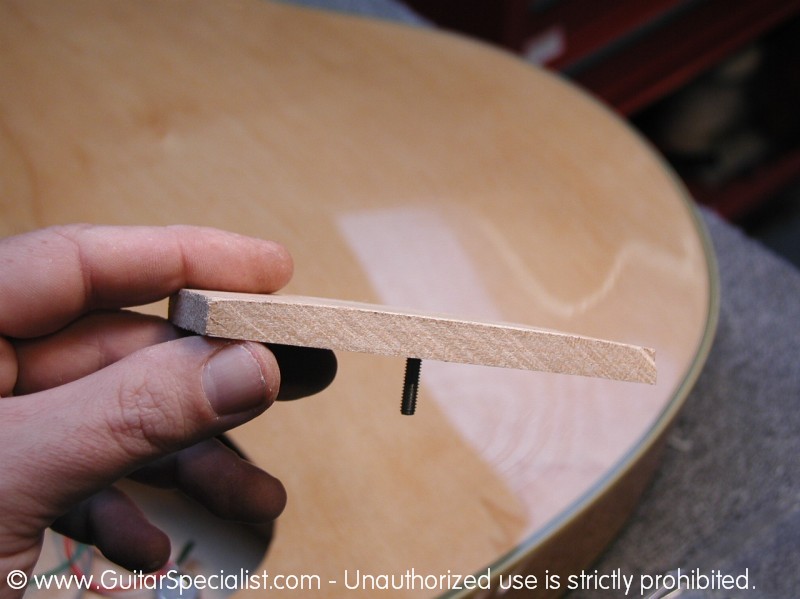
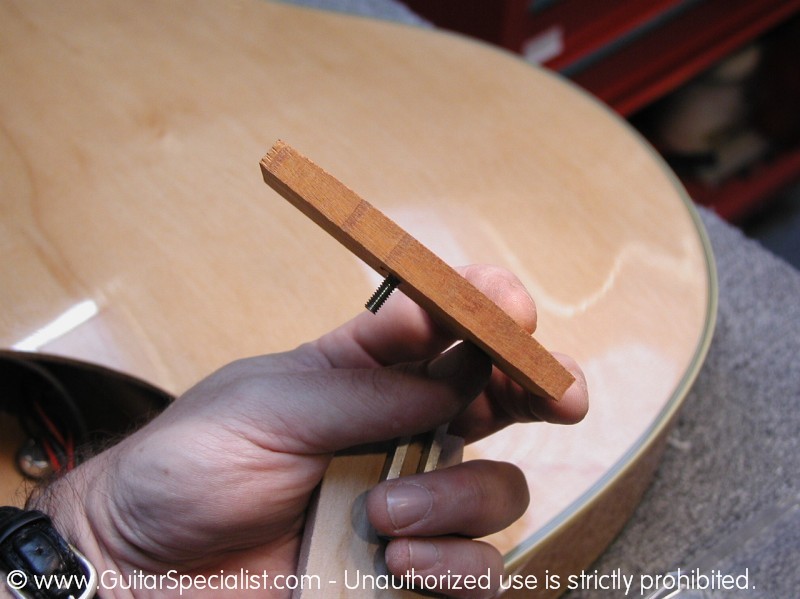
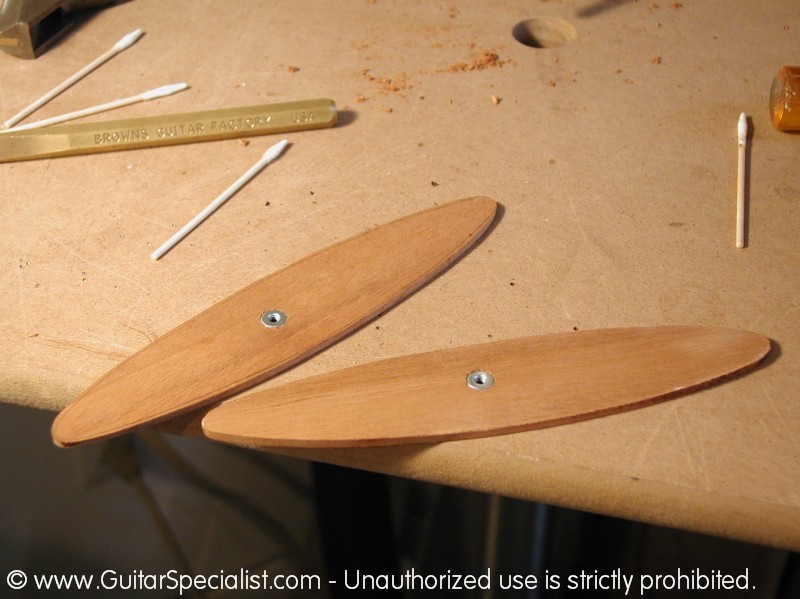 Inserted into each backing is a small threaded nut to accommodate the knob that will be used to tighten the whole plug system. |
 I wanted a good looking piece that functioned with the turn of a knob but didn't want to use a large knob like you would find on a volume control. So we turned our own knob. |
 We mounted it directly to the threaded rod that matched the 8/32 threaded nut inserted into the backing we made earlier. The knob looks a bit rough in this picture - we cleaned them up quite a bit for the finished product. |
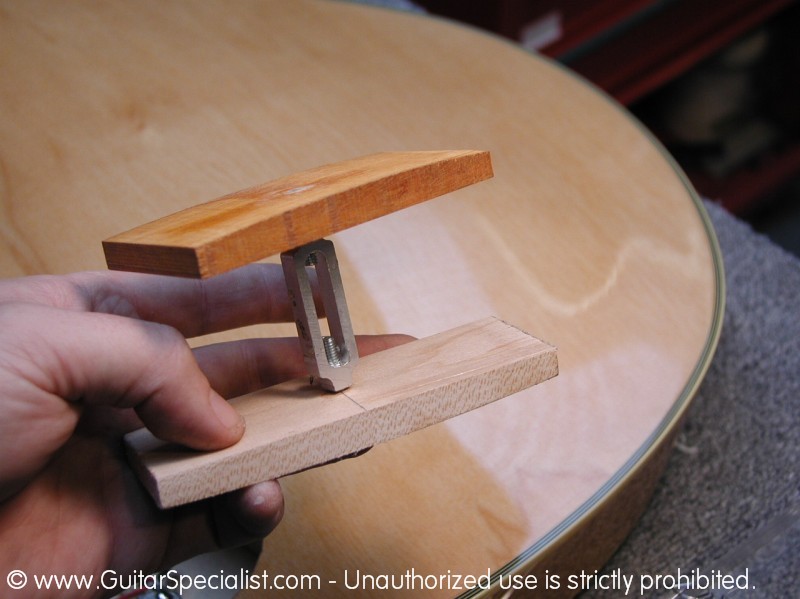
 Here you can see how the insert works. |
 you slip the underside in the guitar at a slight angle to seat the cover of the insert. |
 Begin tightening the knob to make the underside swing perpendicular to the top of the insert. |
 Continue tightening until the insert is nice and snug - don't over tighten - just good and snug. |
 the idea here is not to merely fill the holes but help restrict the tops movement a bit. |
 Here is another shot of both inserts in place. By the way - the knobs are all cleaned up now. |
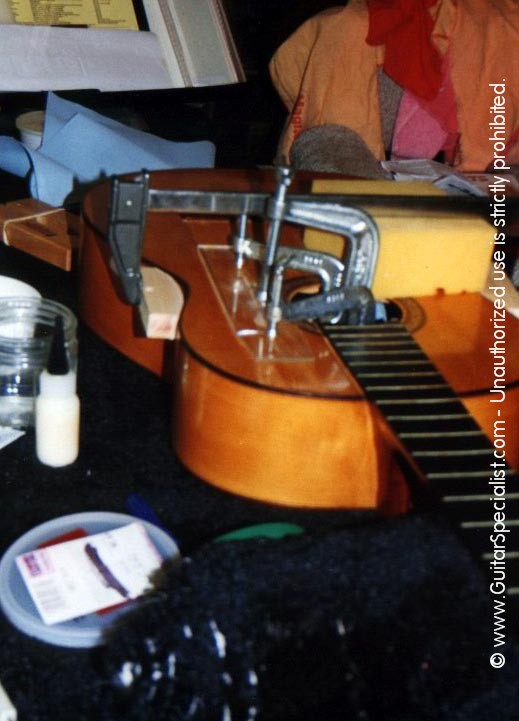
| At this point you might be wondering why we cut this big hole in the back of the guitar. You're about to find out. Joe wanted a feedback proof guitar - I didn't think that sound hole plugs would do it all on their own. | ||
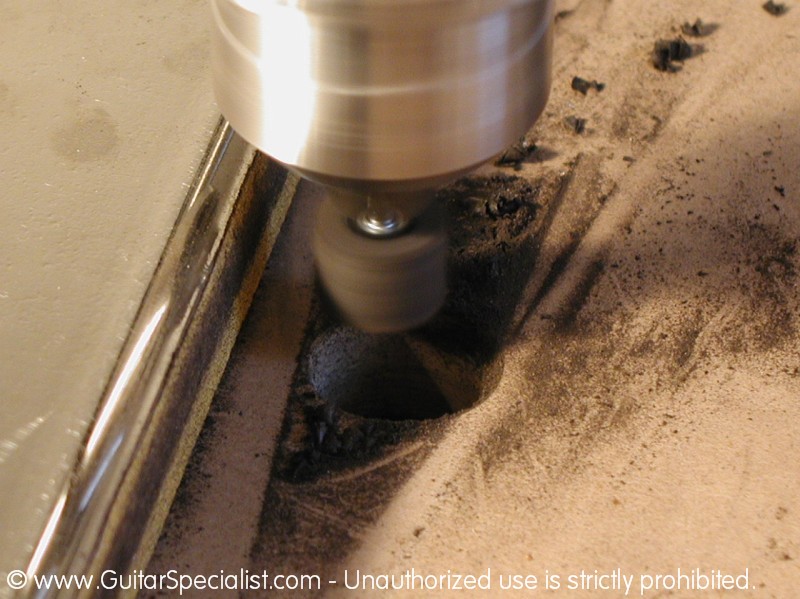
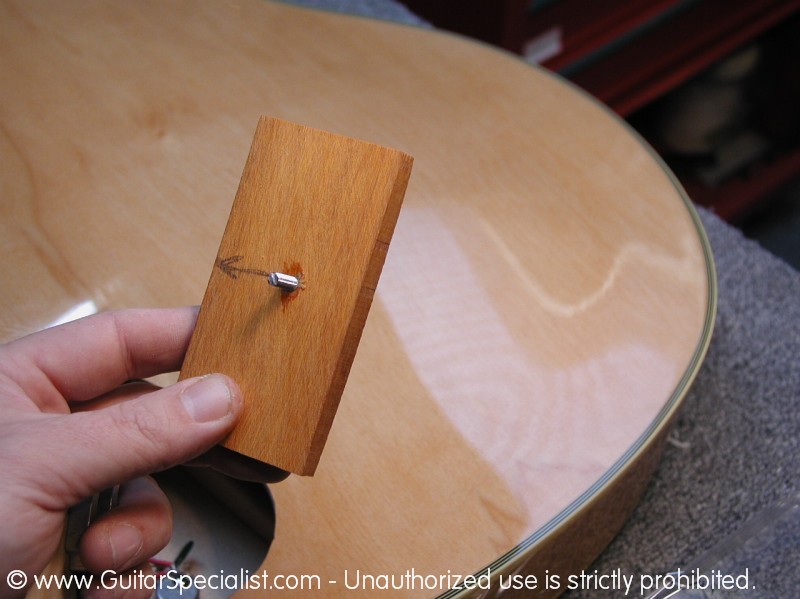
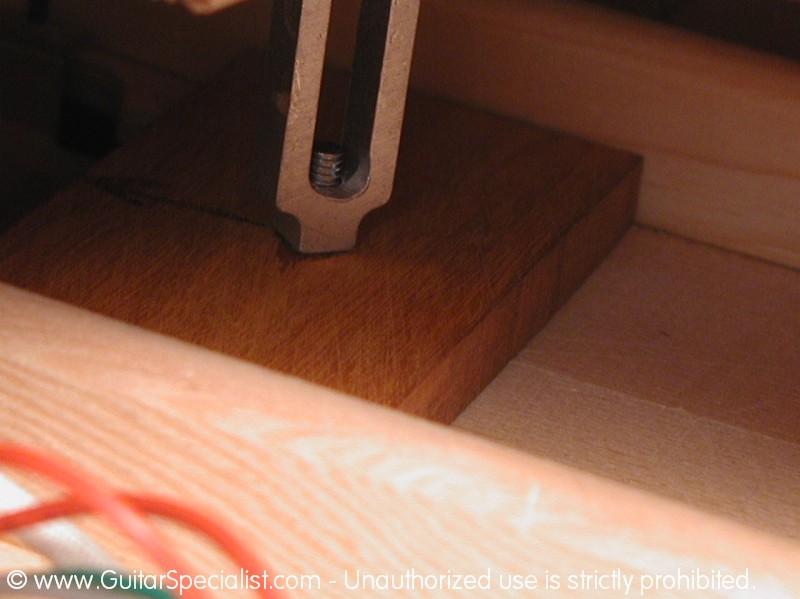
 First we made a block of maple that matched the inside curve of the back of the guitar just in the area where the bridge would sit. |
 the block has a threaded insert that will accept one end of a turnbuckle. |
 next we made one for the top. you can see that it's a different material - I didn't bother matching the types of wood - since this part is not coming in direct contact with the guitar |
 Both parts were made to fit in only one direction so we were careful to make sure each part was marked appropriately |
 Here is the full assembly. The lighter maple piece is for the back of the guitar and the mahogany will be on the top. |
 before we finish it up, I;ll double check the fit of the curve inside the guitar. It fits just fine. |
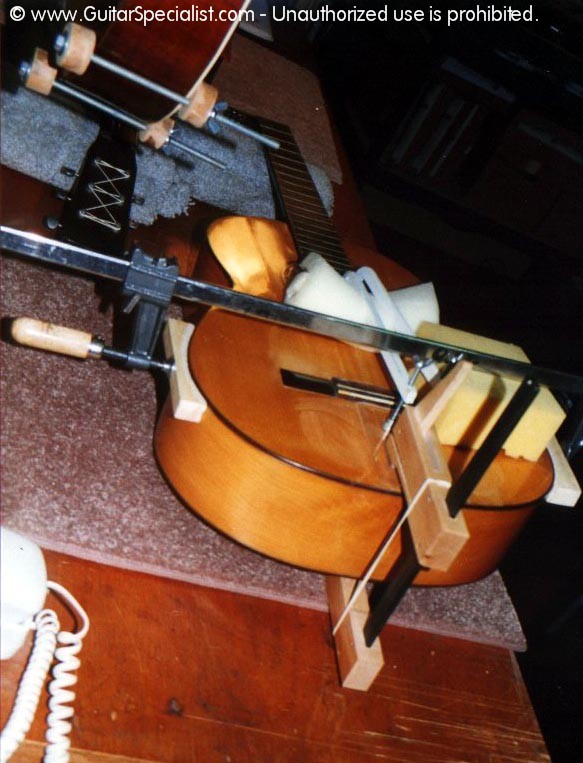
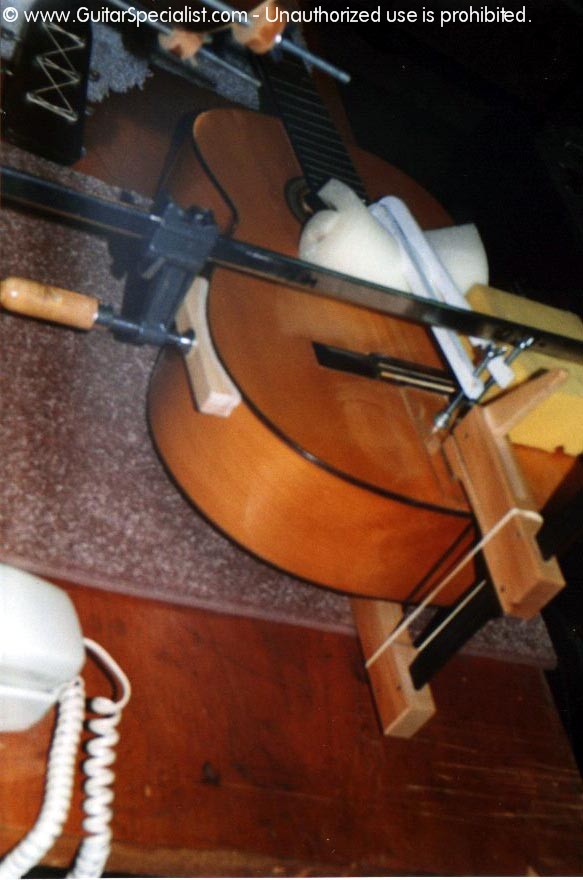
 I chose to use a fairly thick piece of hard felt for the top of the jack. This will stifle the to when tightened |
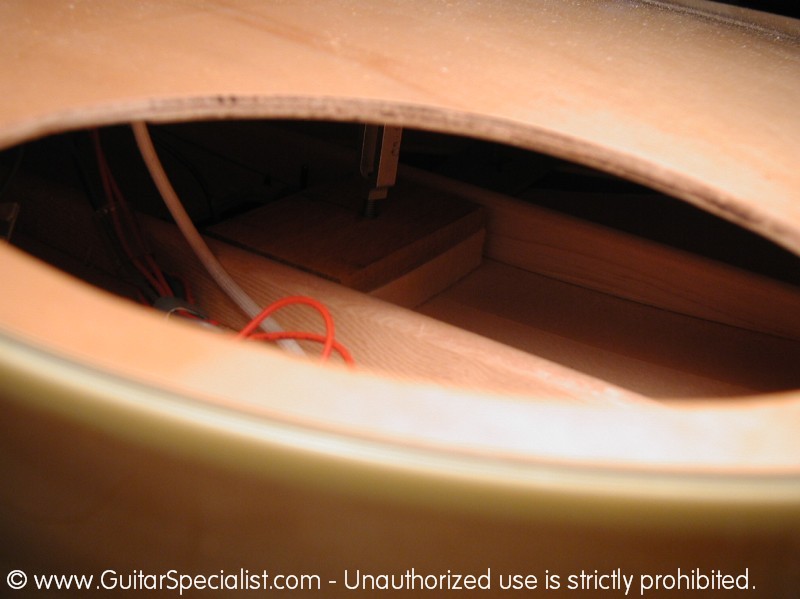 Here is a look at the insert in place. The reason for the big hole is not just o put this part in - but it is adjustable. |
 You can reach in the guitar, and loosen the whole thing and the top part will release from the top of the guitar. When you tighten it, it acts as a dampener for the top, restricting it's movement |
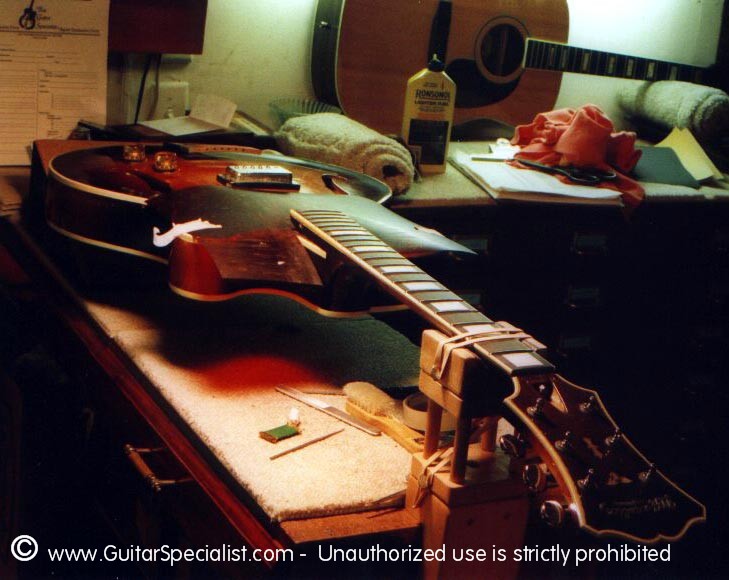
 Here we are gluing inserts to attach the new back plate. |
 We can't just leave a huge hole in the back of a guitar - can we? |
|
 After that's done - we traced the hole in the back of the guitar. |
 this is sign makers tape very thin - very low tack. |
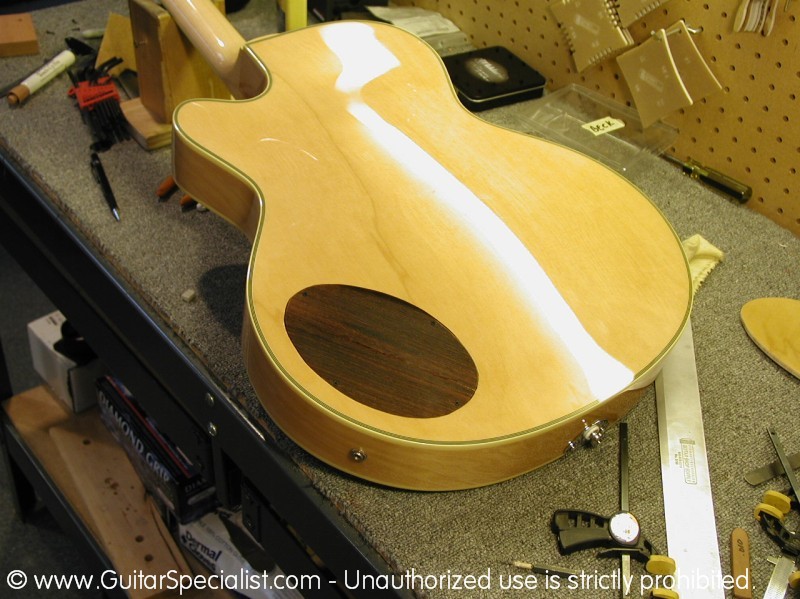 Our back plat is in place - screwed in like the back plat on a Les Paul. I chose rosewood to match the rest of he appointments on the guitar. |
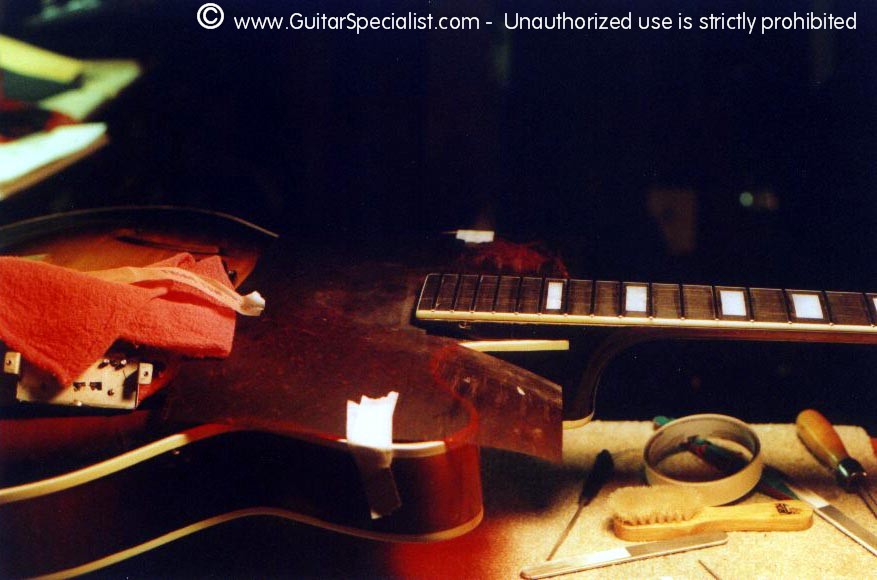
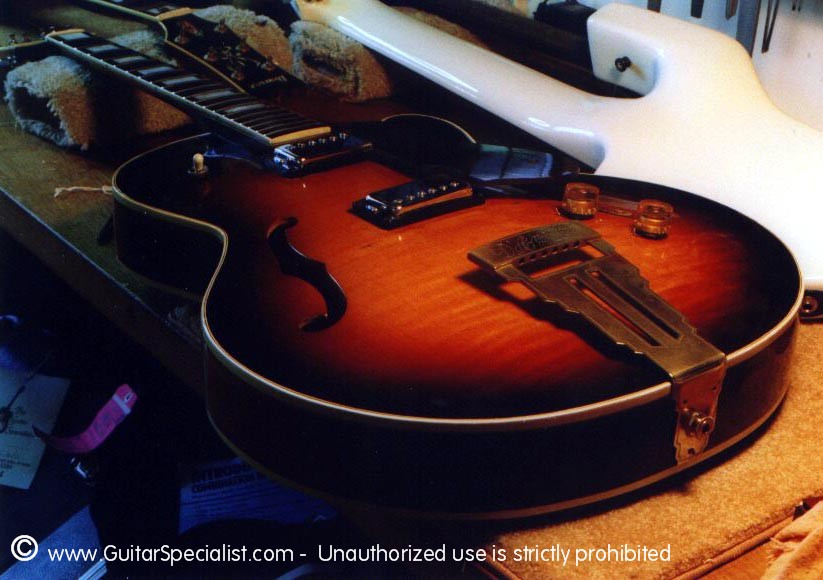
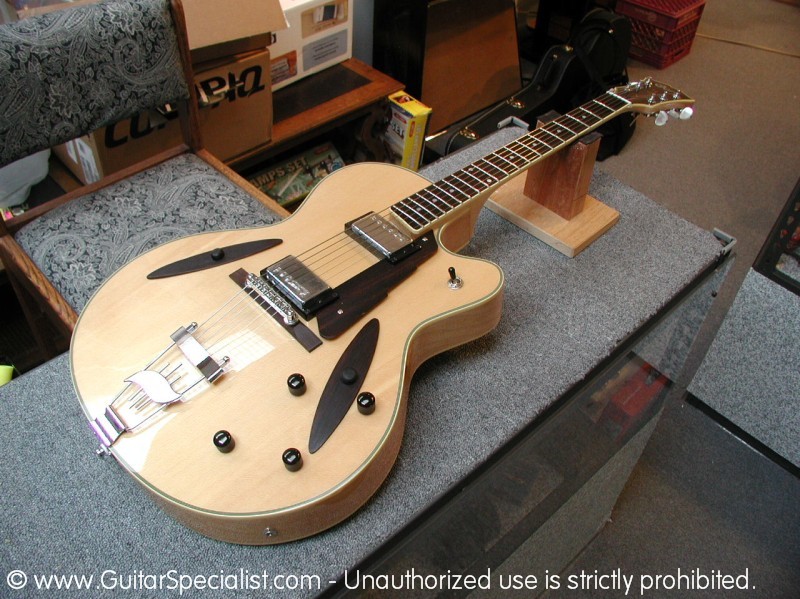 Here is a look at the finished product - all strung up and ready. |
 another look at the sound hole plugs. |
|
 |
The plugs match the overall look of the guitar, matching the rosewood finger-rest. |
 |
 |
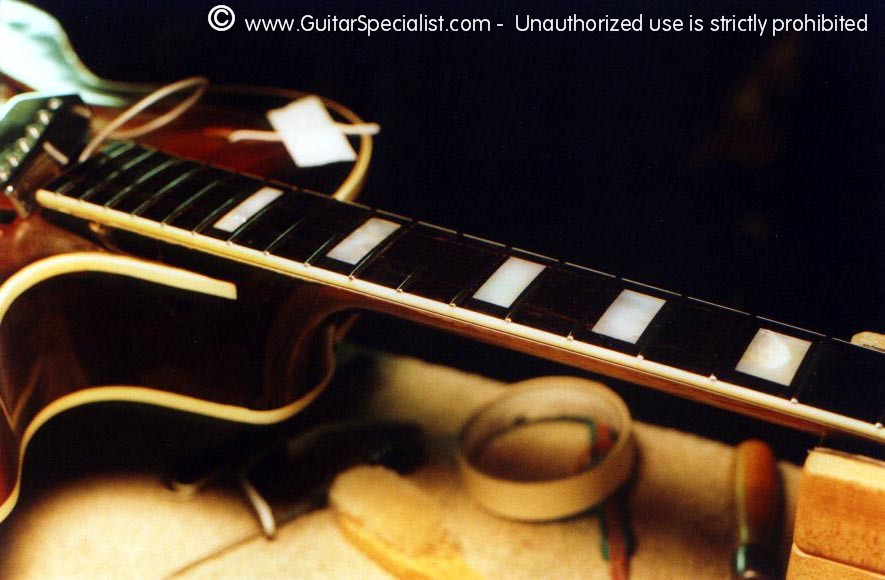
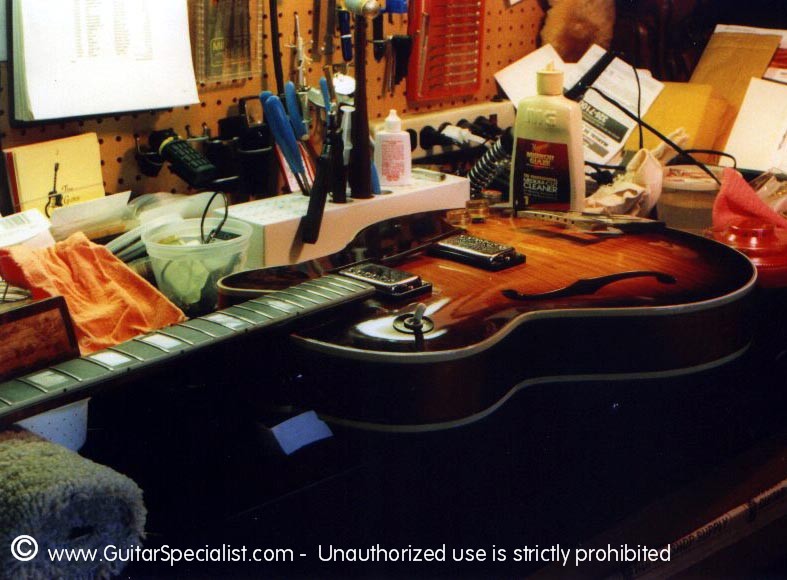
Here is a close up of the finished plugs. When Joe came to pick up the guitar, we cranked up the loudest amp in the shop to 10 - even with distortion - not an ounce of feedback. we had a ball until the lawyer who occupies the office space next to the shop stopped in to complain - oops. |
 |
![]()
Joe brought me His 1951 D'Angelico to look at this past March. To read the story behind this one -
| The Patient: Joe Beck's 1951 D'Angelico
|
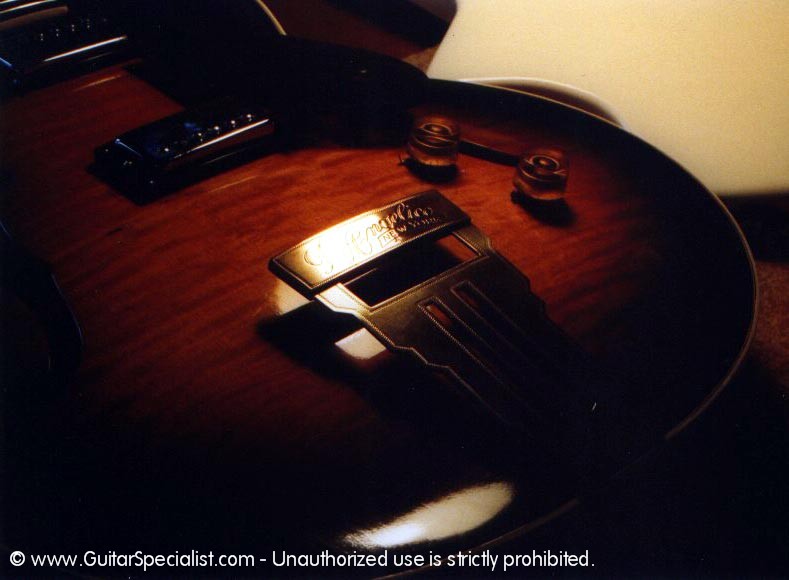
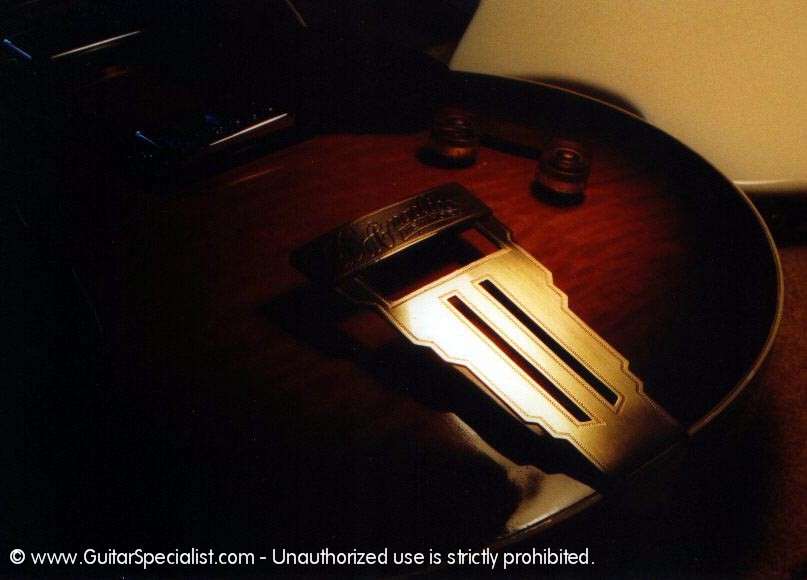
 This is a shot of the completed guitar. |
Diagnosis: Desperately needs a refret - the fingerboard is dry & pitted - I think the only thing holding sections of this bard in were the frets - no exaggeration. Will get a new nut - De-rust the parts & reshape the bridge for better intonation. |
 Joe's frets measured only nineteen thousands of an inch high - gotta come out. |
 Nearly all the metal parts on this guitar were badly rusted. |
 Here's the bridge all shined up. |
 Another View. |
 Here's a shot of it with the new frets in. |
 Something happened at the photo lab - none of the pics of the actual refret ever came out. |
 I hear that the clerk at the photo shop is recovering nicely. |
 A good look at the newly crowned frets. |
 I find that final shaping the new nut in playing position is easiest. |
 I keep the profile nice & low to provide a comfortable feel while playing chords at the nut. |
 Time to clean up the finish & buff it out. |
 Just about ready to string it up & set it up. |
 There! - Now I can play it for a while before Joe gets here. |
||
 A true thing of beauty |
![]()
| The
Patient: Joe Beck's 1959 Esteso Flamenco.
|
This is the only shop Joe beck has ever trusted with this guitar. This one has had a lot of mileage - Joe said he has recorded with this guitar more than any other he's got. | |
 The most difficult part of a job like this is not knowing how the guitar will react to having all the cracks shut & braces clamped after years of disrepair. |
Diagnosis: This puppy was in sad shape. There were a total of eight very long cracks in the body, including two fingerboard cracks - three braces were completely unseated - the top was splitting lengthwise from dryness & grain runout - & the tap plates had to be replaced. |
 The best way is to proceed slowly - making sure the guitar is well humidified before any work is done. |
 Cracks are clamped flat using Plexiglas cauls to keep them level . . . |
 . . . and the face is actually pressed together to help close the cracks. |
 The biggest danger is that already repaired cracks will open up while applying pressure to close other cracks. |
 Here's a guitar that's now ready to make another 40 years of great music in the hands of a great musician. |
||
![]()
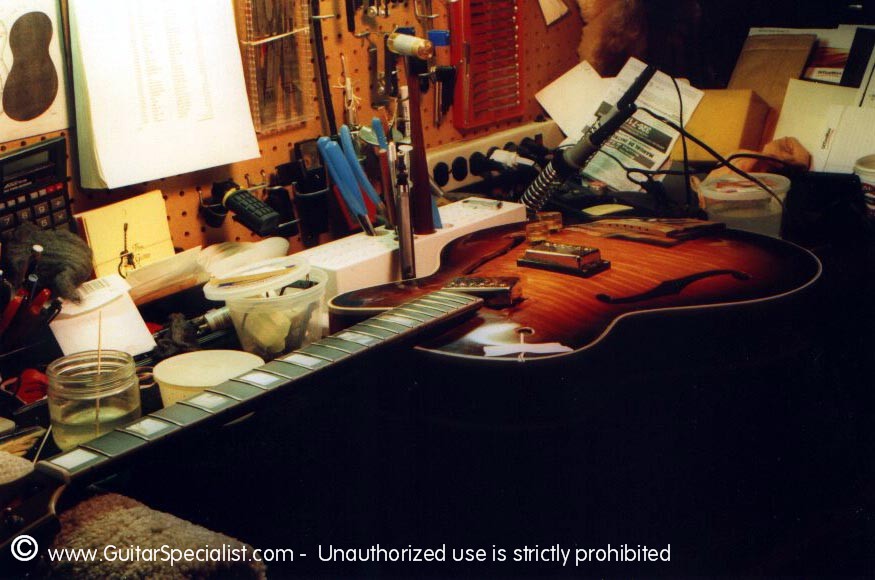
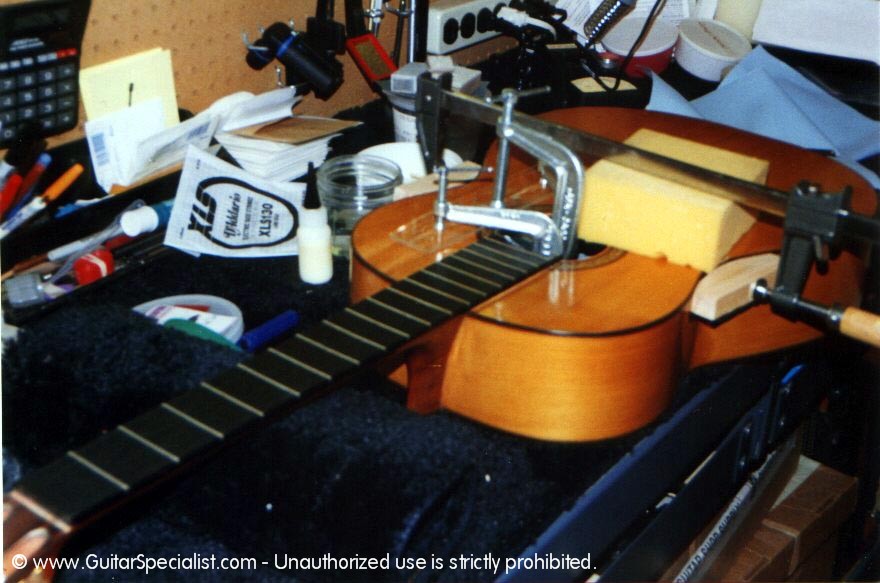
 Here is a quick shot of the prototype for Joe's new signature series of guitars - he had us do some fret work & some minor electronics work to it to make it "Just Right". |


|
(914) 401-9052 |
|
|
|
� Copyright 1998 - 2019 and beyond |