
Back To


Please Be Patient
The thumbnails may take some time to load.
Click on any picture to see a larger version
![]()
|
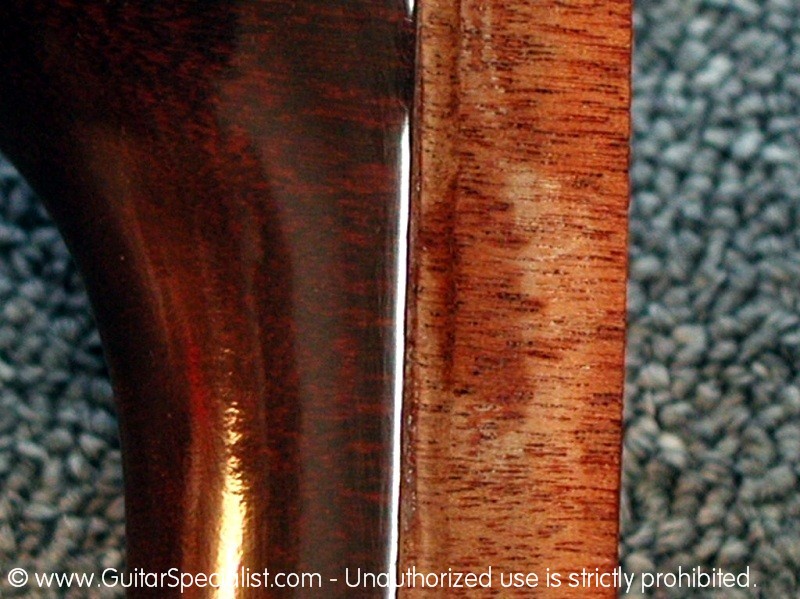
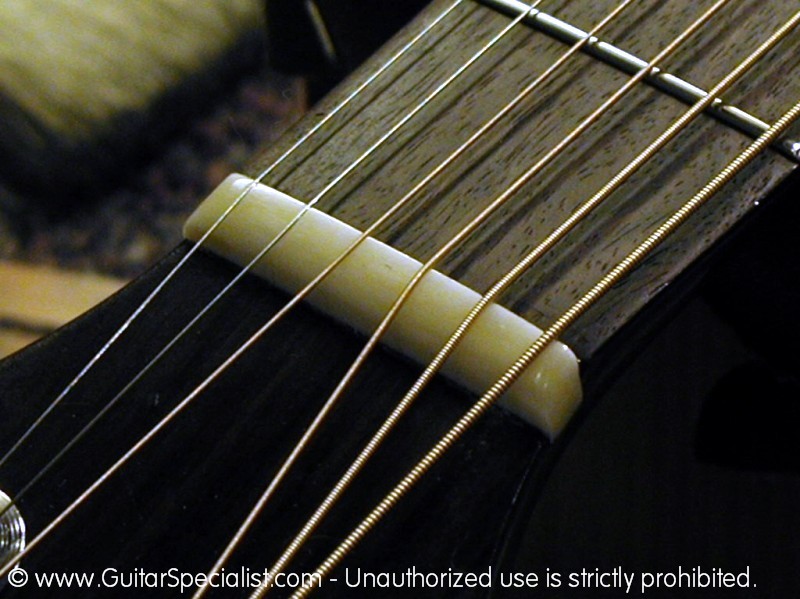
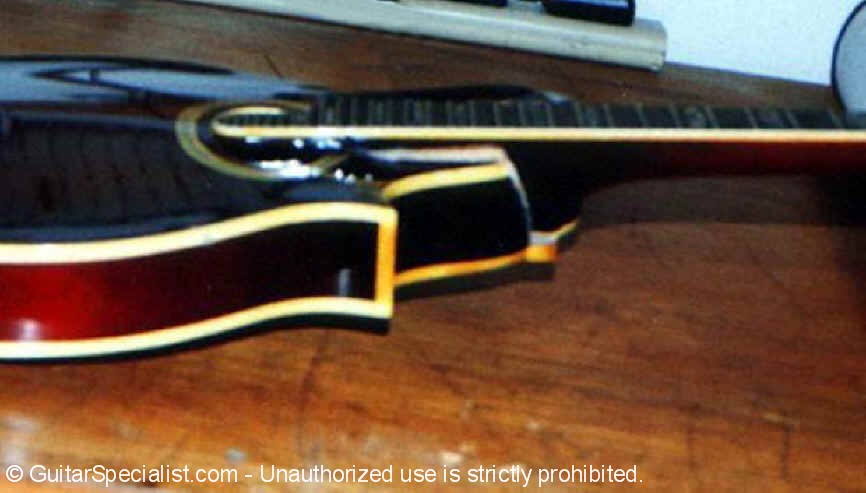
Every acoustic guitar and many electrics, at some point in it's life will need a Neck Reset. It is an expensive and invasive repair, but in the right hands it is a procedure that can breathe new life into an old, tired guitar. I find that many repair shops to recommend resets all to quickly - as if it is the answer to all problems. On an inexpensive instrument there may be ways to avoid the need to reset the neck. If your luthier recommends a neck set on a significant instrument and you can't afford it, my advice will always be to wait and save up until you can. Don't let anyone talk you into shaving down the bridge, cutting deep string ramps, slipping the heel, re-tapering the fingerboard etc - just to avoid the expense of a neck set. All you will be doing is adding costly repairs later when the only resort is a neck reset With that said... |
![]()
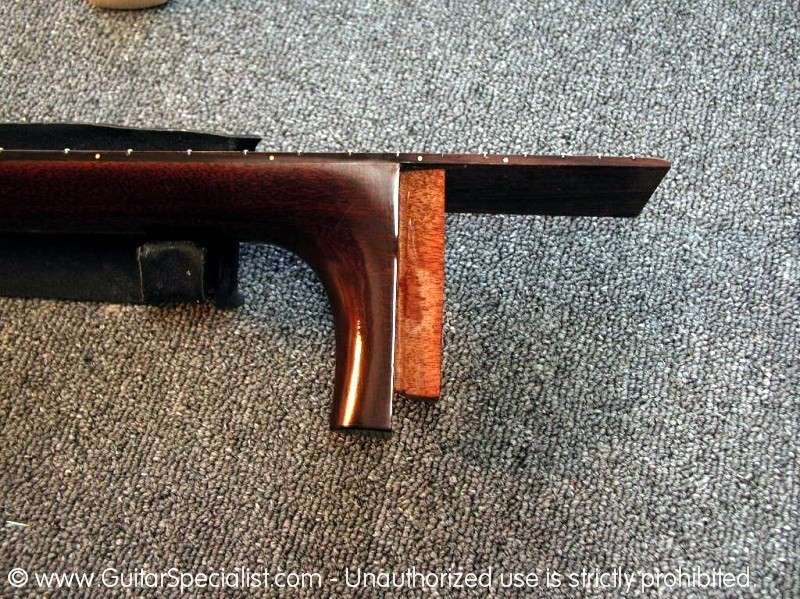
 A Martin Neck Reset
From Start To Finish
|
For some reason it
seams that Martin guitars are the most common candidate for neck resets in our
shop. Nevertheless, our candidate for this demonstration is a 1960's Martin D-18.
Need I reiterate here that this article is for information purposes only and not
a tutorial on how to do your own neck reset? |
||
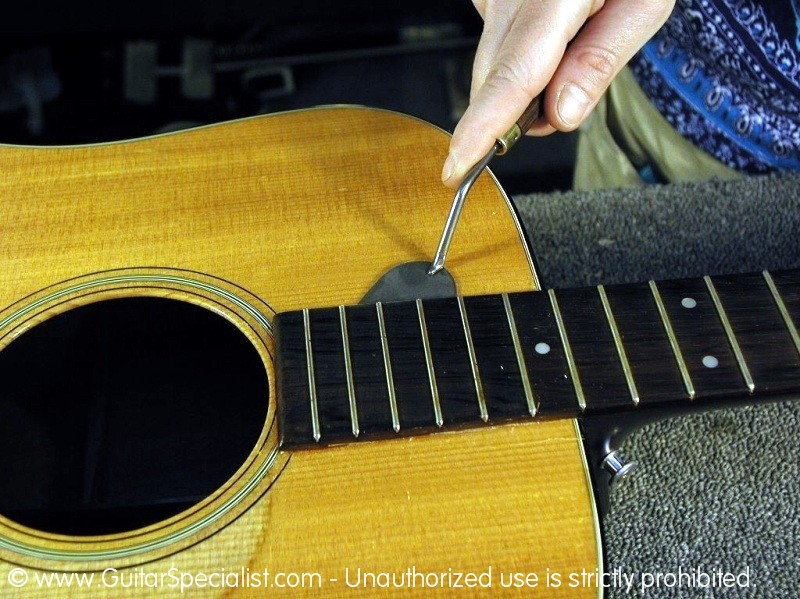
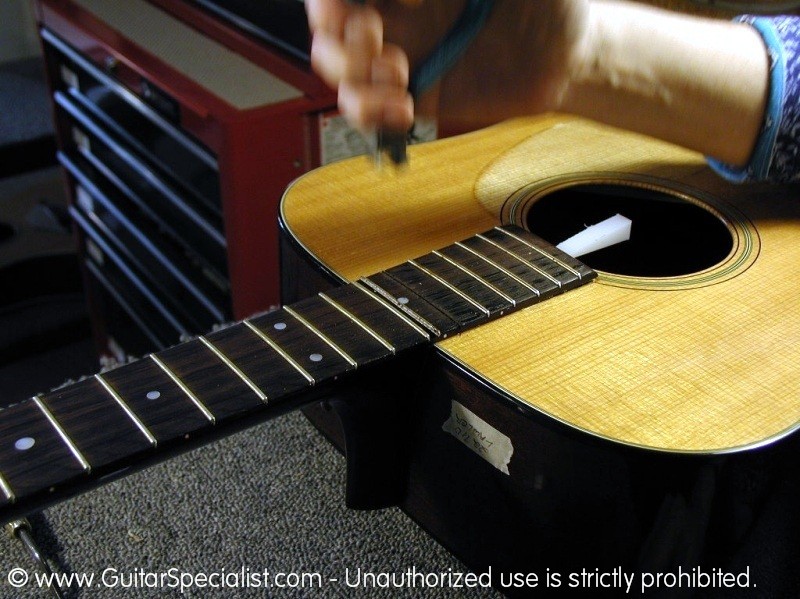
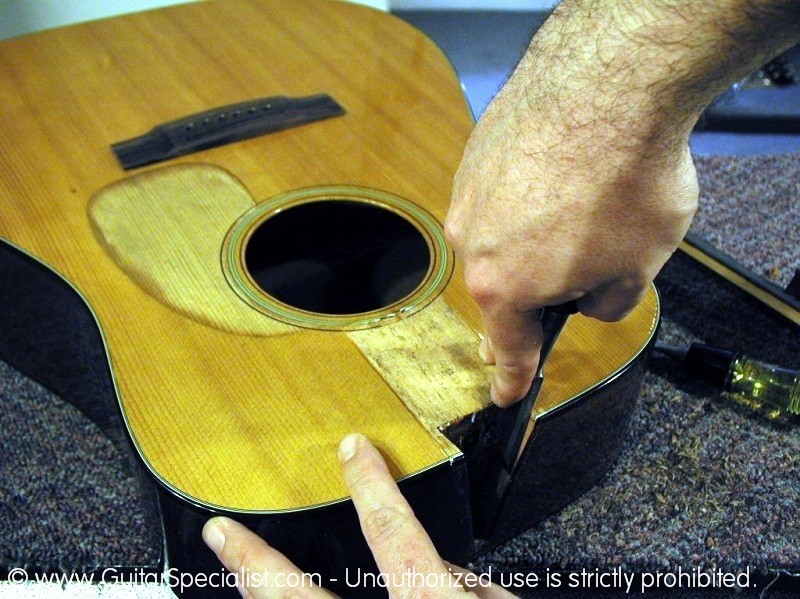
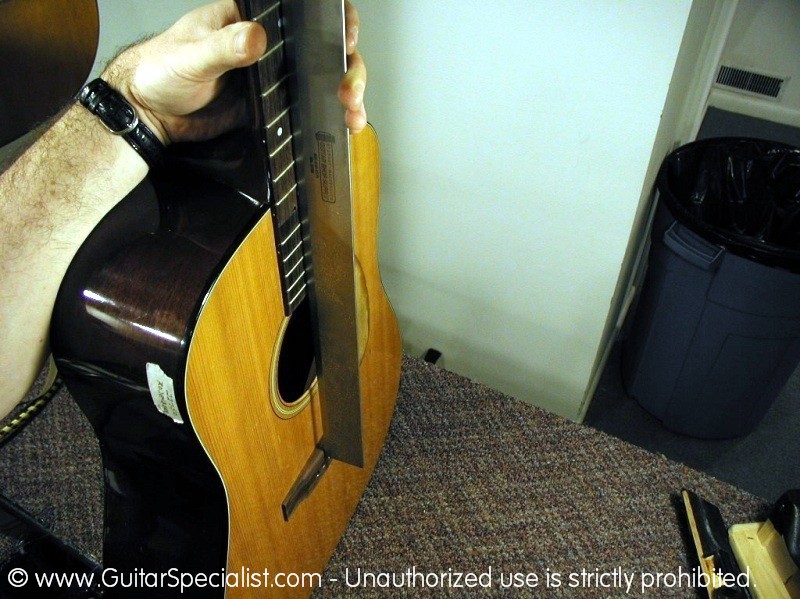
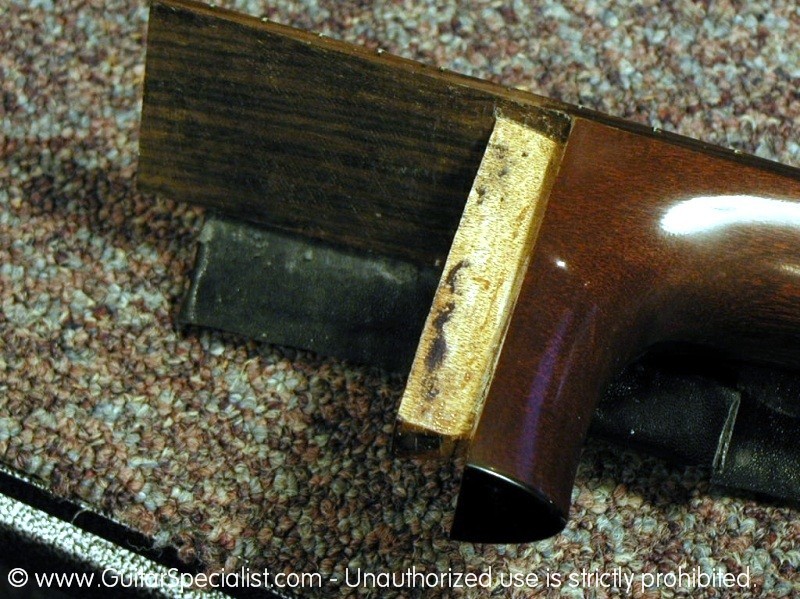
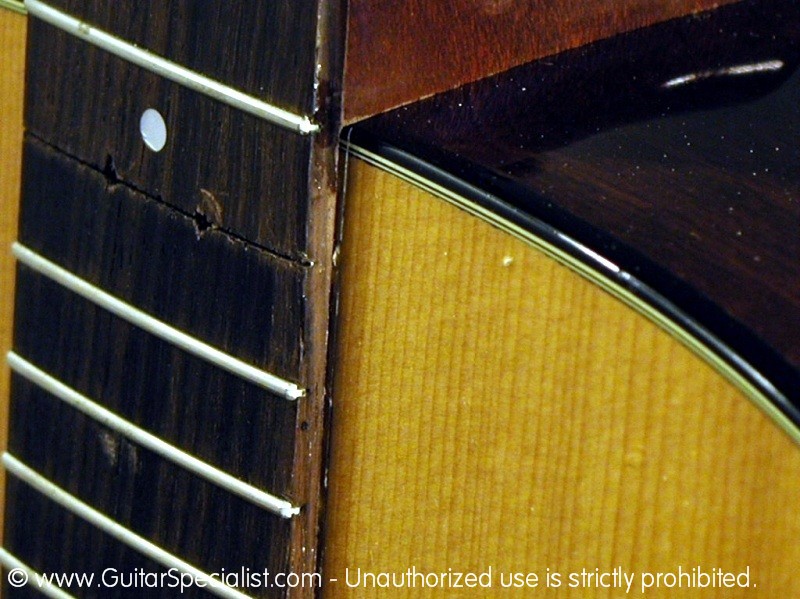
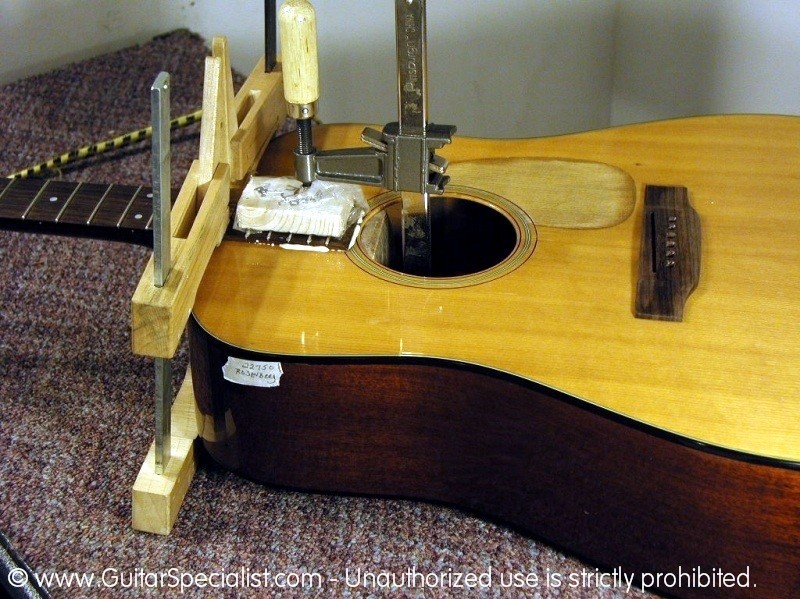
 We always start by heating the fingerboard extension with a specially made iron that fits over the frets and heats the fingerboard. |
 We get things pretty hot. we usually heat things up to about 400 degrees. Our thought here are that we want to transfer as much heat as possible in as little amount of time. |
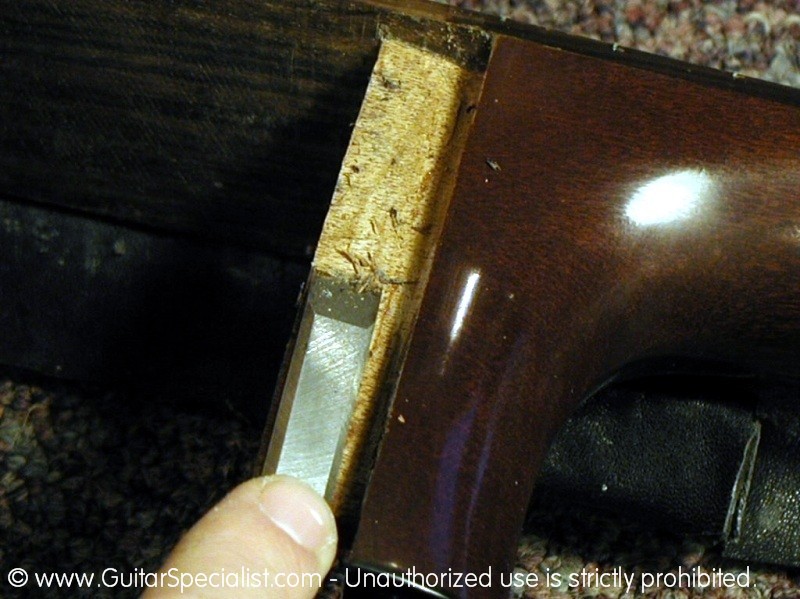
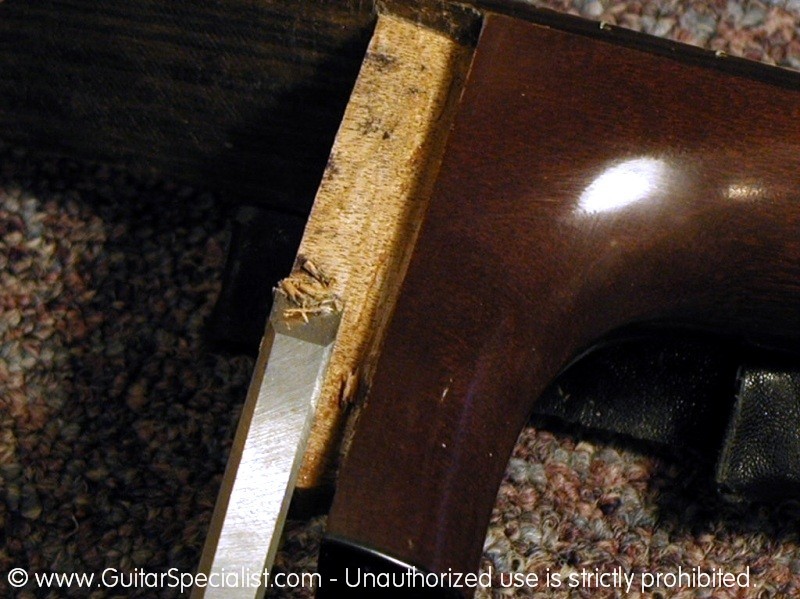
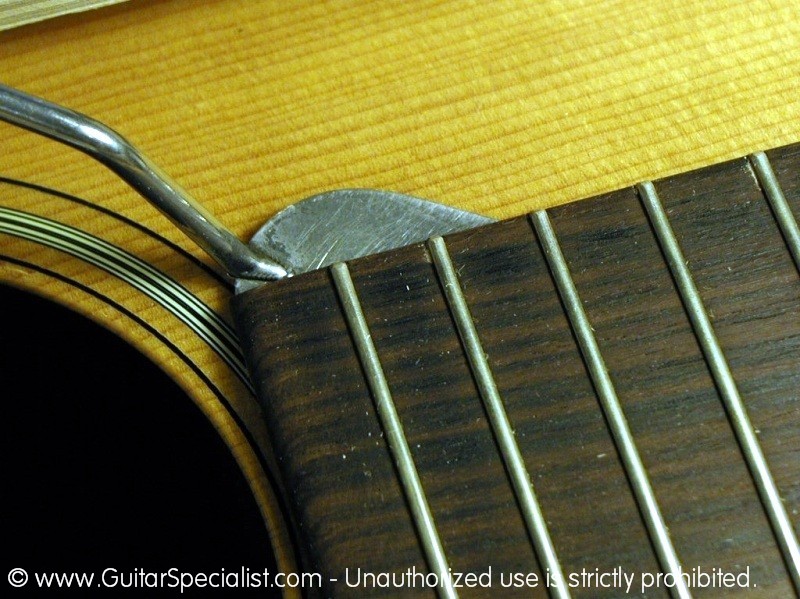 After only a couple of minutes the glue joint softens and we are able to start prying up the fingerboard with a small palette knife. |
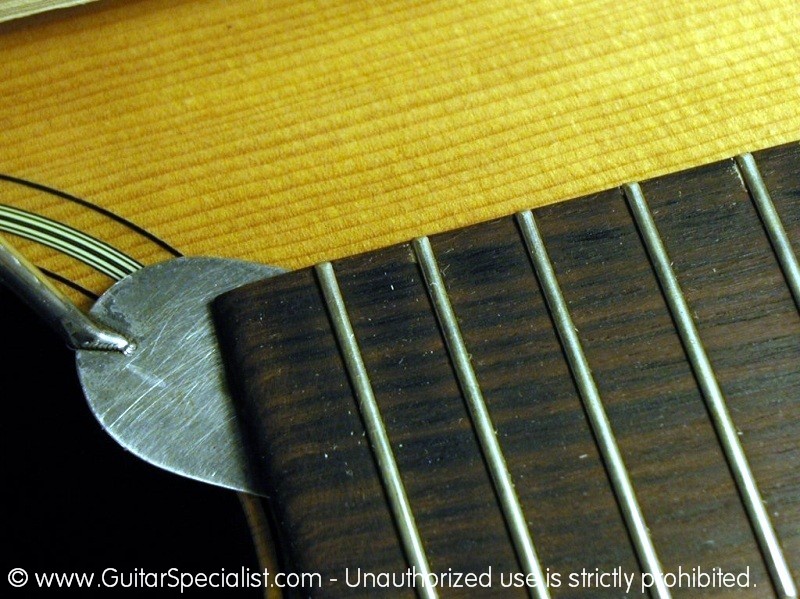 Working our way around the corner of the fingerboard extension, the fingerboard begins to give. |
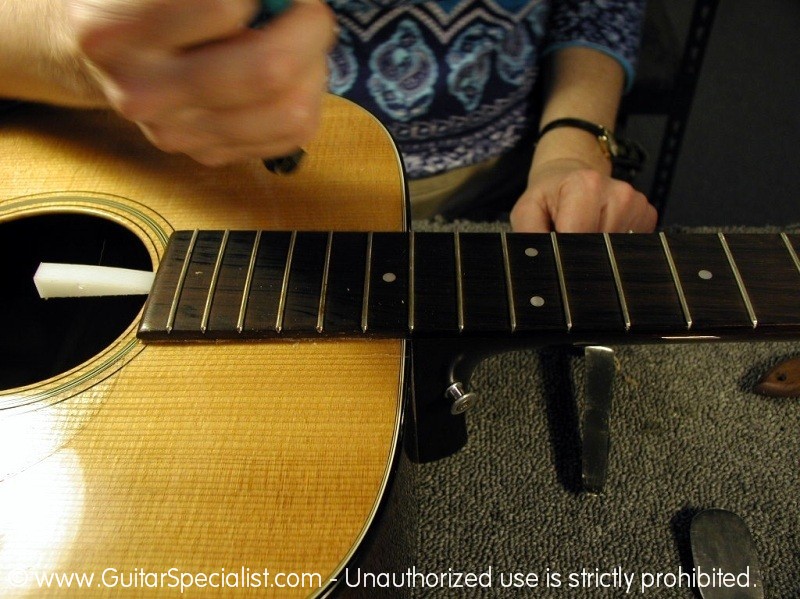
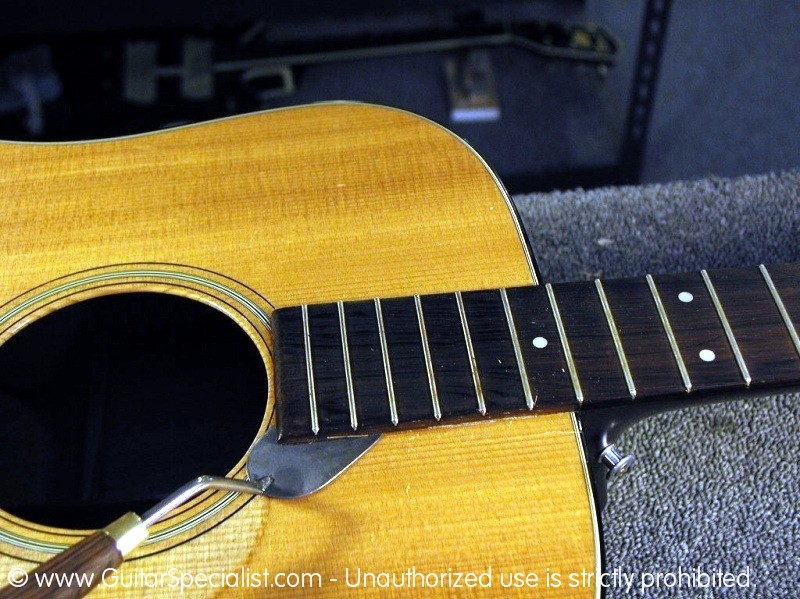 Once the end is free we start working our way towards the neck. |
 Pretty soon we'll switch to a longer palette knife. |
 Here you can see Sharon working the longer palette knife all the way up to the 15th fret. |
 Sharon does most all of the loosening of fingerboards in the shop - as well as bridges, braces or anything else attached to a guitar. |
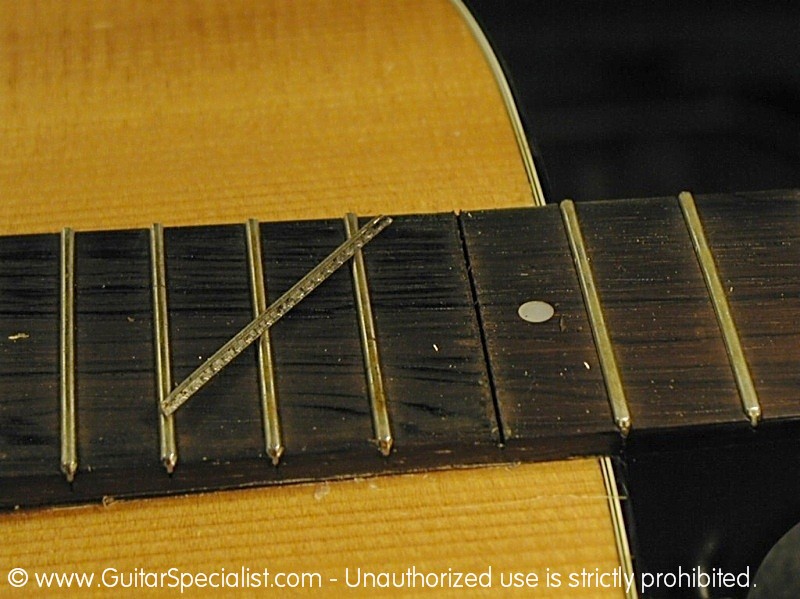
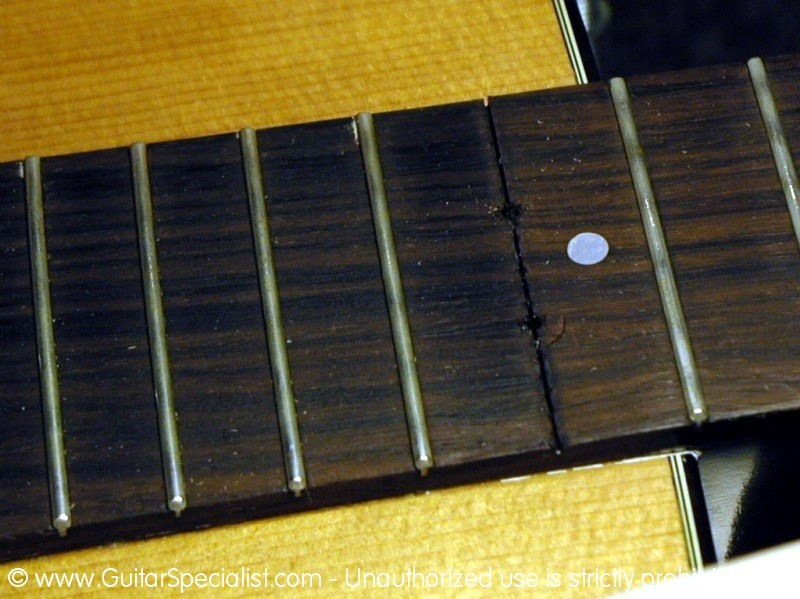
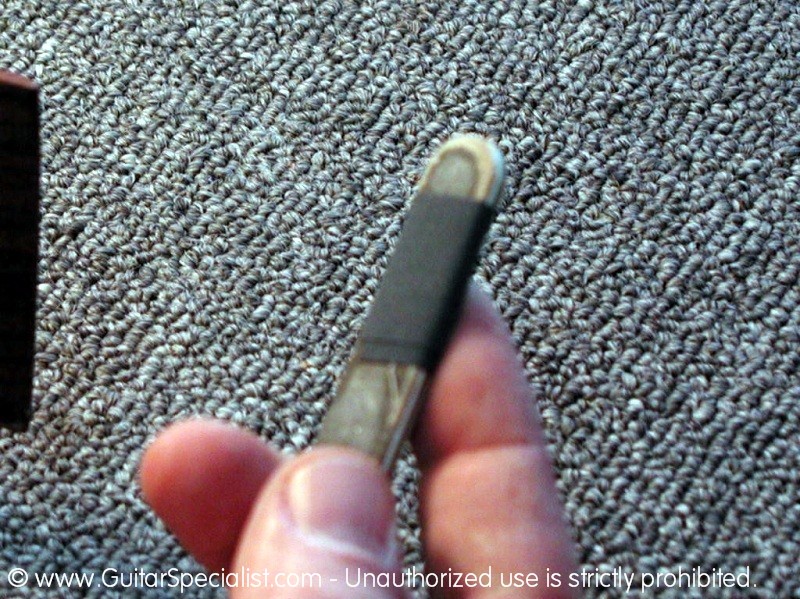
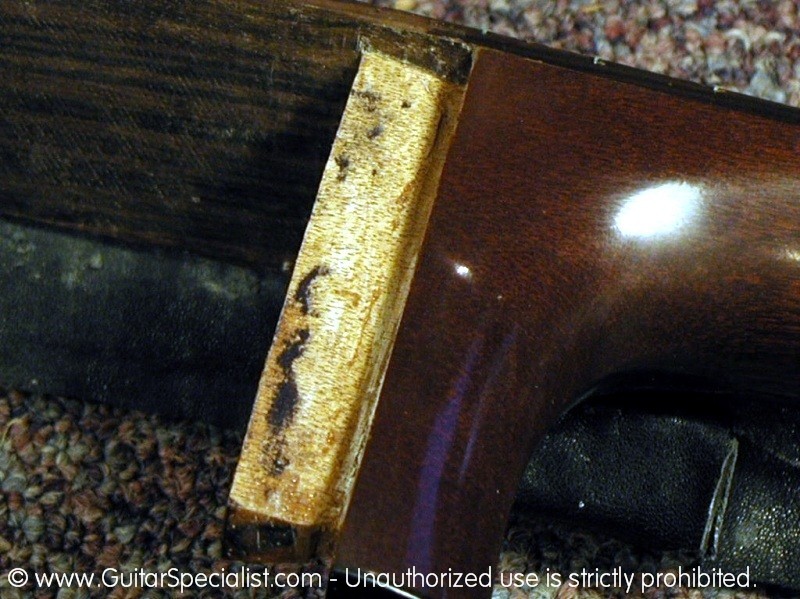
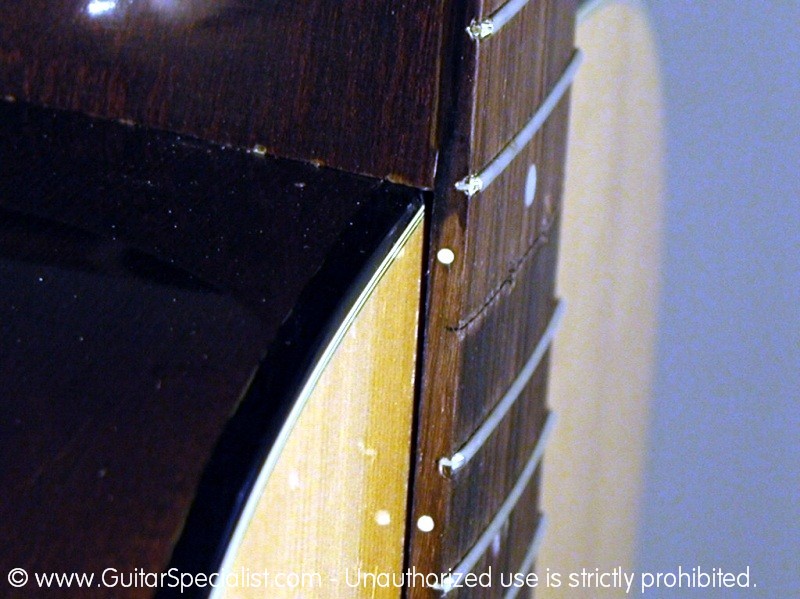
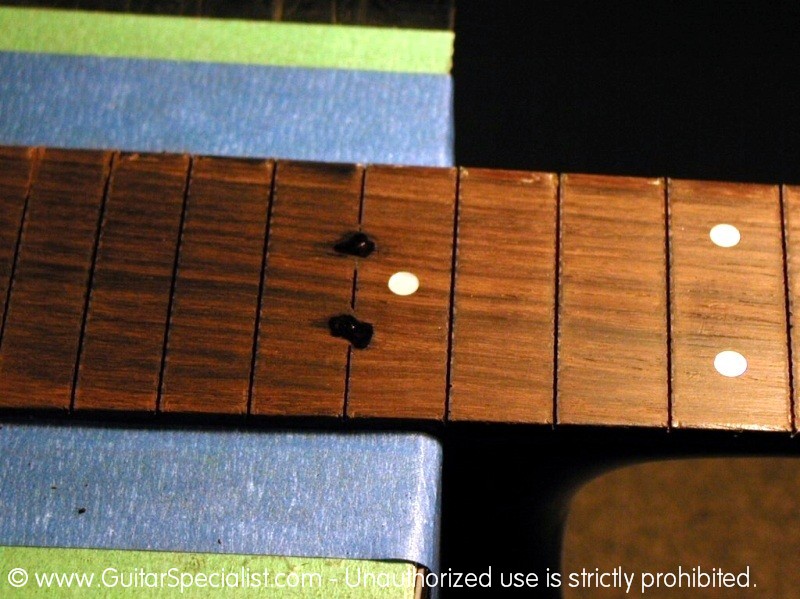
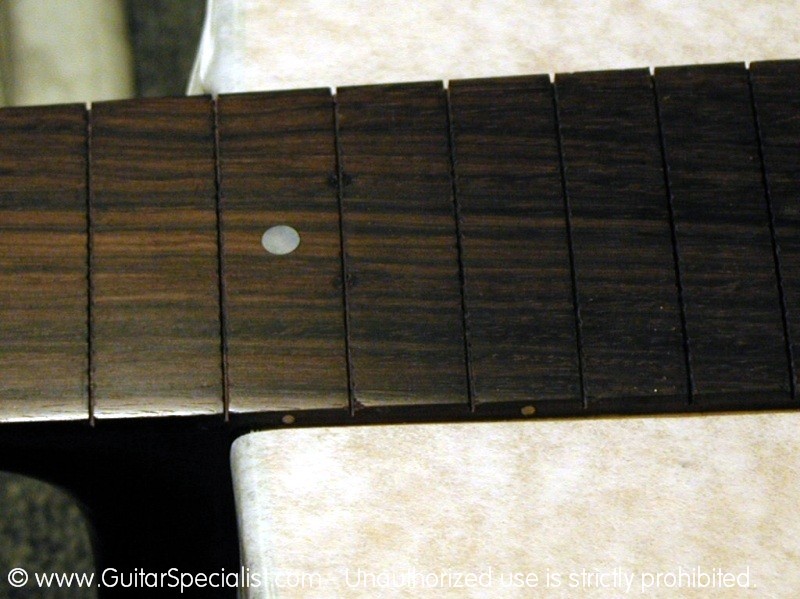
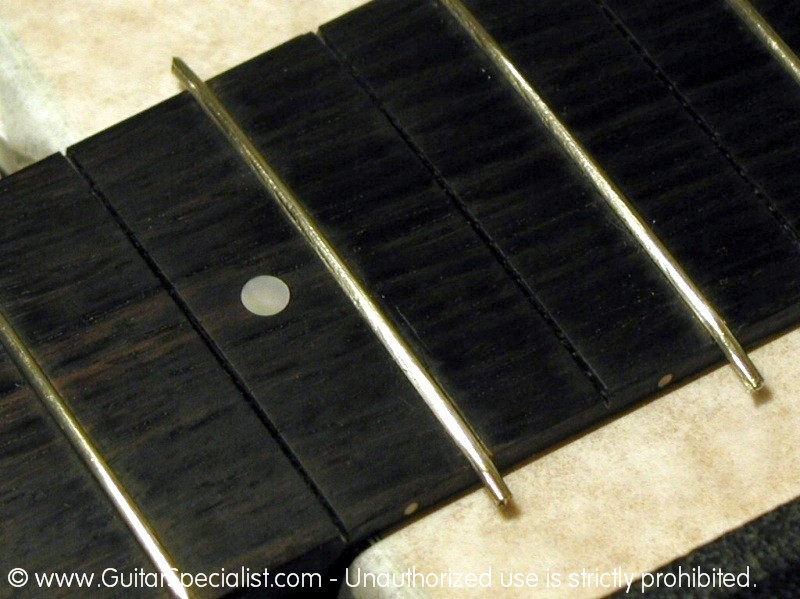
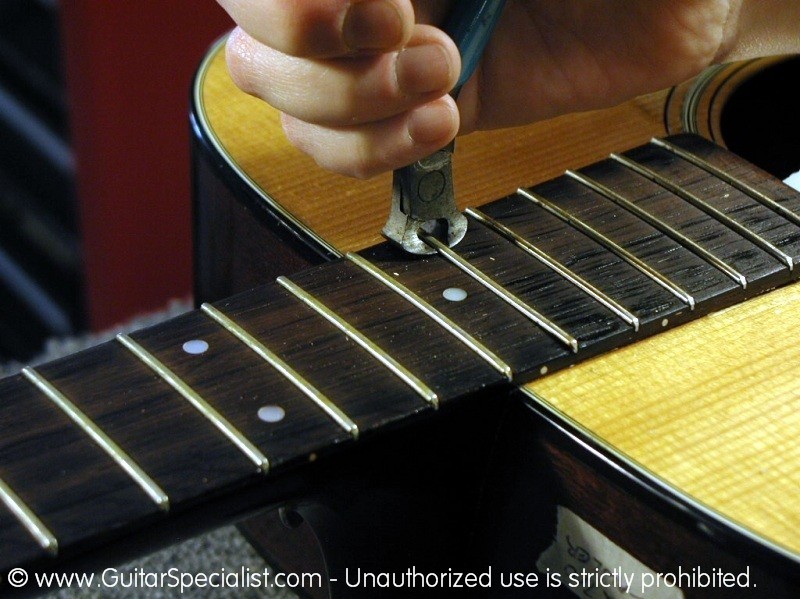 Next, we remove the 15th fret with specially ground fret pullers. |
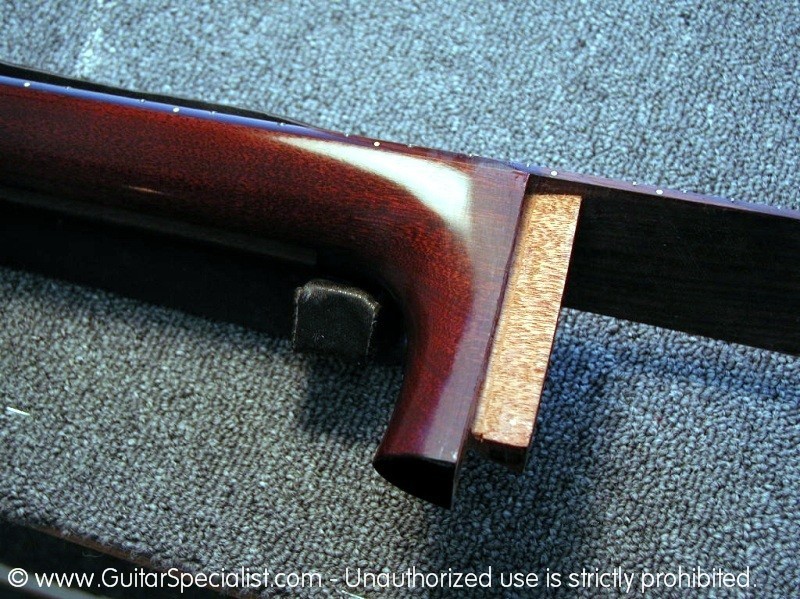
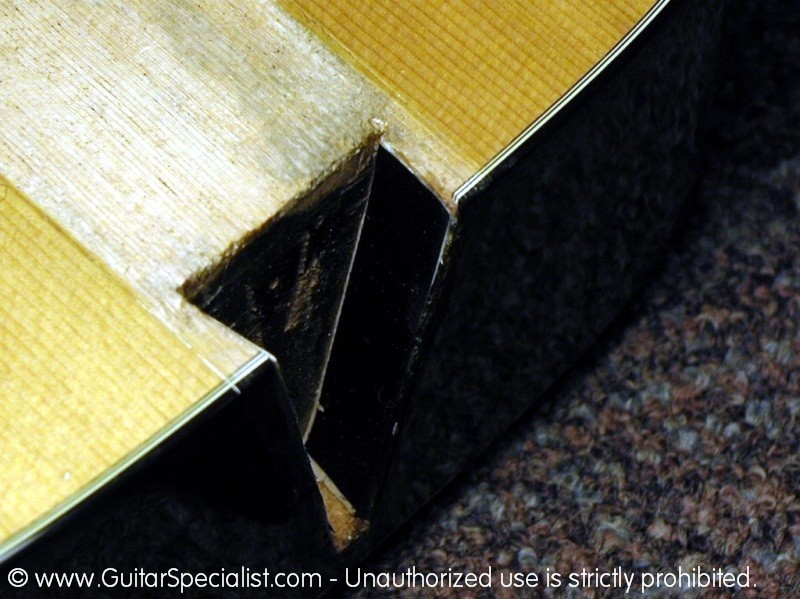
 Removing the 15th fret allows us access to the dovetail joint hidden by the fingerboard. |
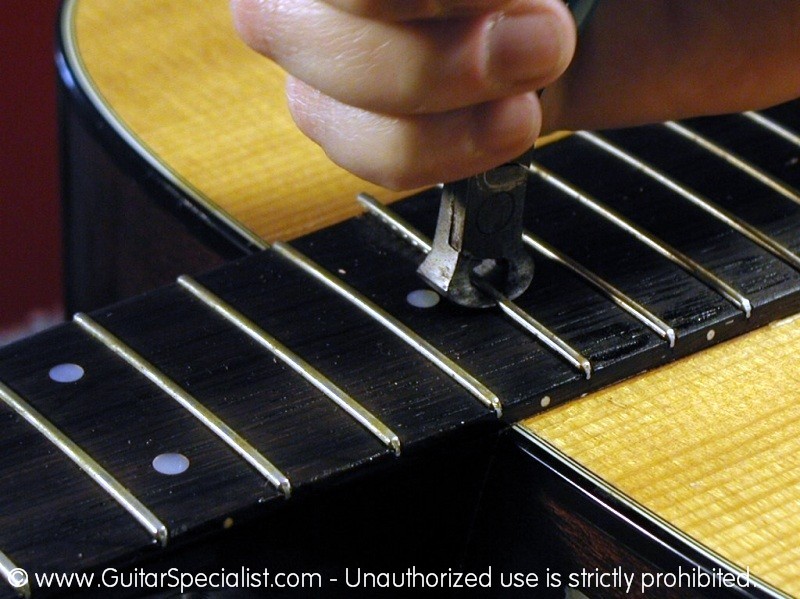 Sharon just "walks" the fret out from one side to the other. |
 With the fret out of the way we'll be able to access the dovetail joint without any further disassembly of the guitar. |
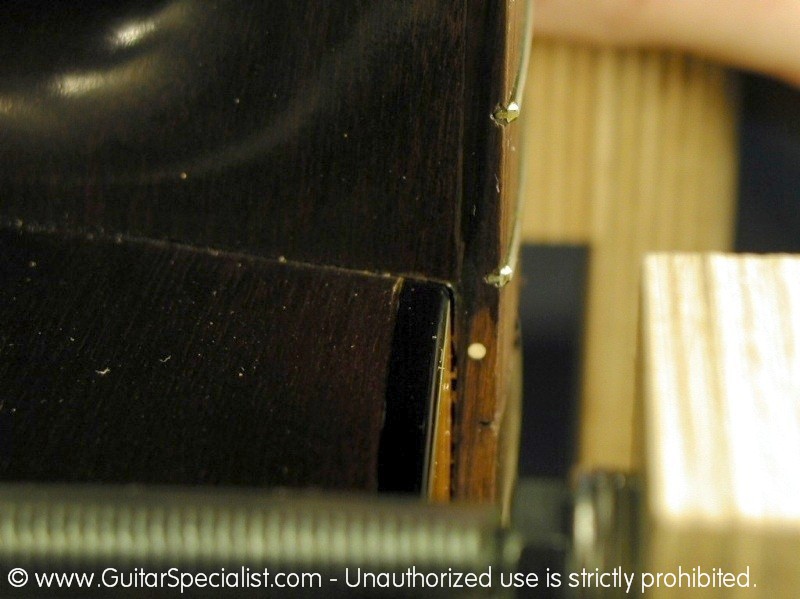
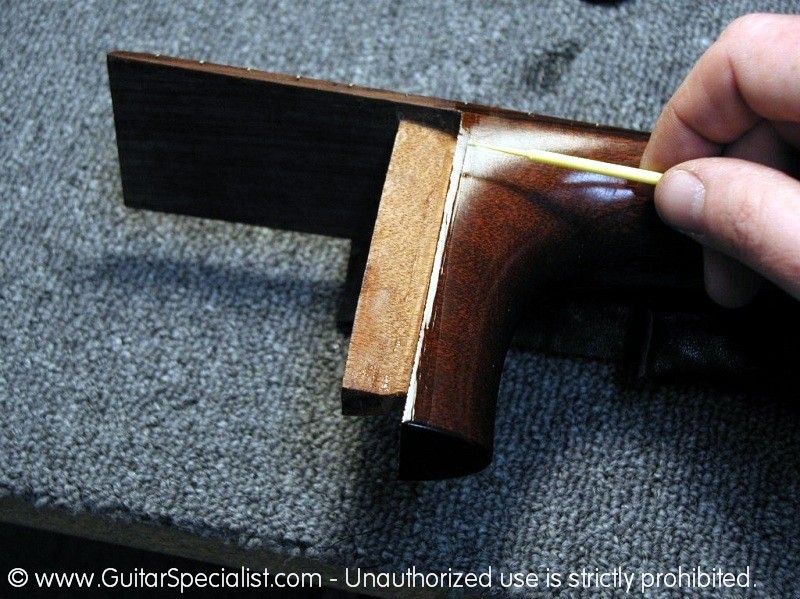
 Here you can see that little Teflon wedge inserted into the fingerboard. We use it to lift the board slightly so the softened glue doesn't re-tack while it's still warm. |
 Now we are ready to access the dovetail joint. |
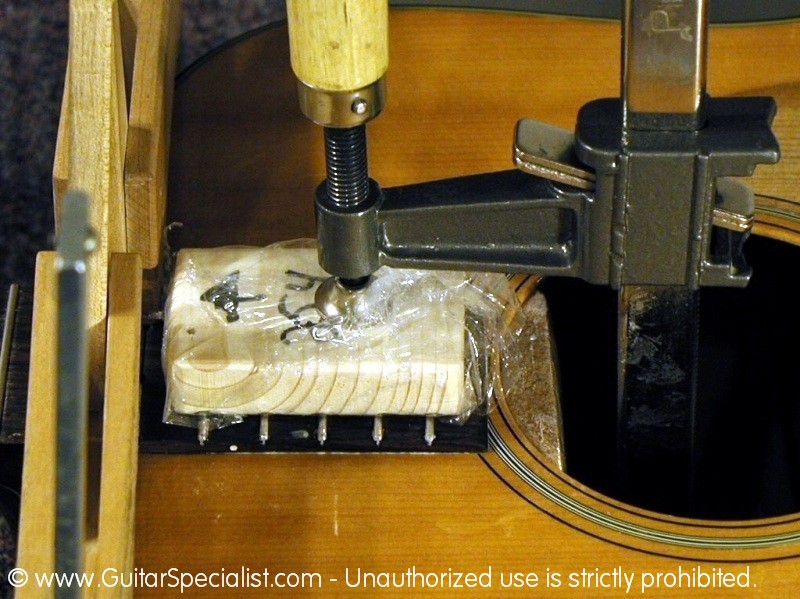
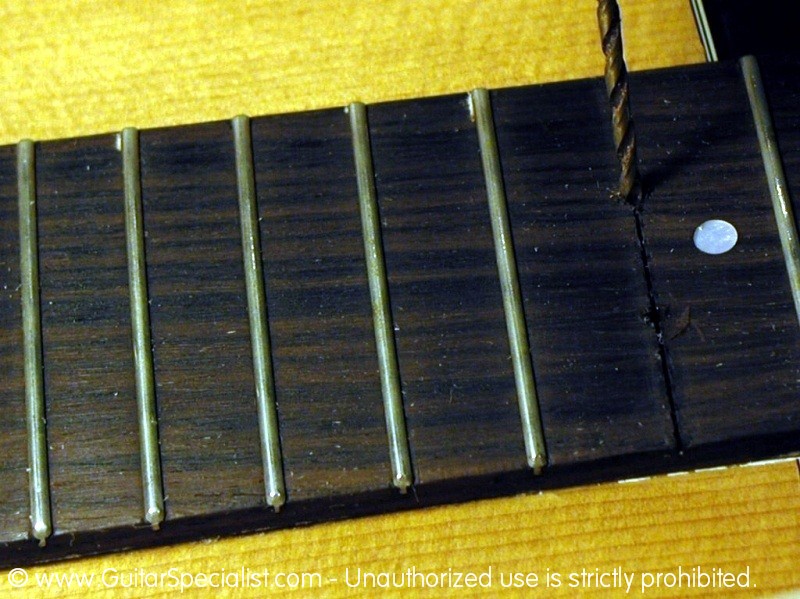 we begin by drilling a hole straight through the fret slot into the gap between the mortise and tenon of the dovetail. |
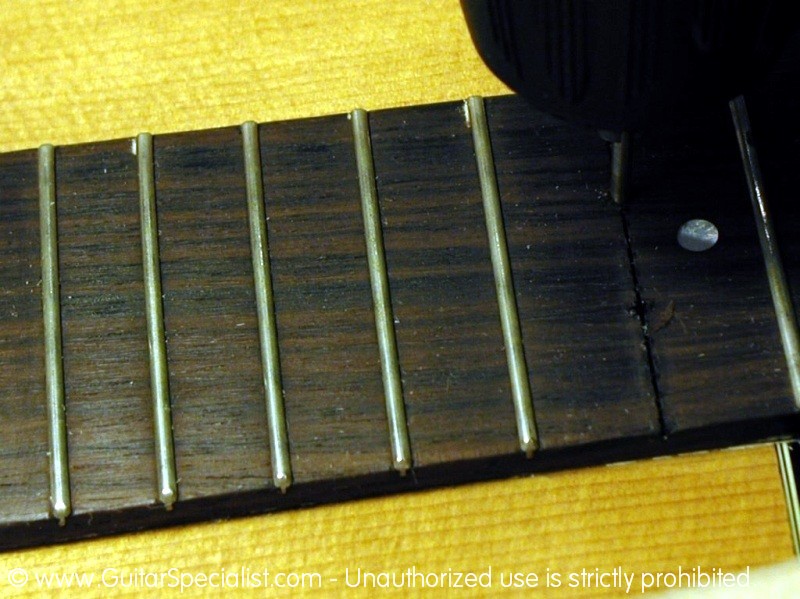 I always drill two holes, one for the steam to go in and one for the steam to escape |
 Some luthiers like one. I like two. |
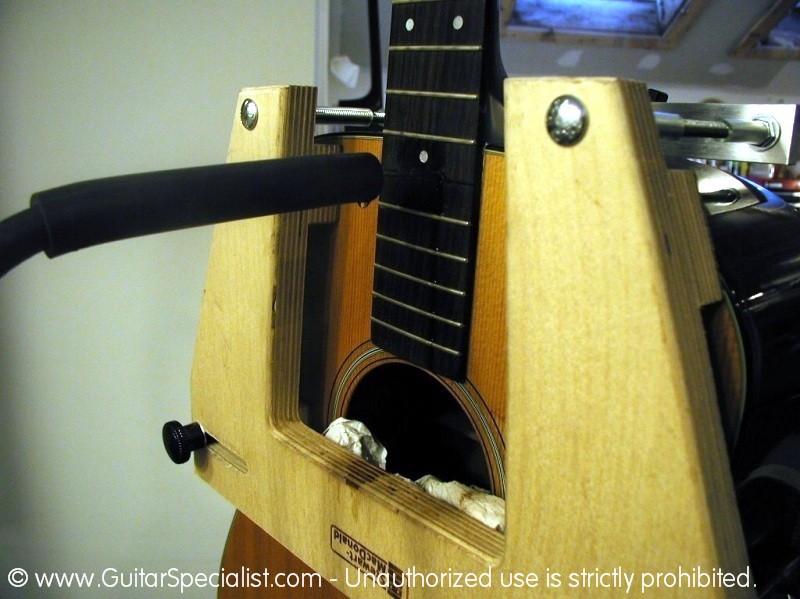
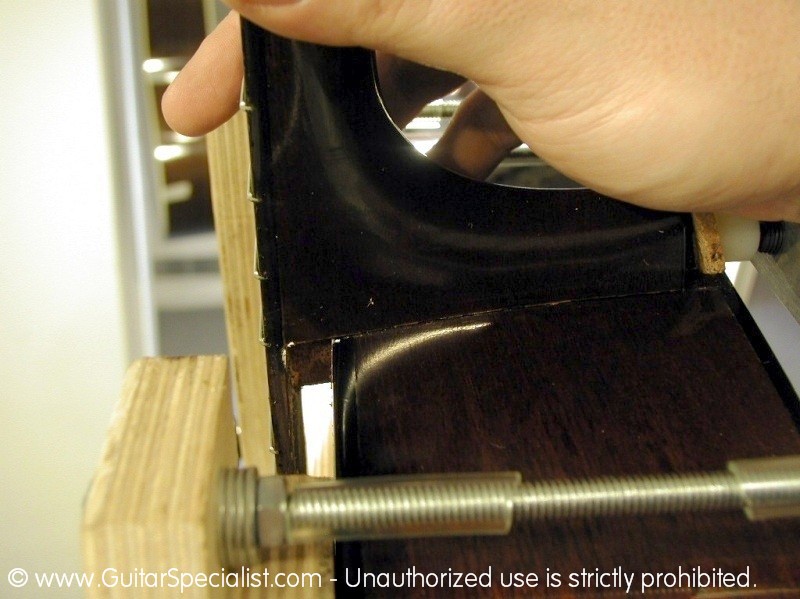
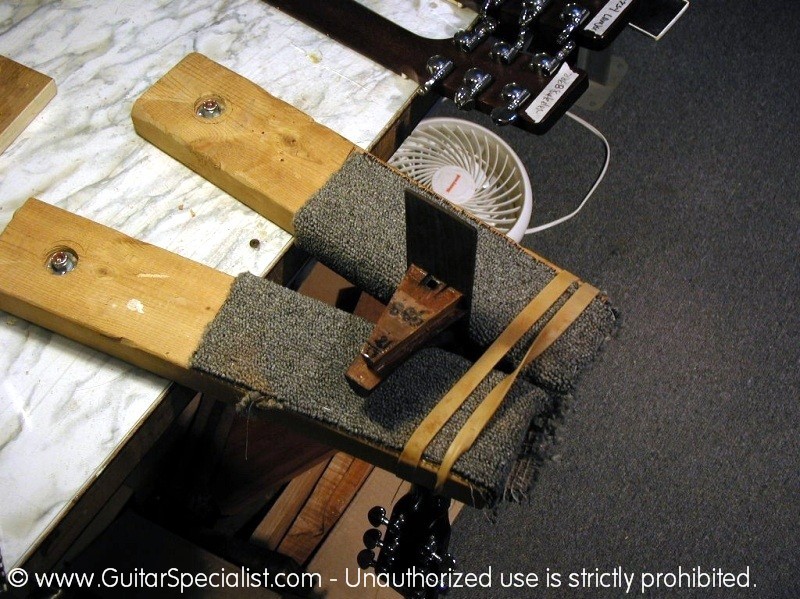
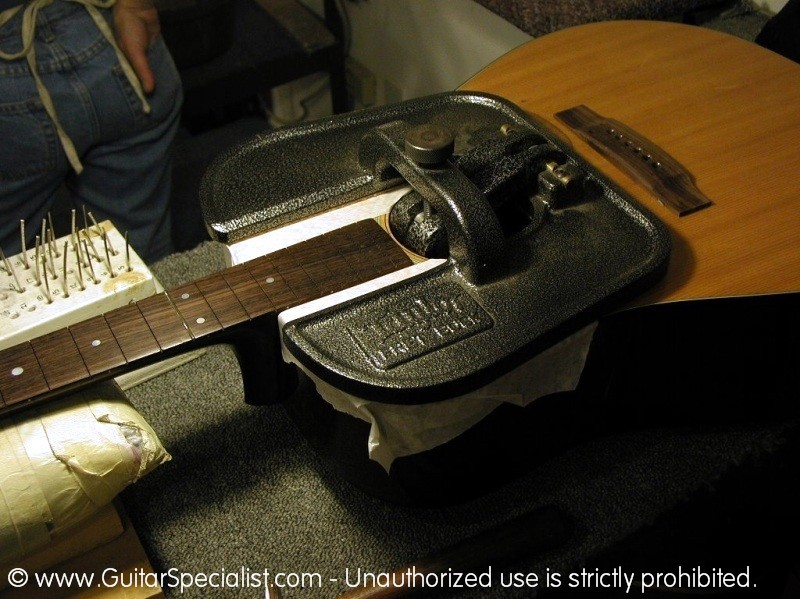
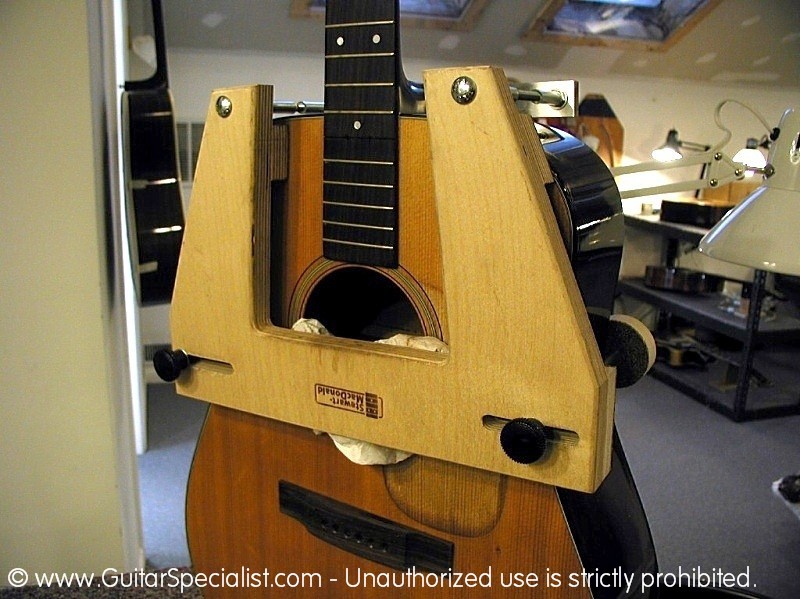 Here is a picture of the guitar wearing the Stew Mac neck removal jig. A very neat tool that makes the job go a whole lot easier. |
 Prior to the folks at Stew Mac coming up with this we used a home made version that was a bit more crude, without all the fun moving and replaceable parts. |
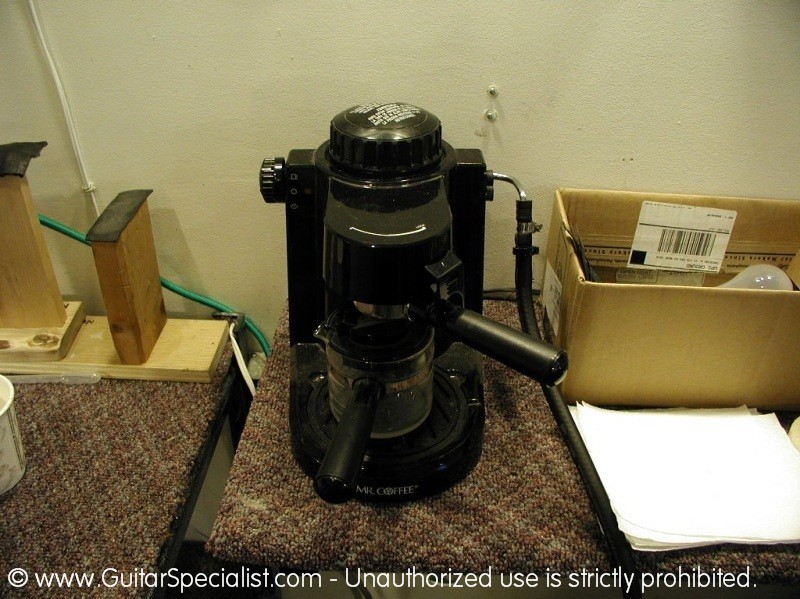 Here we have the ubiquitous Mr. Coffee cappuccino maker. Our chosen tool for the production of steam. |
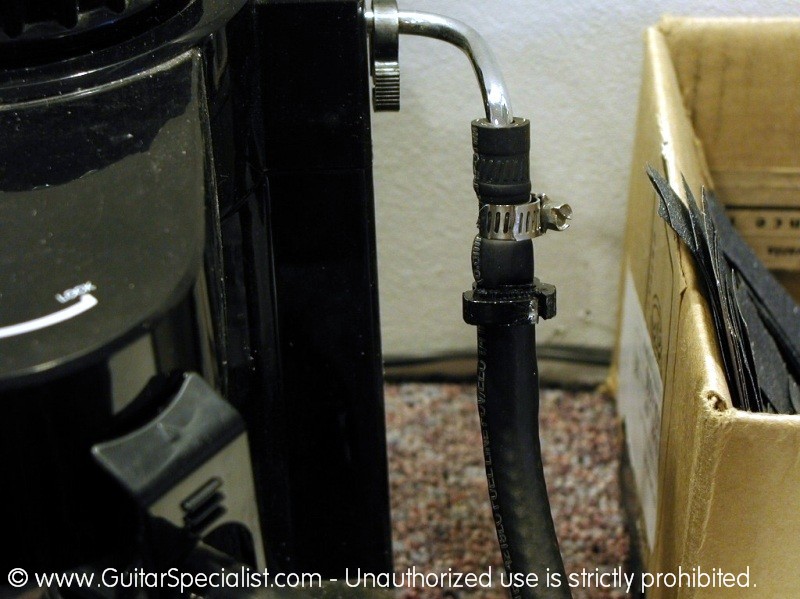 with a hose attached to the frothing mechanism ... |
 and a needle attached to the other end of the hose ... |
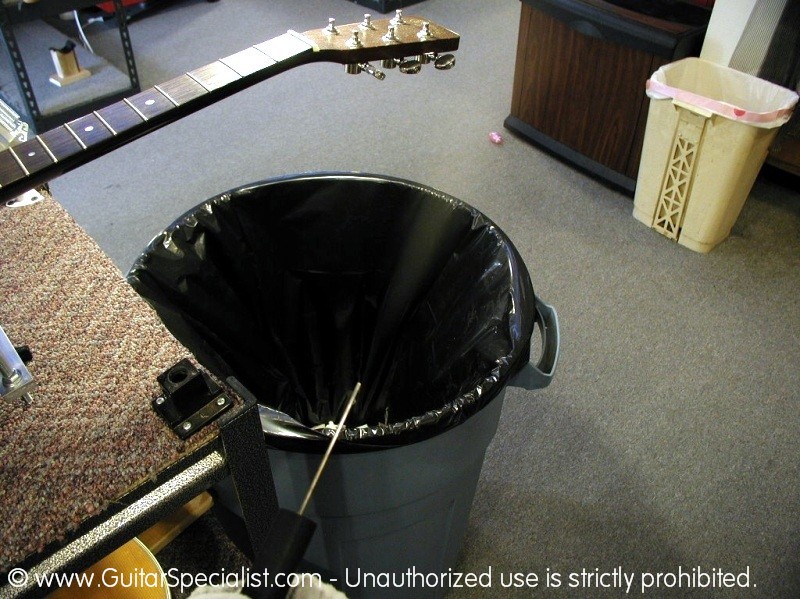 e can inject steam directly into the neck joint. |
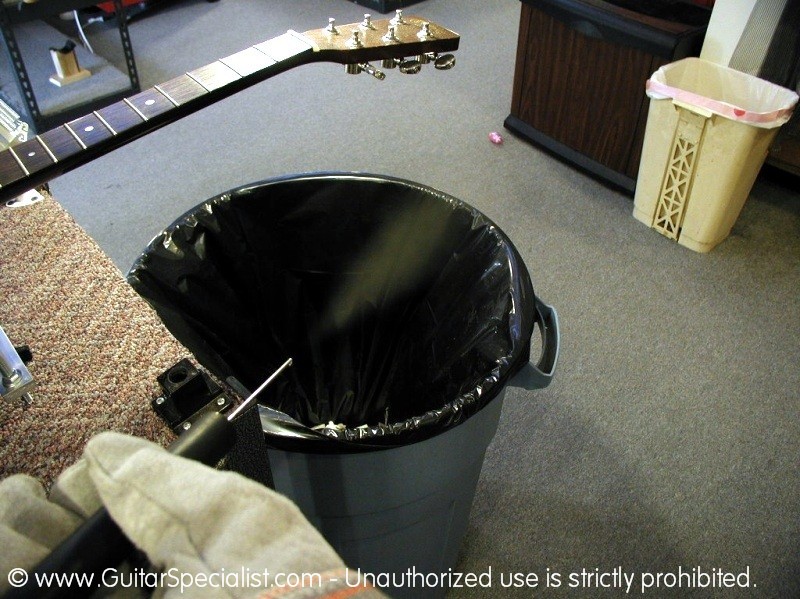 I think you can make out the steam coming out of the needle in this picture. - I never tried to photograph steam before. Do I need to get out more? |
 We begin injecting steam into the dovetail ... |
 Wiping up any drips and splatters along the way - you definitely need a good pair of gloved for this job. |
 The reason why I like two holes as I mentioned above is so the steam has a place to evacuate rather than spit out all the other seams around the neck. This cuts down on any finish damage that can occur. |
 As the steam softens the glue joint, the jig handle is turned to apply pressure to the dovetail. |
 If you look close, you can see a very small gap appearing between the fingerboard and the body. |
 We continue to apply steam in intervals and then apply a bit more pressure. The gap will begin to get larger as the neck is pushed out of the heel block. |
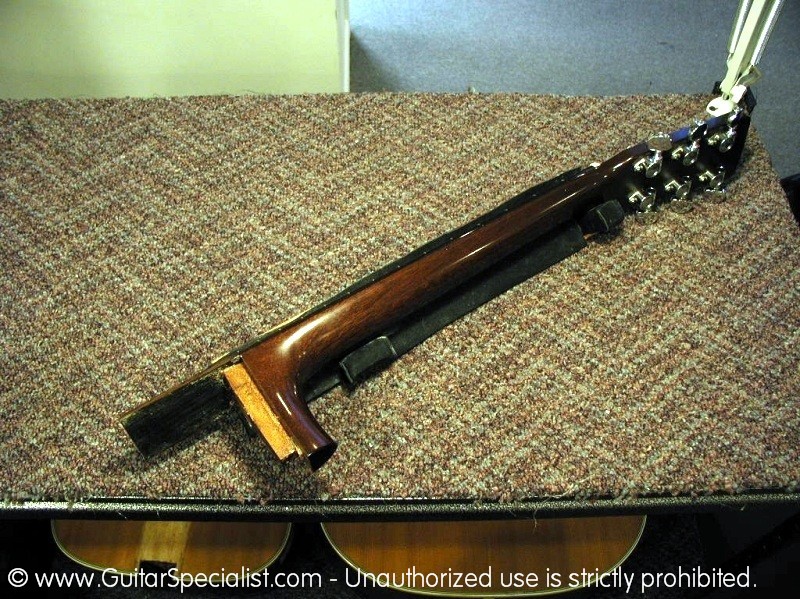
 Here is a look at the neck sliding out of the body. |
 The neck has worked it's way free of the body ... |
 with a bit of manual coaxing ... |
 we gently persuade the neck to let go completely. |
 There - it's finally out. |
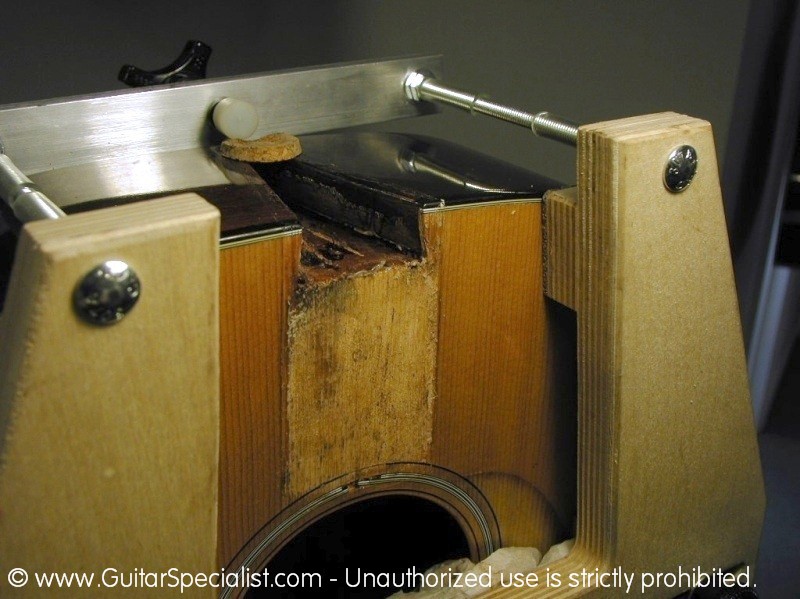 Here is a shot of the neck-less body still in the jig. |
 Looking closely we can see the remnants of glue and old shims It seems this neck has been reset once before. |
 Time to clean up the mess while the old glue is still soft and rubbery. |
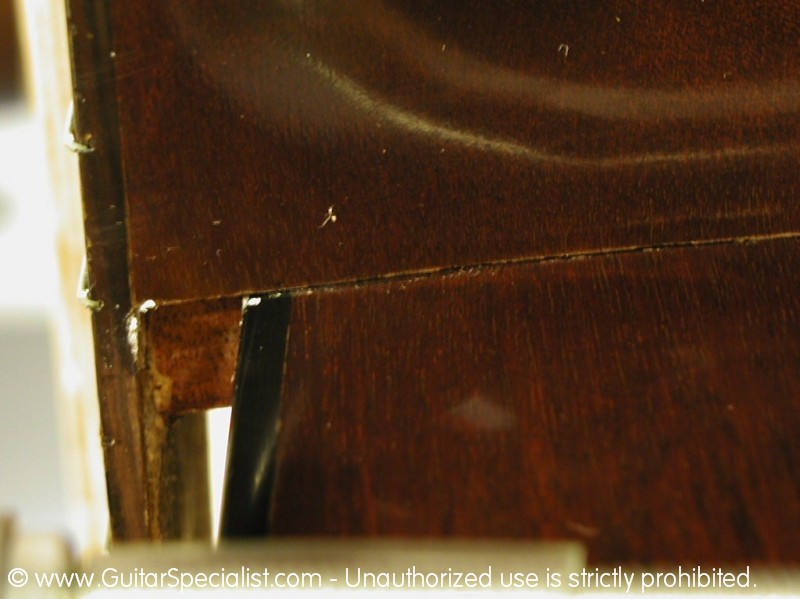
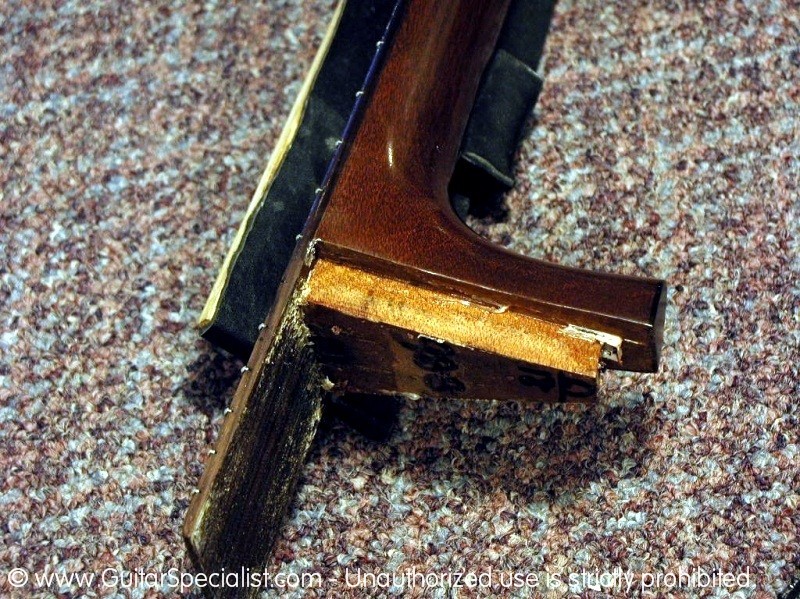
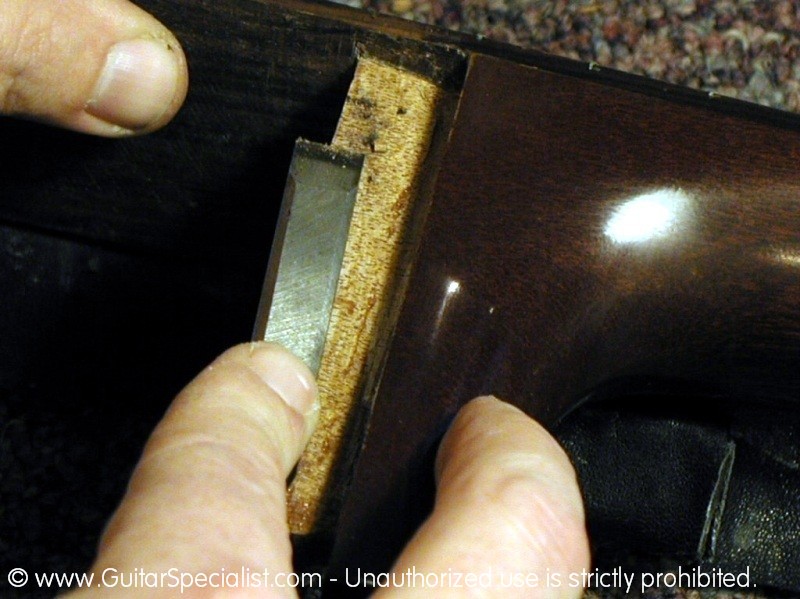
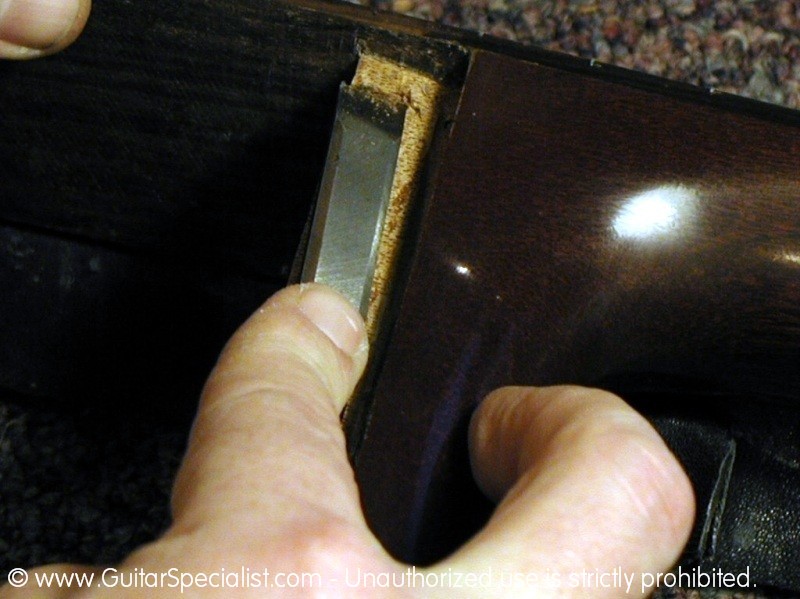
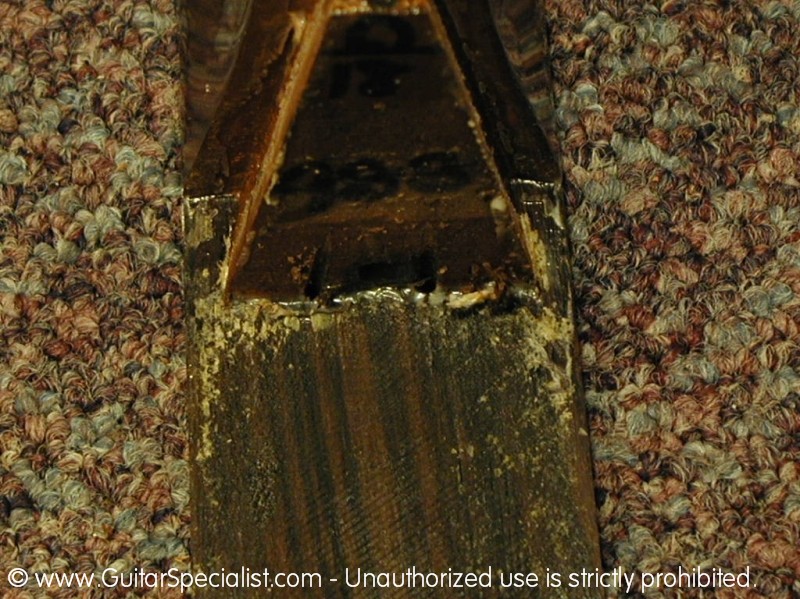 Here is a close-up of the underside of the dovetail and fingerboard. |
 All the old glue and yuck has to be removed from all the surfaces |
 Holding a neck while chiseling away all the old glue can be tricky ... |
 to solve the problem we cam up with this little universal neck holder. It's covered in leather to protect the finish. |
 I can hold a neck in just about any position ... |
 ...to work on practically any part of the dovetail joint. |
 The neck can sit firmly in any tilted position. |
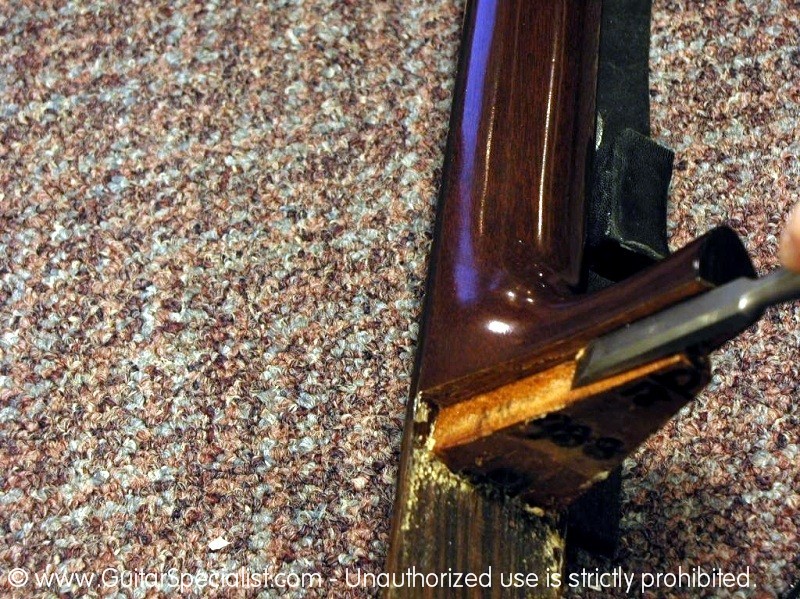 Here we begin cleaning up the old glue. |
 Chiseling away and being very careful to remove just the glue ... |
 ... and not any wood. |
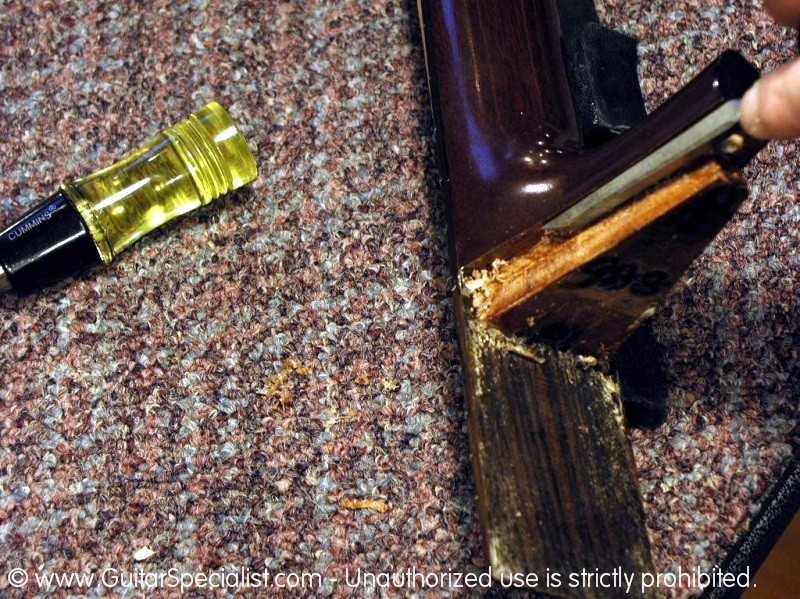 I can get get way up into the cheeks of the heel with a smaller chisel. |
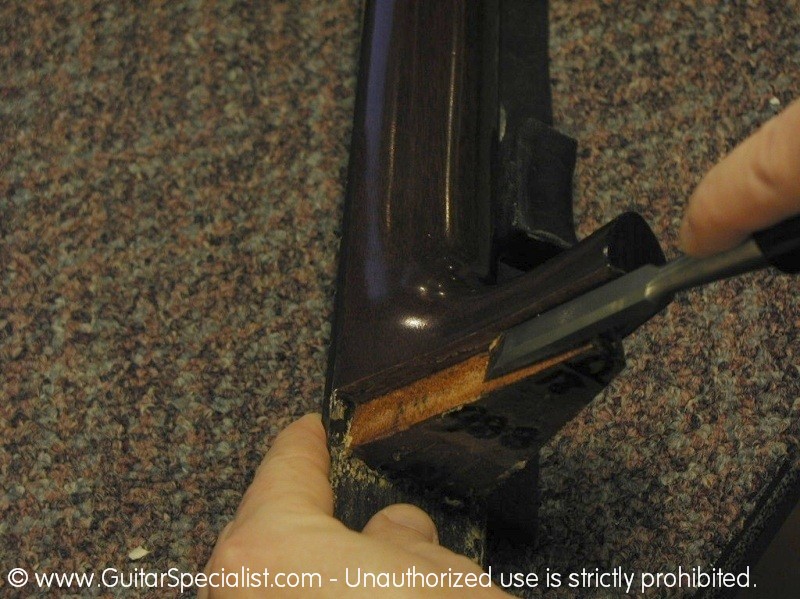
 Now down to the fingerboard, |
 Here I am using the chisel more like a scraper. |
 We keep our chisels pretty sharp but as you can see we are pretty hard on then so we don't spend much on top shelf chisels. |
 The bottom of the fingerboard is cleaning up quite nicely. |
 There we go - clean as a whistle |
|
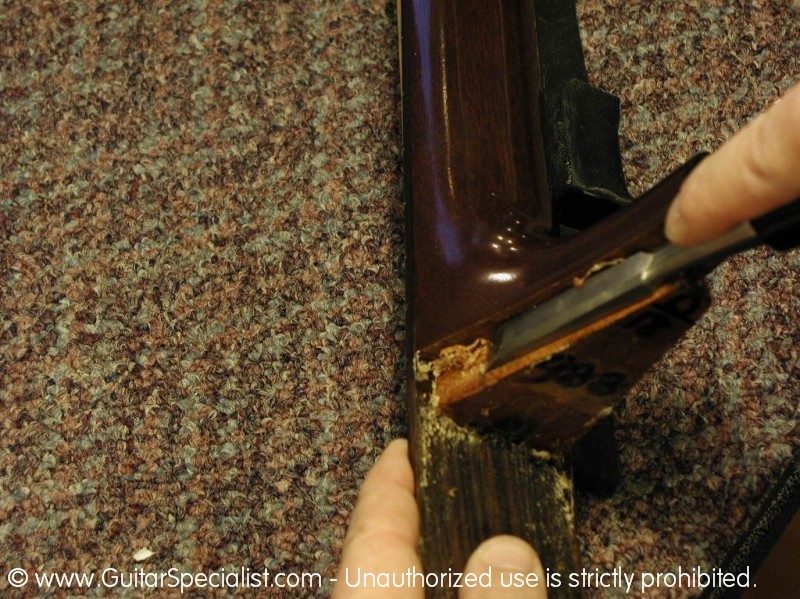
 This is a bit tricky as there is not a lot of room to move around in there. |
 The surface of the face that the fingerboard extension is glued to has to be cleaned as well. |
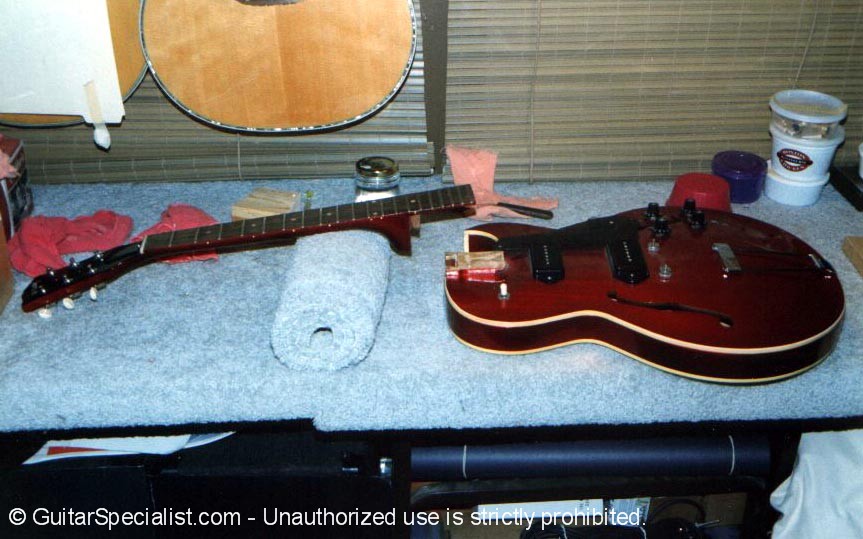
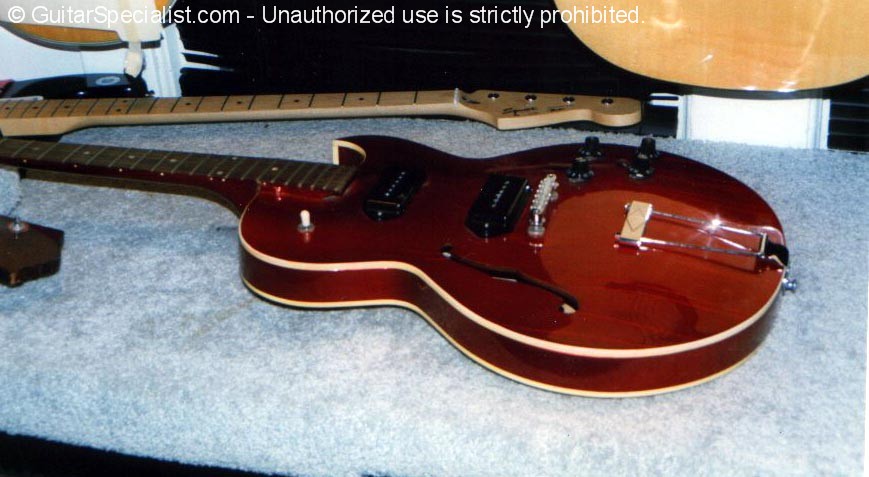
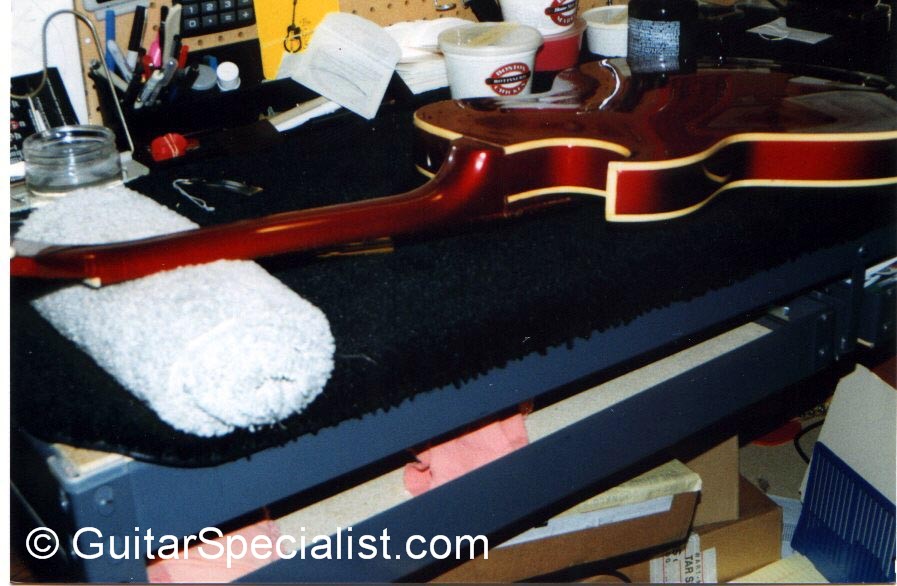
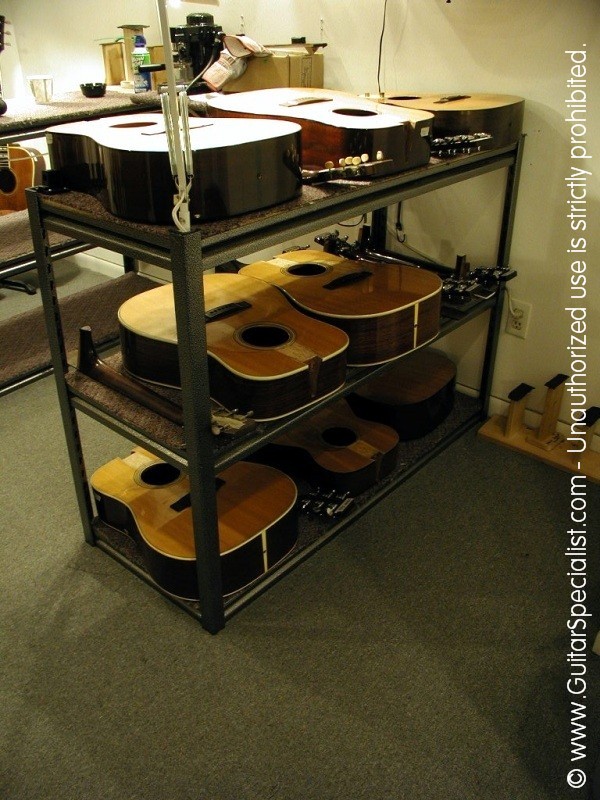 As you can see we spend a fair amount of time taking apart guitars. |
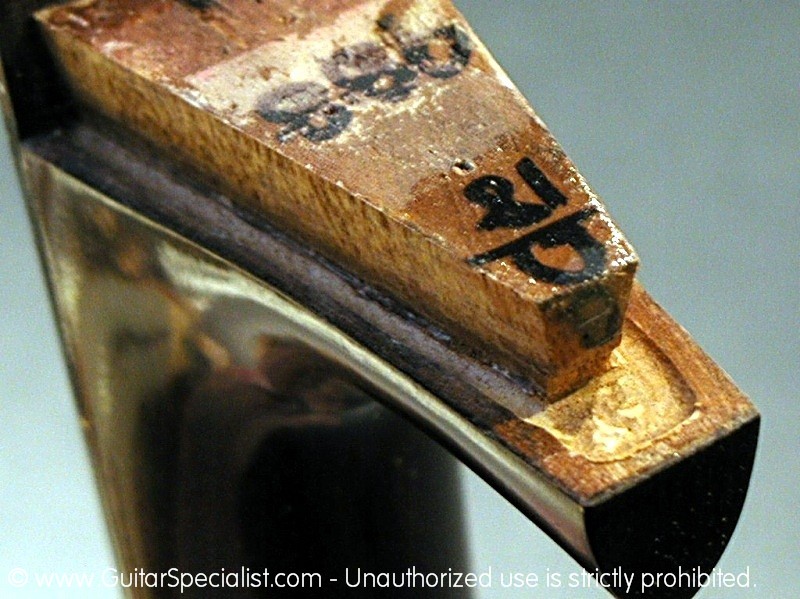
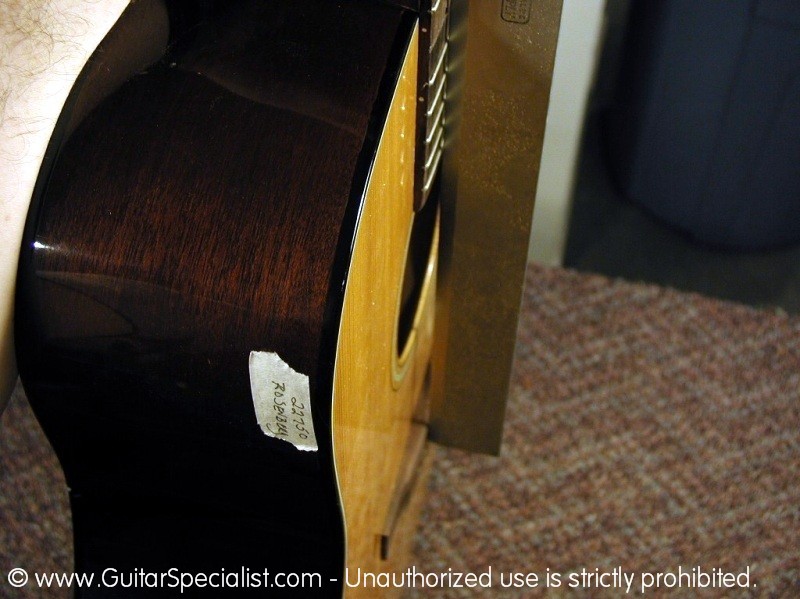
All of the necks and bodies are labeled with the work order number and the customers name. We want to make sure that the right neck goes back on the right body. |
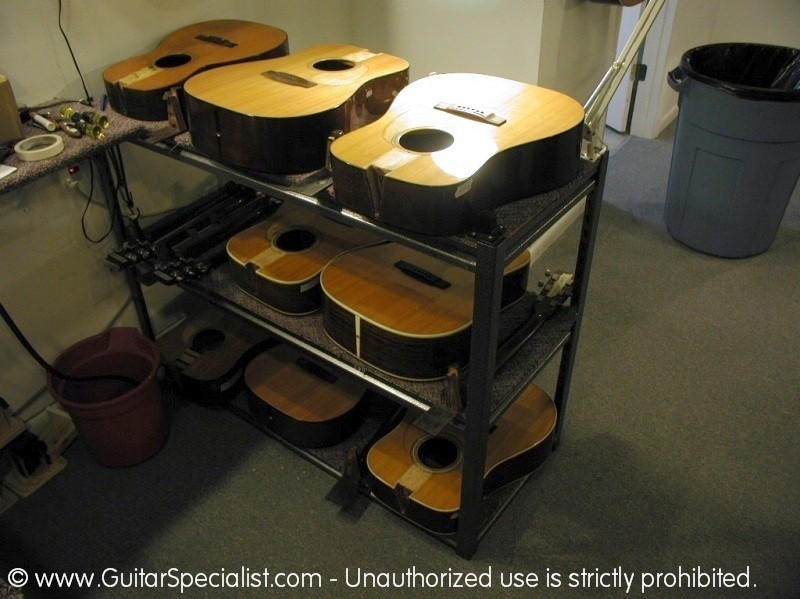 Here is a stack of Martins all in the process of having their necks reset. |
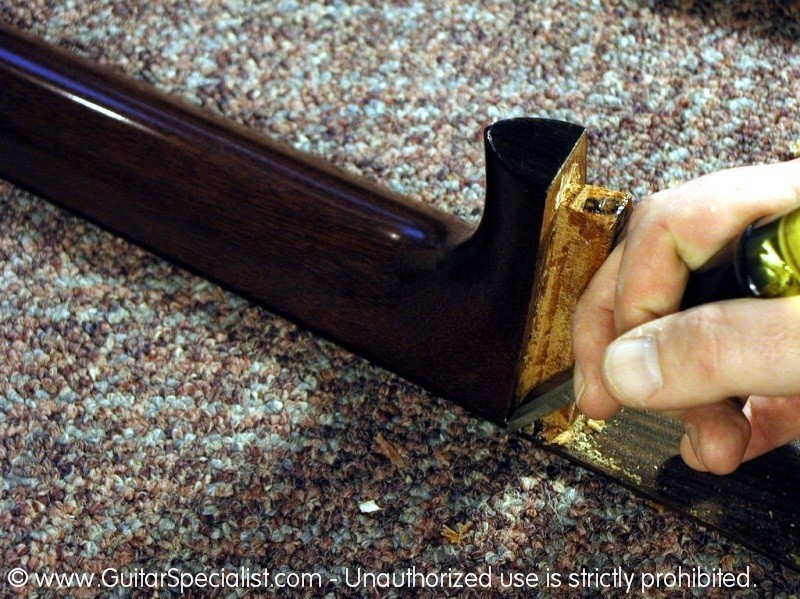
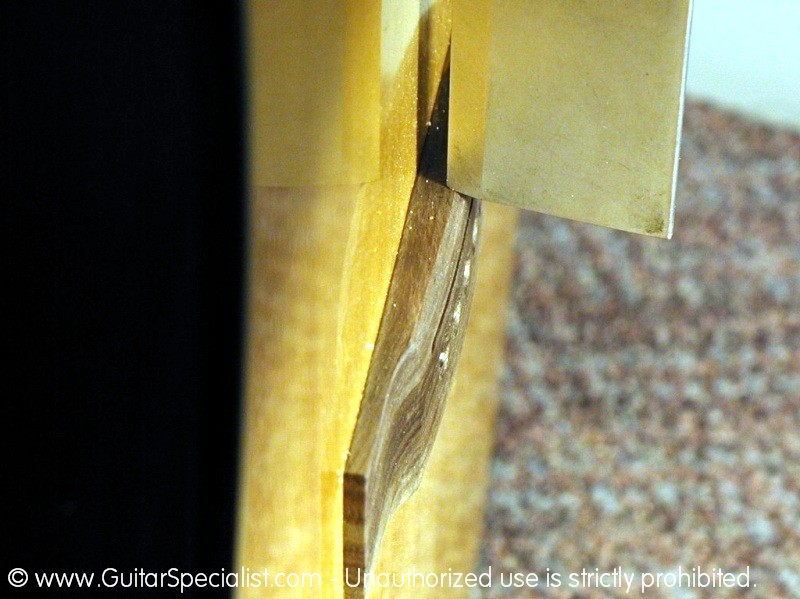
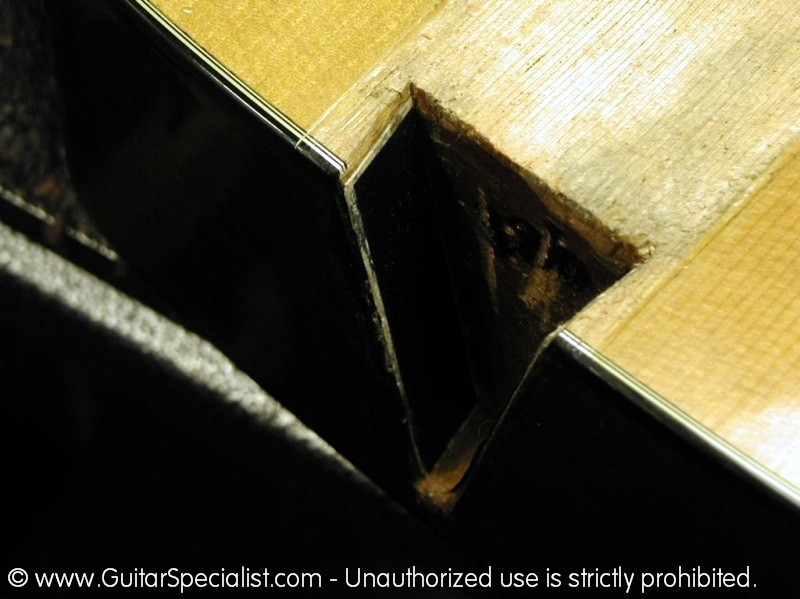
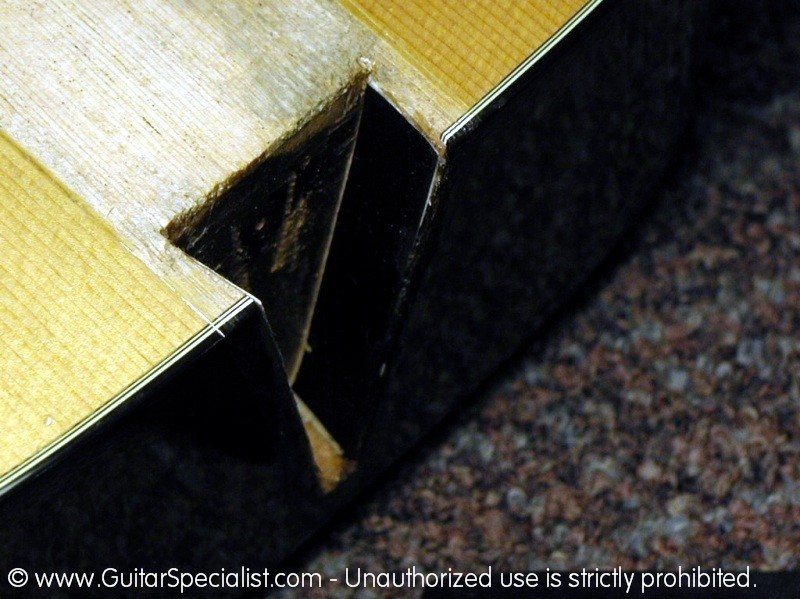
 The next step is to relieve the dovetail. This is a step that not a lot of shops do. I like the procedure because it assures a tight fitting look between the heel and the body when we assemble the guitar. |
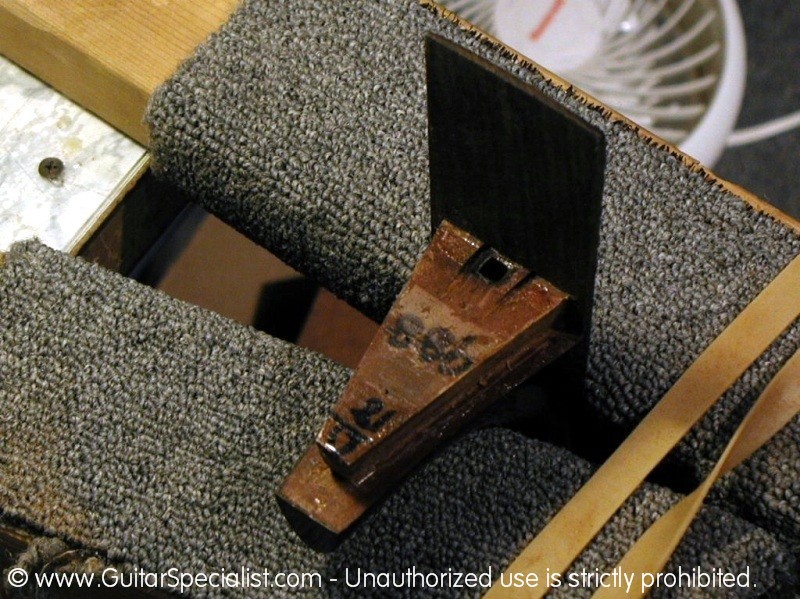
 The neck is held in a jig we normally use to hold guitars upside-down. |
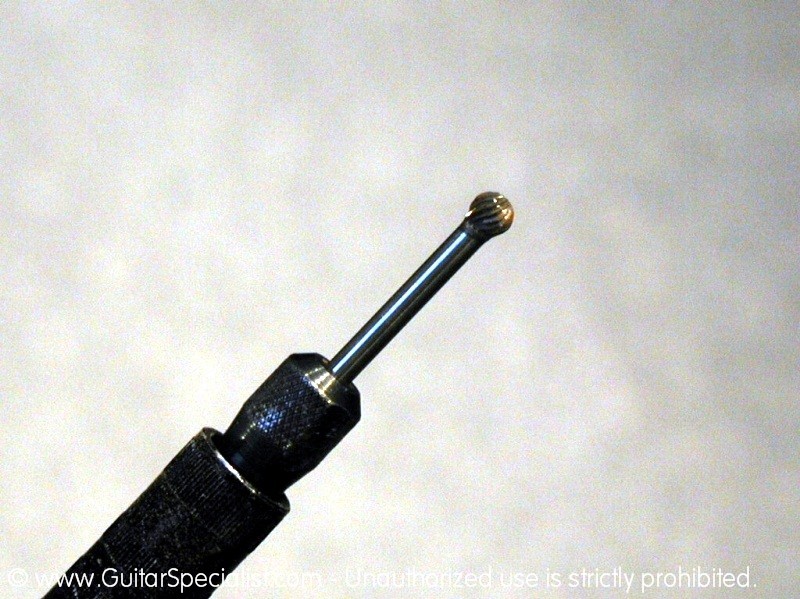 We us a small ball end cutter to make the cut. |
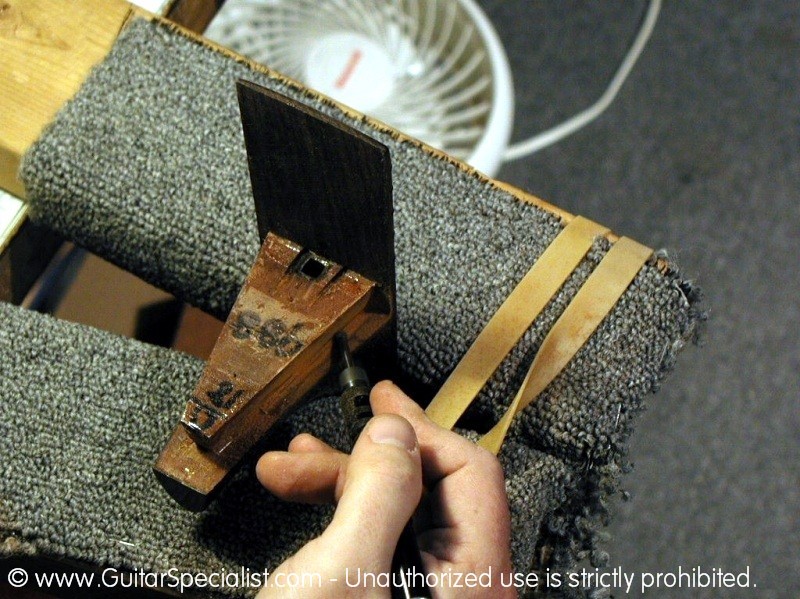 We carefully cut a channel on the "cheeks" of the heel. |
 By relieving this area just a bit, the removal of material to re-angle the neck goes quite a bit smoother and conforms to the sides of the guitar much better. |
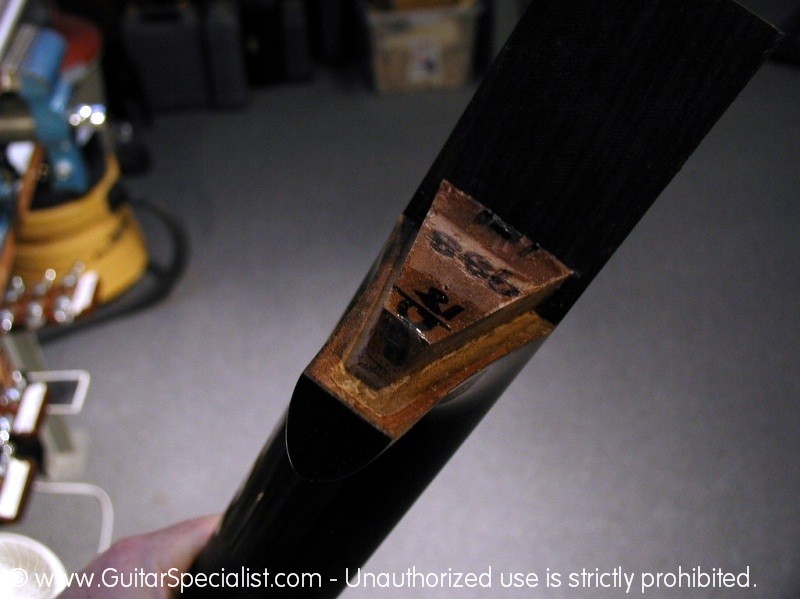 Here is a look at the relieved part of the heel. |
 After we re-cut the angle of the neck, the relieved area will be much smaller then it is now. |
 As it is we remove very little material. |
|
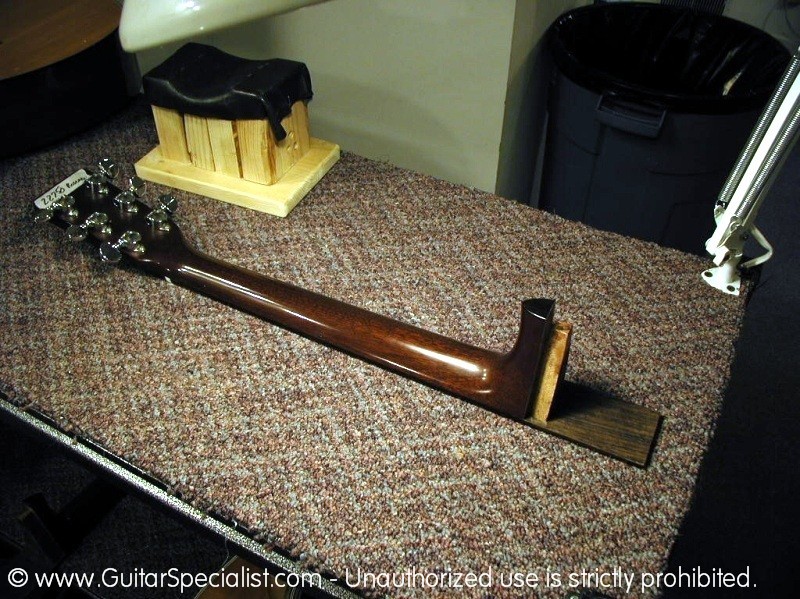
 Now it's time to start re-angling the neck. We double check the neck angle before we start. |
||
 You can see how far below the bridge the neck angle points to before we get started. |
 With a neck angle this "under-set" there is no way to get a nice low action on the guitar |
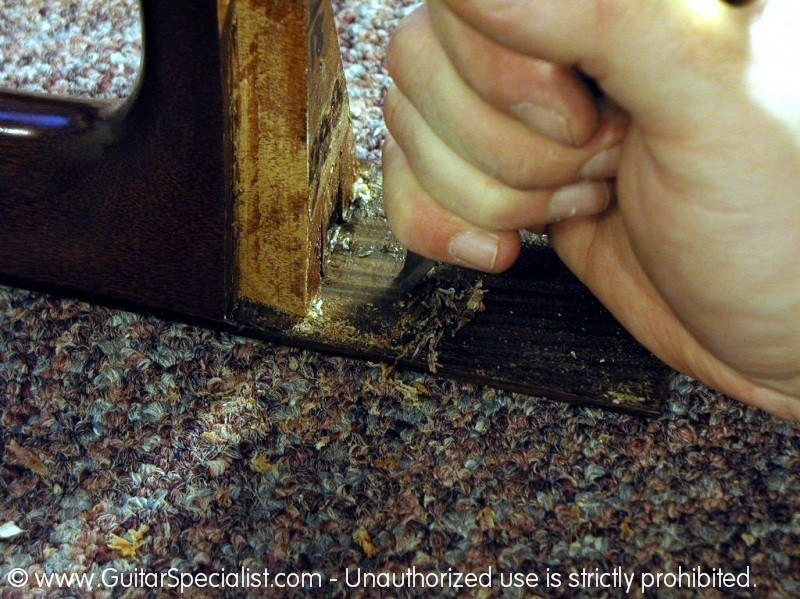
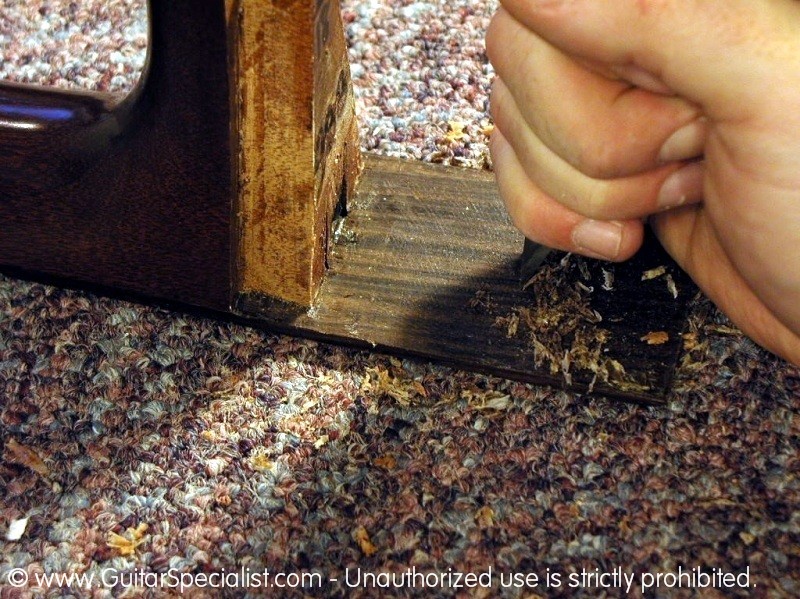
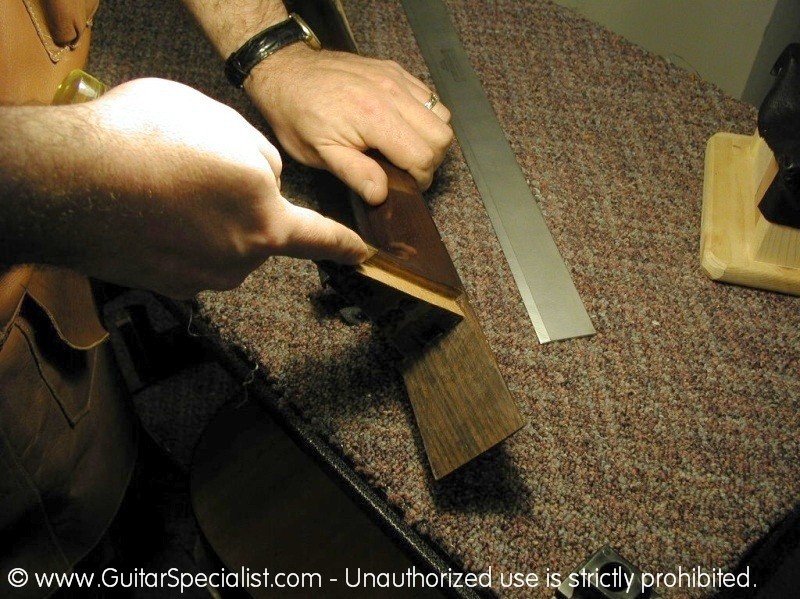 We begin by tapering the cheeks of the heel, taking more material off the back end of the heel and pretty much nothing from the fingerboard end. |
 Once I have removed enough material to satisfy me that there is improvement. we tape off the area of the guitar that the heel comes into contact with. |
 The tape will protect the finish from the next step in our process. |
|
 Once again and all the way through the process, we keep checking our progress in terms of neck angle. Here you can see that we have already improved things dramatically by about 50 percent. |
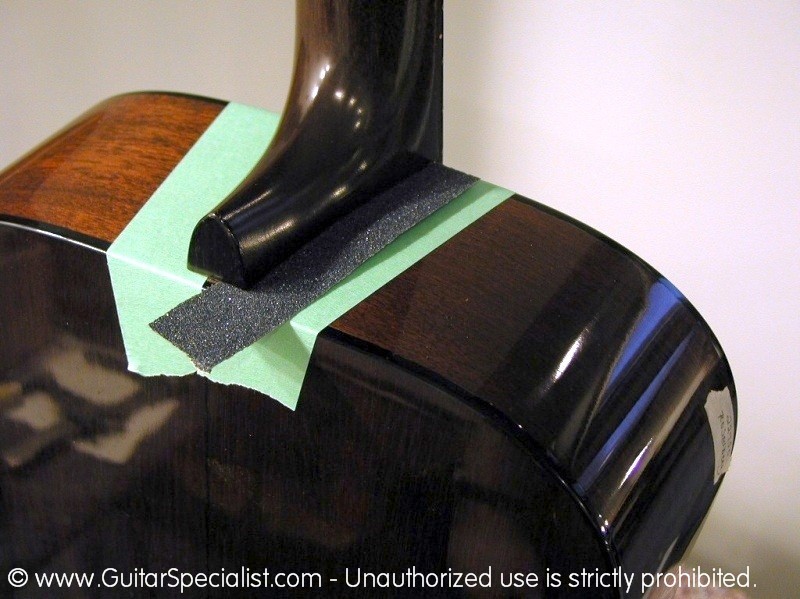 We cut strips of 180 grit sandpaper and place it under the heel of the guitar face up, where the heel contacts the body. |
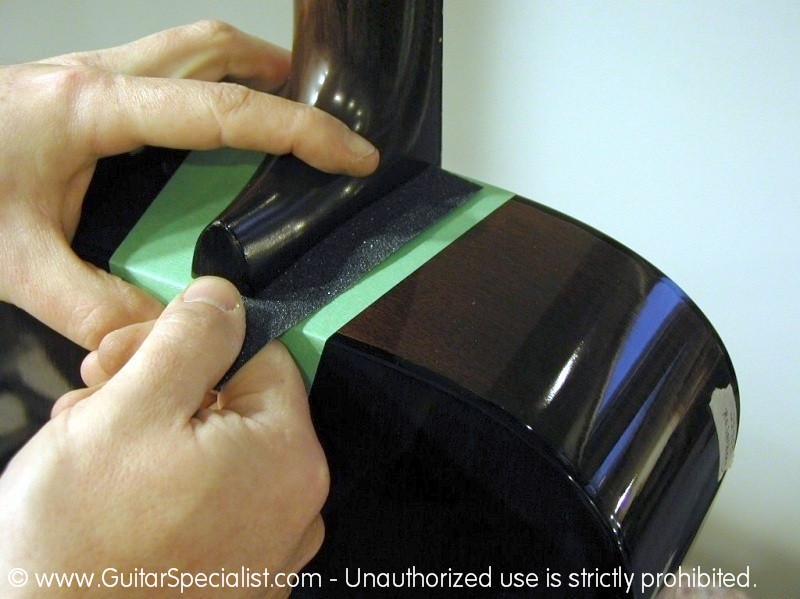 Holding the neck firmly in the correct position, we pull the sandpaper out in one motion. |
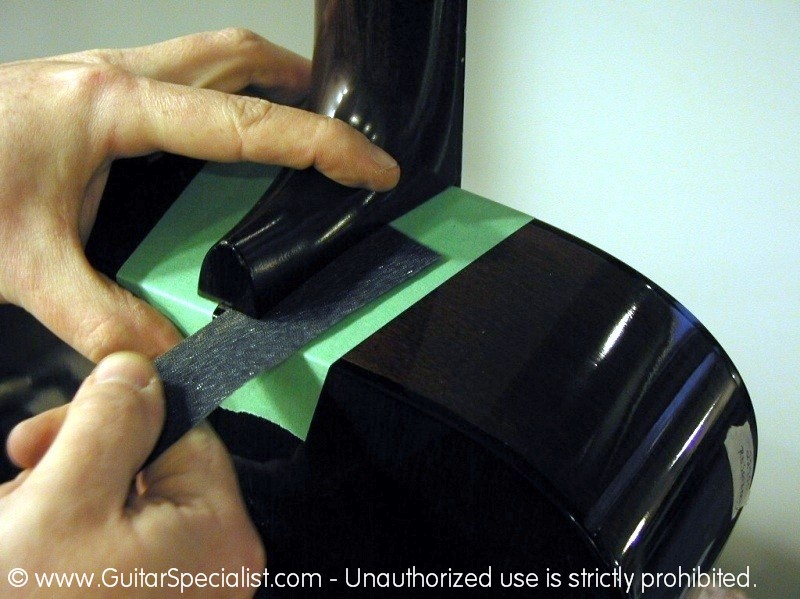 As the sandpaper is pulled out from under the heel, it will continue to cut the heel end of the joint more aggressively than the fingerboard end |
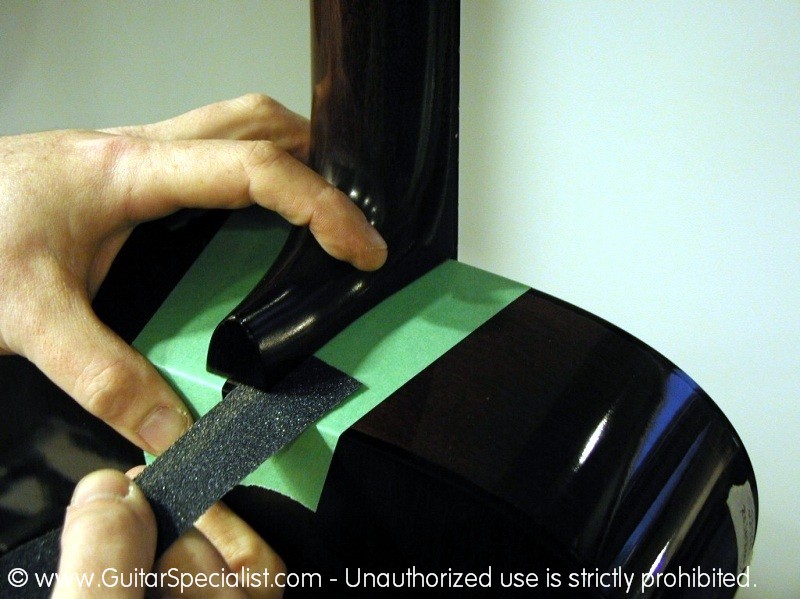 This ensures that we will continue to improve our neck angle and also make sure that the cheeks of the heel conform nicely to the sides of the guitar. |
 Once again, we check out progress. I think it goes without saying here that these steps take a lot longer than is represented here. If we showed you all the pictures of how many times we check the angle, and then remove some more material, and then check again, and remove some more ... it would get a bit boring woudn't it. |
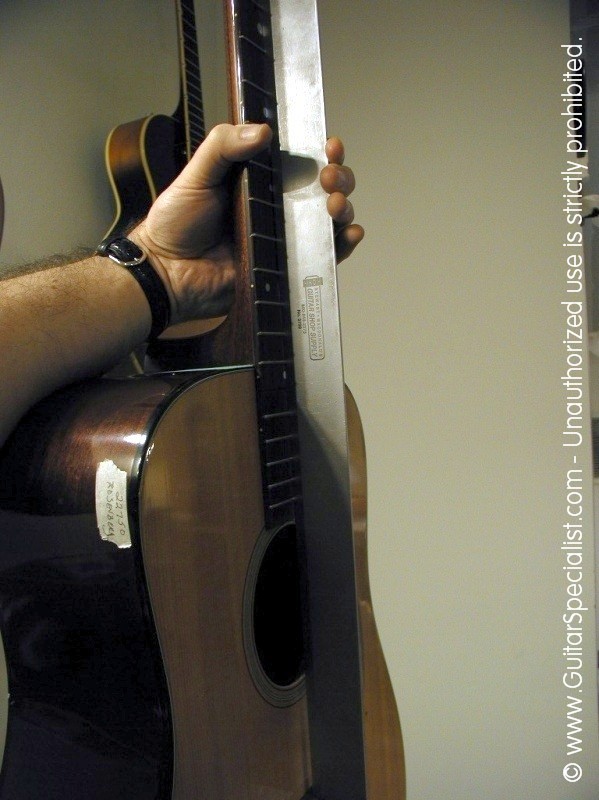
 Laying the straight edge on the fingerboard, we will be able to see where the neck points to at the bridge. |
 Finally things are looking pretty good. |
 A closer look shows us that the straight edge is pointing well above the bridge - Perfect. |
 It's time to move onto prepping the neck for re-installation. This is another step that I find a lot of shops skip. |
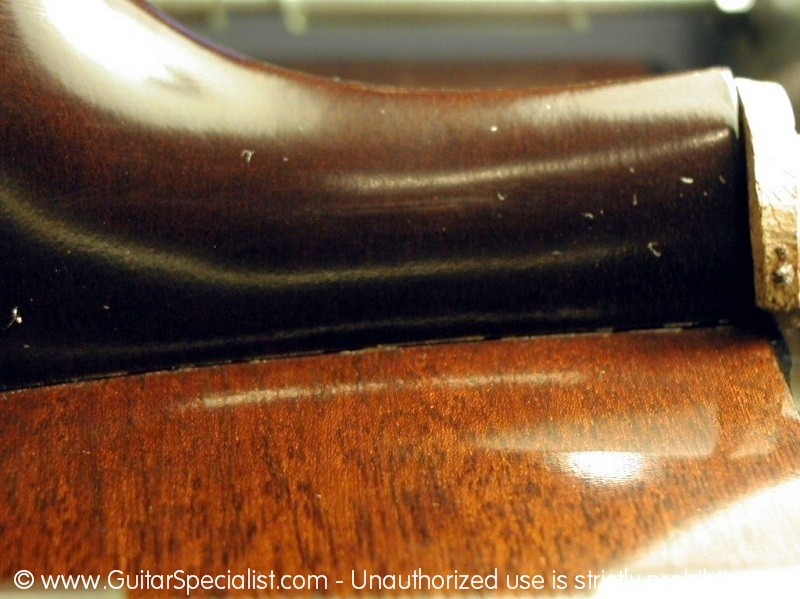
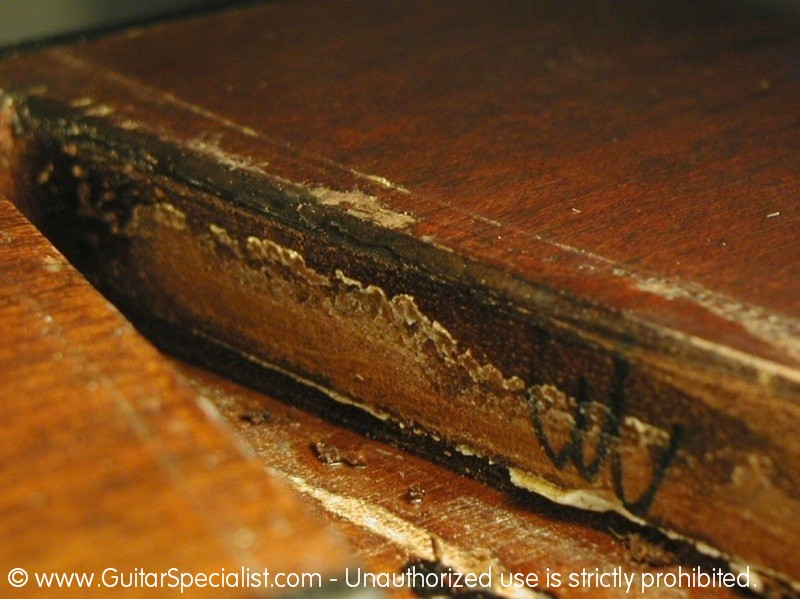
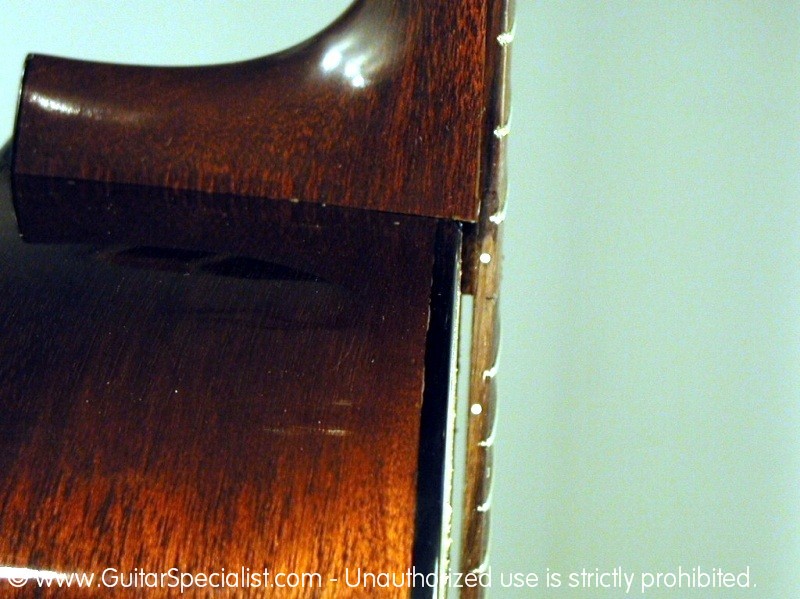
 During the course of neck removal, trimming the heel and setting the angle, the heel can show some evidence of handling. |
 If you look close you'll see some small chips of missing finish. This one isn't too bad at all. In fact most shops would ignore it. |
 I have always been of the belief that in this business we should (wherever possible) try to cover our tracks and remove all evidence that a guitar has been worked on. |
 Unfortunately it's a belief that not too many repairmen share, all together too evident in all the "teeth marks" and tool marks we see on guitars coming into our shop having had repairs done elsewhere |
 Alight - I'll get off my soapbox. Back to this job. In these couple of pictures I am brushing on some lacquer to the edge of the heel. |
 It can take several applications and plenty drying time in between. |
 And not for the other side. |
 After several applications and enough drying time, we have successfully built up the finish taller than the surrounding area. |
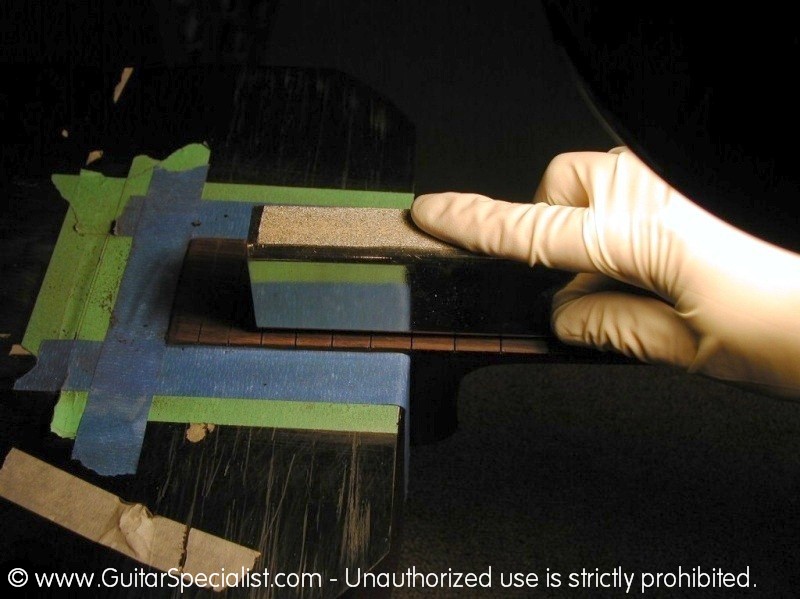
 Time to do a bit of sanding. I merely wrap a small piece of 320 grit wet or dry paper around a polishing stick. |
 It gives me the right kind of backing for the sanding job, |
 After working up through a few grits, 320, 400, 600 and 1000 - this is what we get. |
 Now it's time to compound and buff up the finish. |
 Using some liquid compounds I gently buff up the area. |
 Things get a bit sloppy while compounding. |
 The results are a nice shiny finish with no trace that we've been anywhere near the neck. |
 Even upon close inspection you'll notice all those little finish chips are gone. |
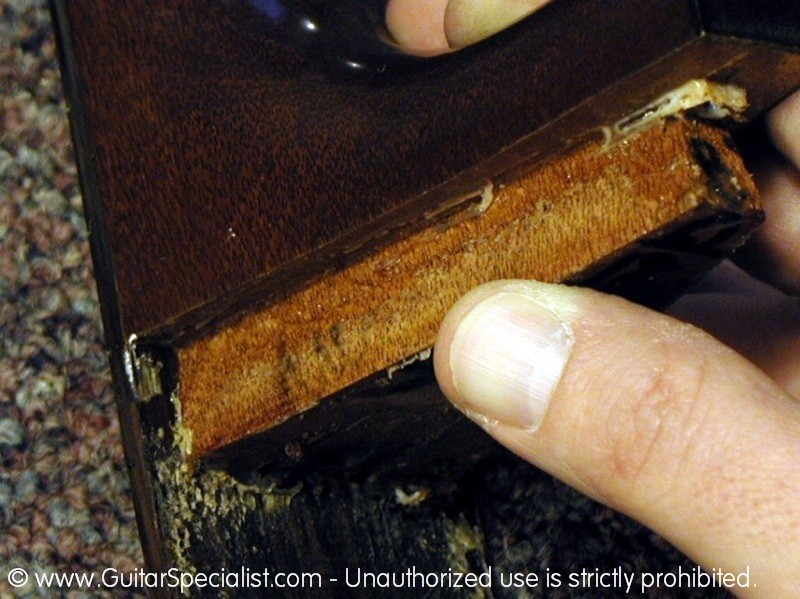
 Not it's time to re-work the dovetail and get this guitar back together again. |
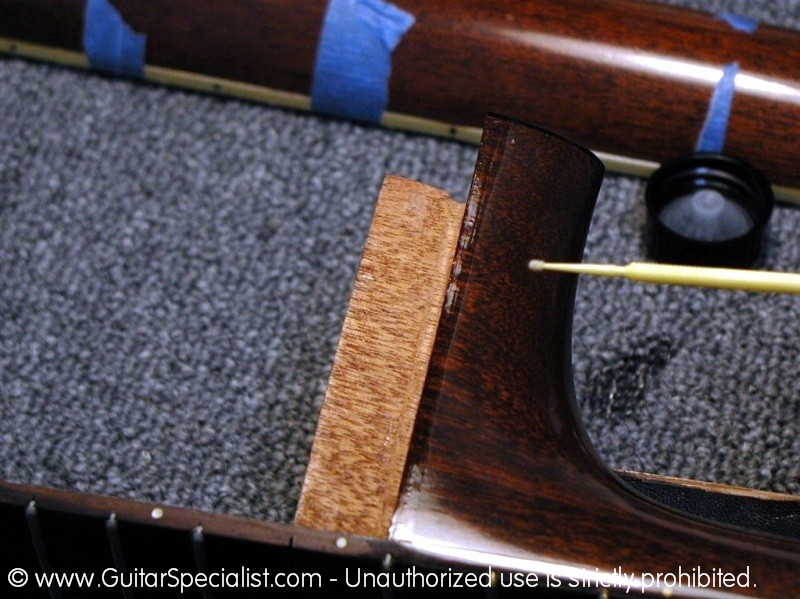
 Shims are glued in the neck. We make ours out of Mahogany. The same wood as the heel block and neck. |
 On top of the shims, we place very thin pieces of articulating paper - the same that your dentist uses. |
 They are glued in with a very light tack adhesive so they will be easy to remove later. |
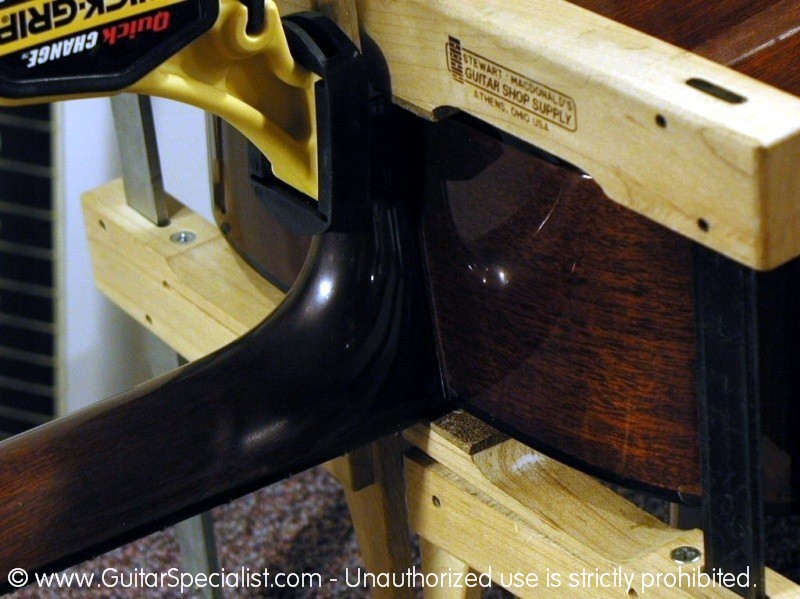
 As the neck get inserted into the dovetail, the shims are making the neck sit proud of the body. |
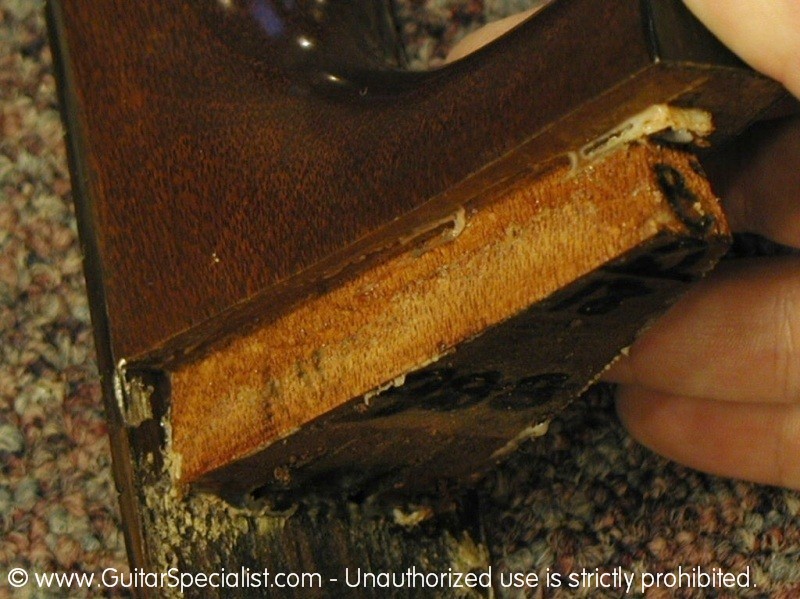
The idea
here is to re-cut the dovetail tenon to exactly match the angle of the
mortise. Not a simple task since you can't really see in there. |
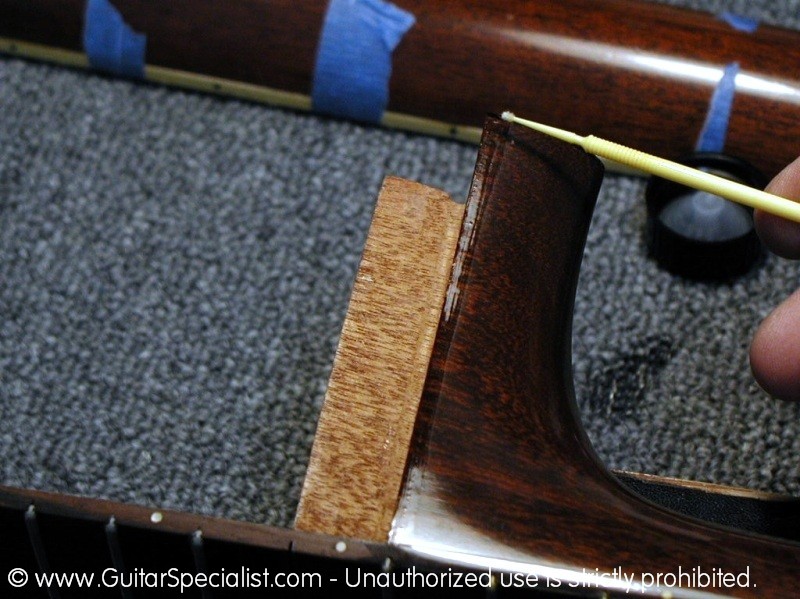
 Applying firm pressure, the articulating paper will leave it's mark on the tenon. |
 here we can see very few spots that the tenon has contacted with the mortise. |
 We chisel down just the areas we know to be touching. |
 After another fitting we can see more area has contacted the mortise. |
 As we remove only the "blued" area the tenon will sit a bit farther back into the dovetail making futher contact and pulling the neck into the mortise. |
 This is perhaps the trickiest part of neck resetting. It taks a firm understanding of the geometry involved. |
 Here we are removing a bit more material. |
 and a bit more. |
 After another fitting we see some more blue spots. |
 The blue spots will shift as the tenon changes shape to fit the mortise. |
 We continue ... OK - I think you get the idea hear - unless you want to see 70 or 80 more pictures like the last 10. |
 As we keep this process up, the gap between the body and neck continues to shrink as the tenon takes the shape of the mortise. |
 Finally we get to the point where there is almost no gap at all. The remainder of this tiny gap will disappear as we press the neck into the dovetail, ensuring a very tight fit. |
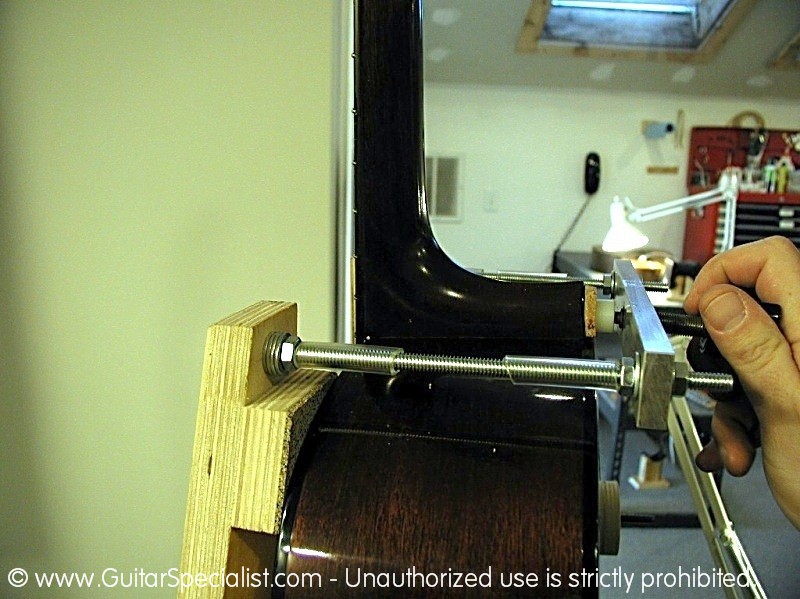
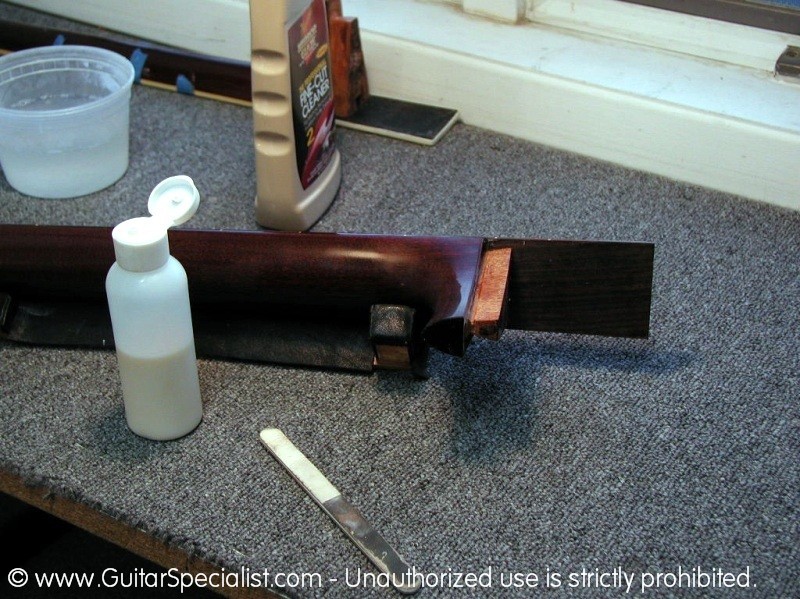
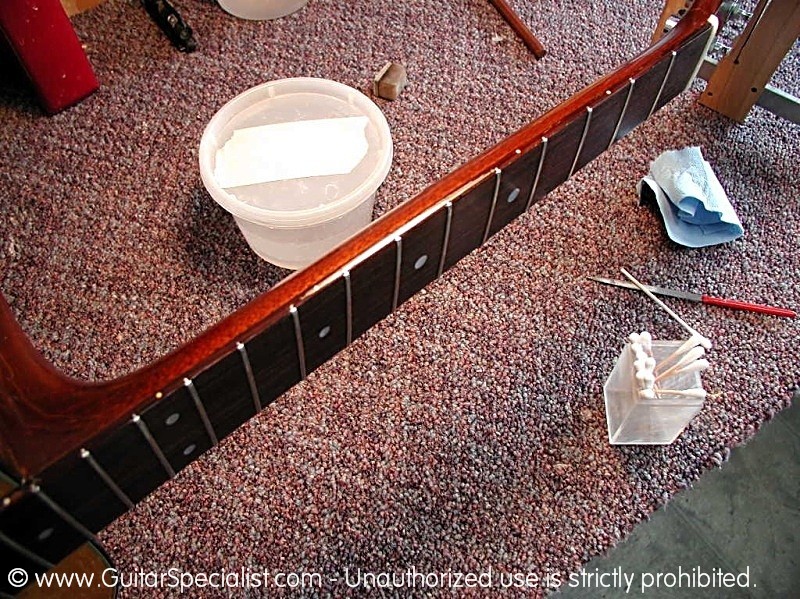
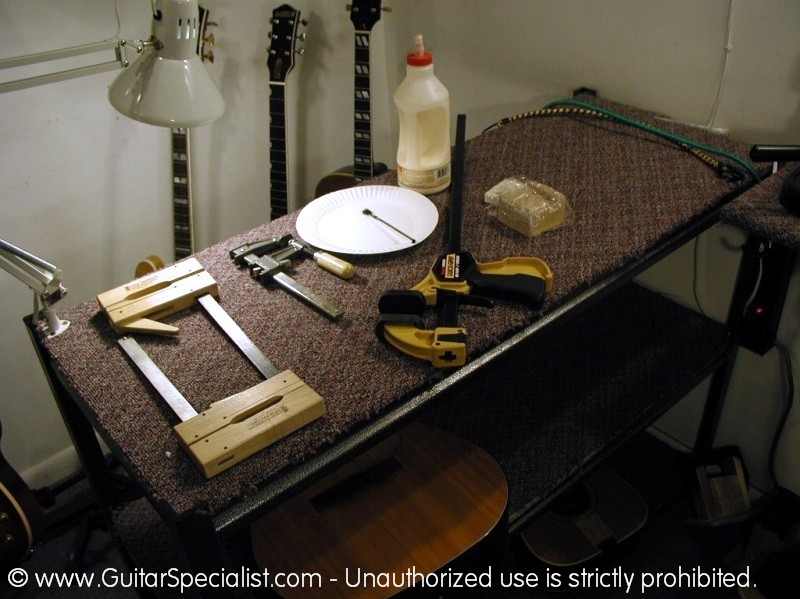 Here we are lining up all of you clamps and gluing supplies so they are at the ready. |
 We apply a thin coat of glue only onto the surfaces that are going to be in a bare wood to wood contact. |
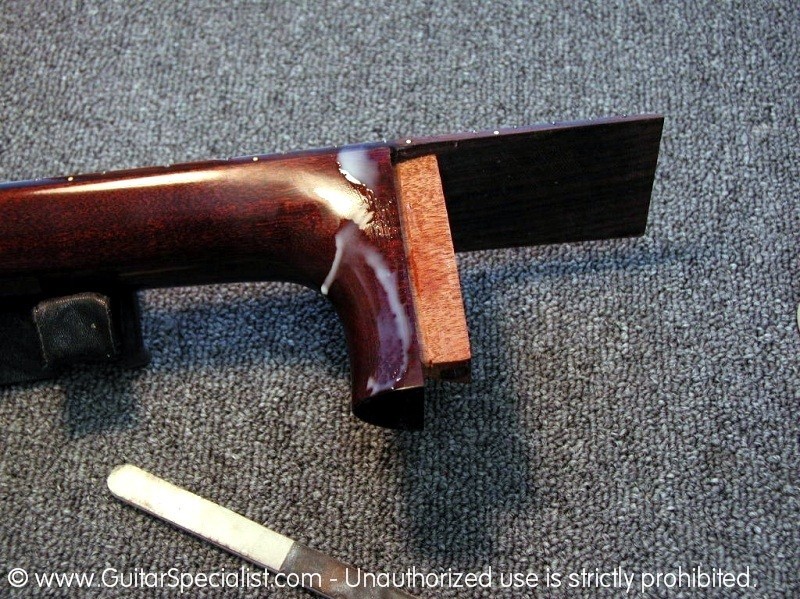
 First we clamp the fingerboard extension and check the centerline fit of the neck. Then we get a couple of cam clamps to press in the dovetail area. |
 It's not very clear in this picture because of the plastic covering on the caul, but it is notched to fit over the frets and has a radius to match the fingerboard. The saran wrap is so we don't inadvertently glue it to the fingerboard while cleaning up any squeeze out. |
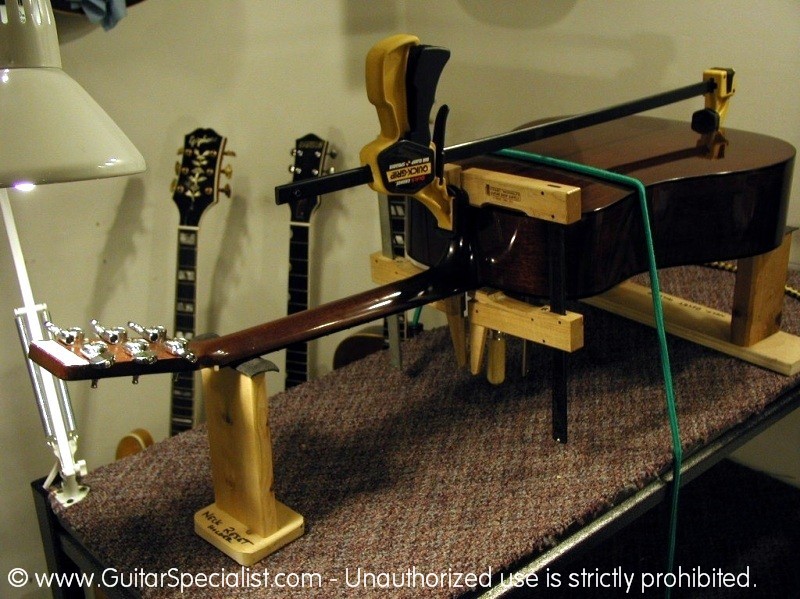 Here is our complete clamping setup, the long clamp from the heel to the tail block is probably unnecessary, but this setup covers all the bases, and I've always been a big believer in insurance. |
 The most important part of our clamping setup is the two cam clamps. They are doing all the real work. Now we wait for things to dyr and move on to the frets. |
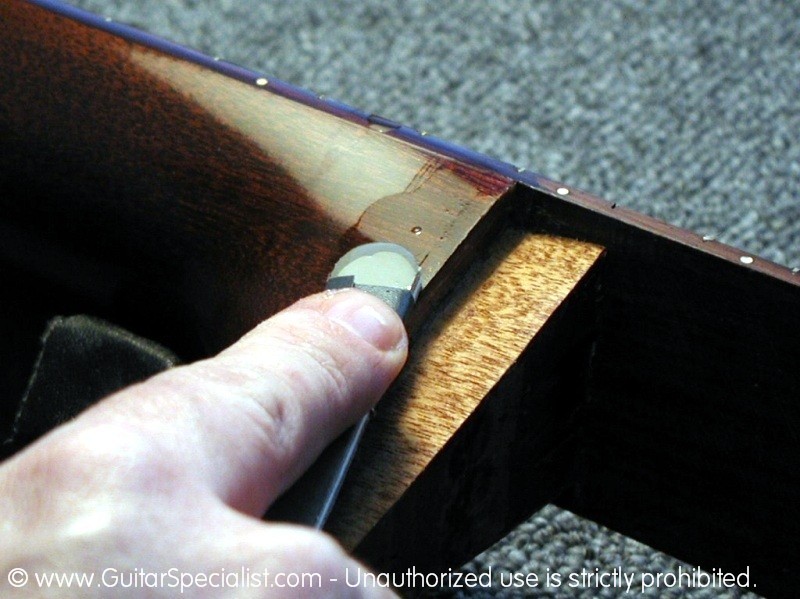
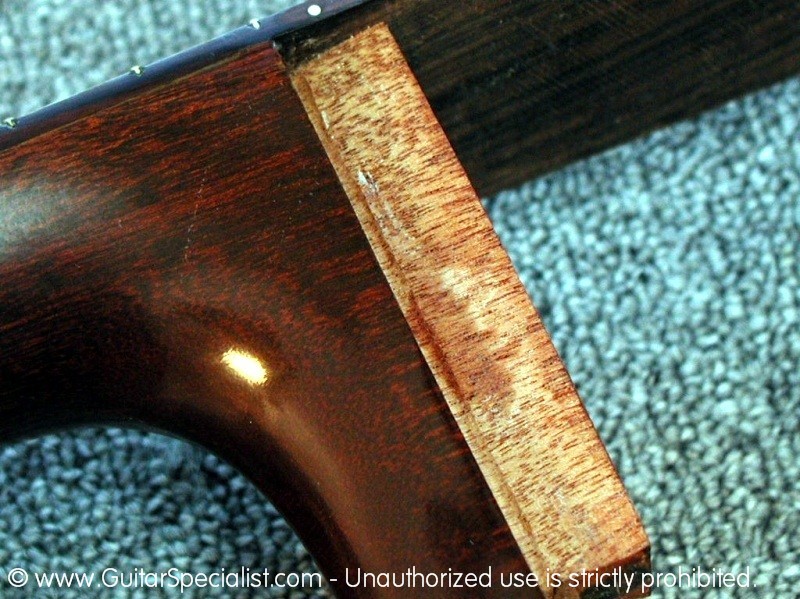
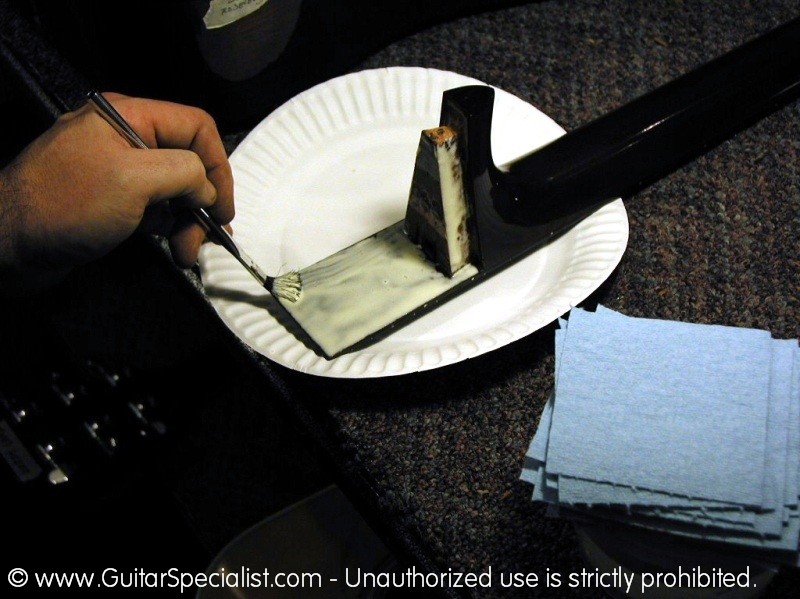
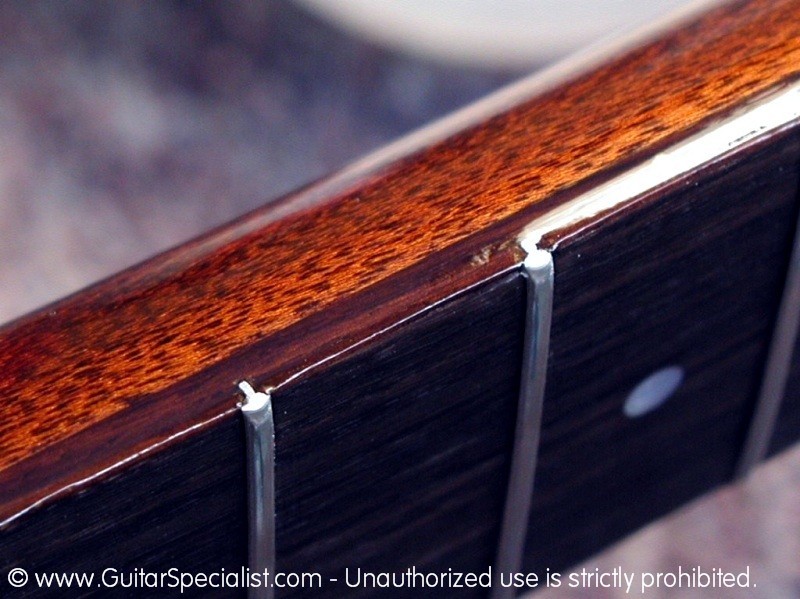
 First order of business, remember those two little holes in the fingerboard at the 15th fret? We fill them with a bit of glue and wood dust. Looks nasty, I know. |
 with a little sanding in the area things will improve dramatically. |
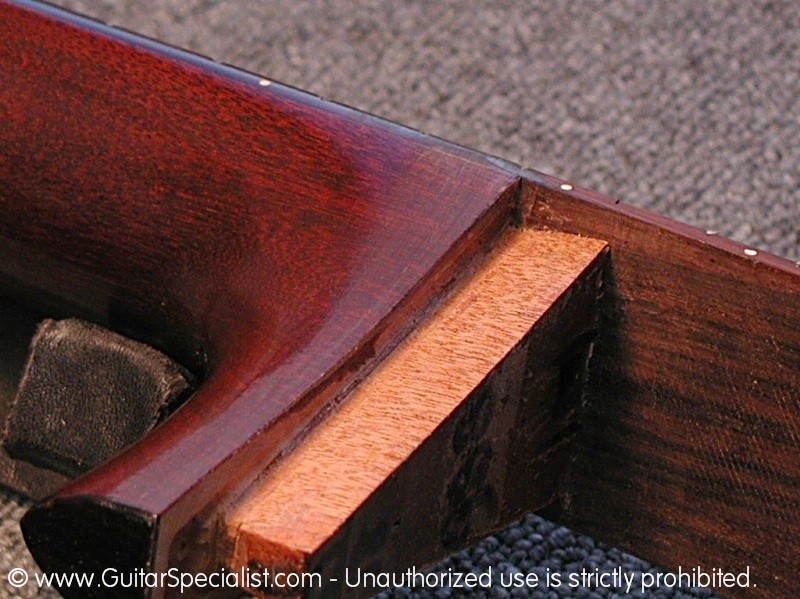
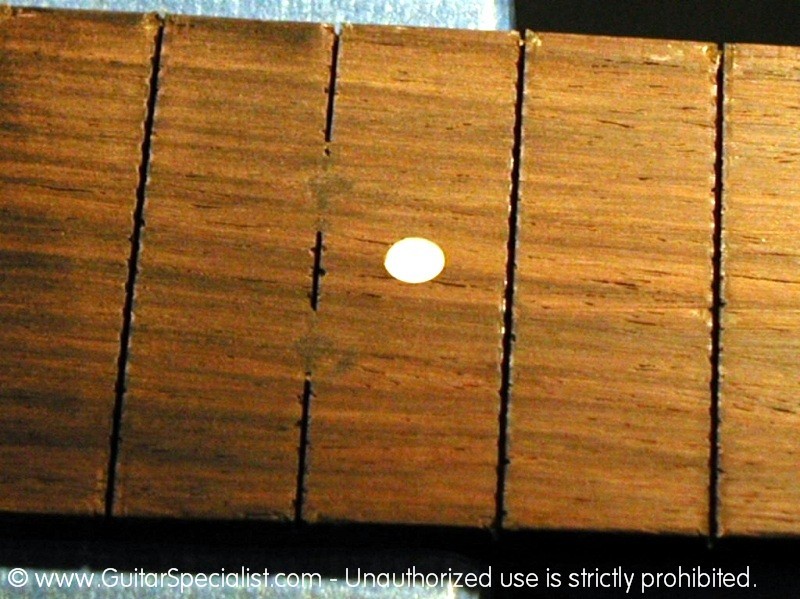 Here's what things look like after a bit of rough sanding. A lot better. |
 That's a big improvement. The filled holes will be re-cut to accept the new fretwire. |
 First we plane and prep the board for frets. There are plenty of pictures throughout this site on re-frets - step by step - so I'll spare you that here. |
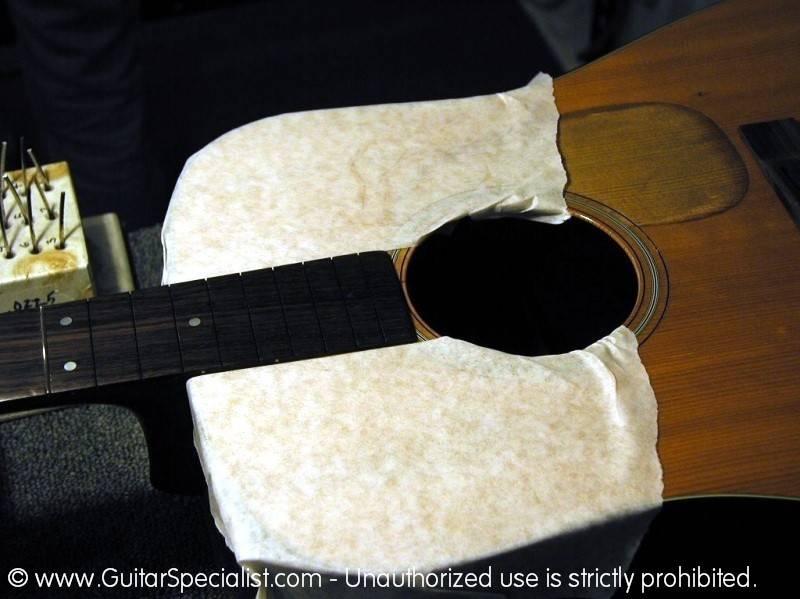 Just the highlights for now - the face gets protected with some transfer tape. Notice the single fret in the guitar - we were testing for the right tang size. |
 A closer look at the 15th fret holes. Nobody will ever know we were there. |
 The ubiquitous "Fret Buck" One of the best tools I ever bought. |
 The Fretting is going quite nicely. |
 Finally all the frets are in. |
The next step is to do the level and crowning of the frets. There are lost of examples of those procedures on this site So I figured I would spare you the photos here. |
 There - all leveled and crowned. that was quick. |
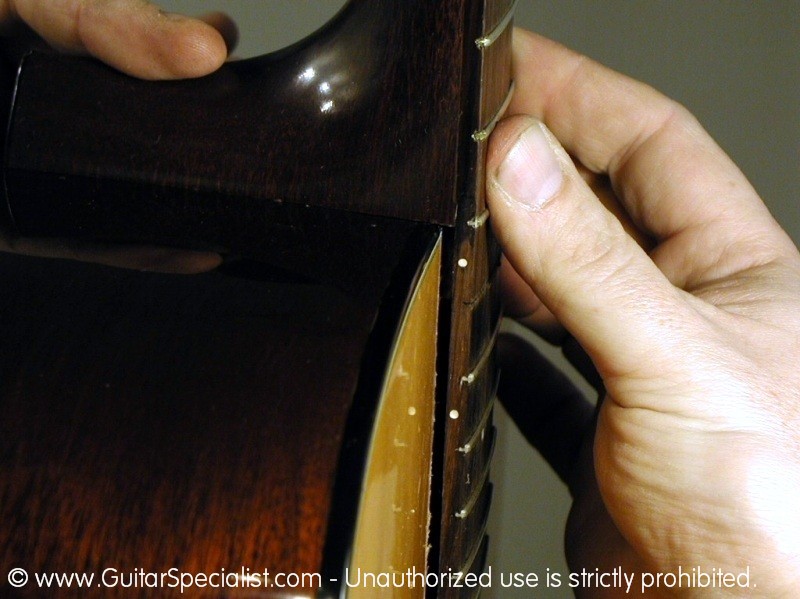
 fretwork invariably leaves a fair amount of telltale signs on the sides of the neck. |
 You can see the lacquer missing from the edges of the frets. |
 In keeping with our philosophy that guitar repairs should always be able to be done with as little evidence that we've "been there" we are going to touch up the sides of the neck |
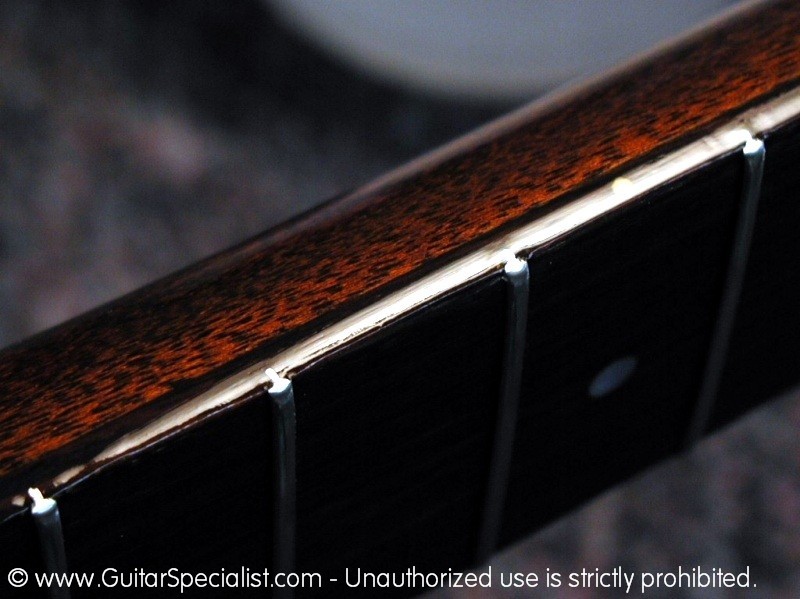 Sadly I have seen all together too many re-frets being done out there that leave this part of the job completely ignored. |
 After a few applications of lacquer, things are looking much better. |
 I'll be the first one to admit that it's not always possible to do extensive repairs without any cosmetic evidence that the work has been done. But there is no excuse for not trying. |
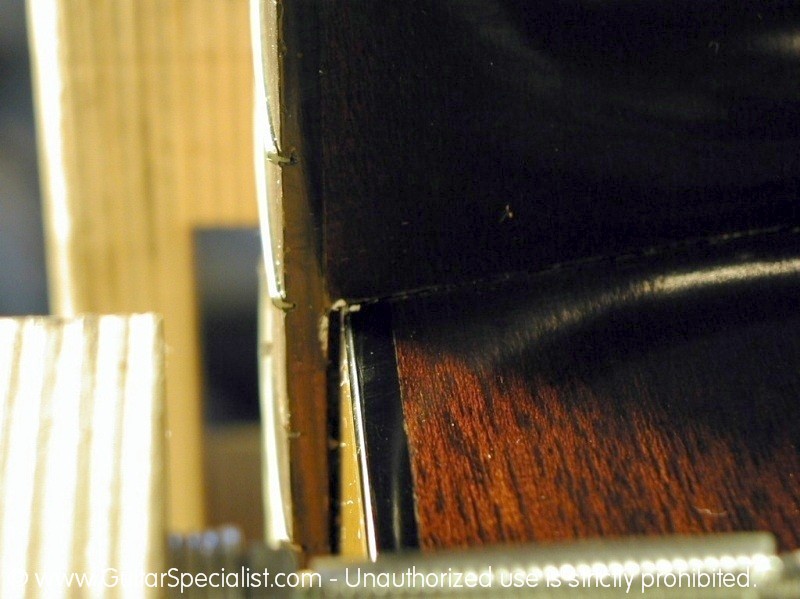
 Here we are at the end of our neck reset. A custom made bridge with a nice tall saddle. |
 Even though we have a fairly tall saddle - the action is now quite low. Resulting in a very comfortable guitar to play. |
 A new bone nut tops things off quite nicely. |
 All set for another 30 years of service. |
||
| Suffice it to say that a neck reset is a pretty complicated job. It takes a great deal of understanding about the "geometry" of the guitar as I call it. It also takes a tremendous amount of experience and skill to do it well. We do about two to three hundred a year. Before committing to a neck reset make sure you check out your luthier very thoroughly to make sure they are up to the task. | ||

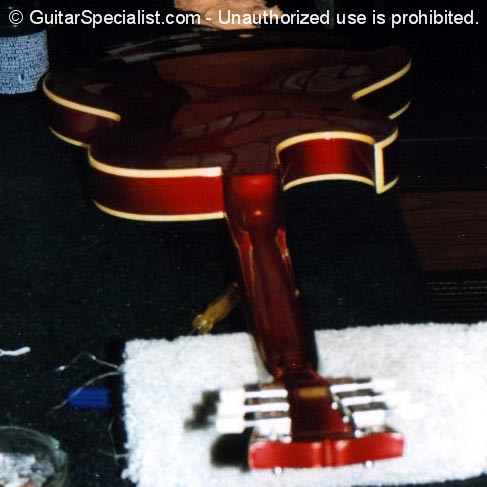
![]()
 Here we have a Gibson ES125 that was left in the trunk of someone's car (not the best place for a guitar) in the middle of summer. |
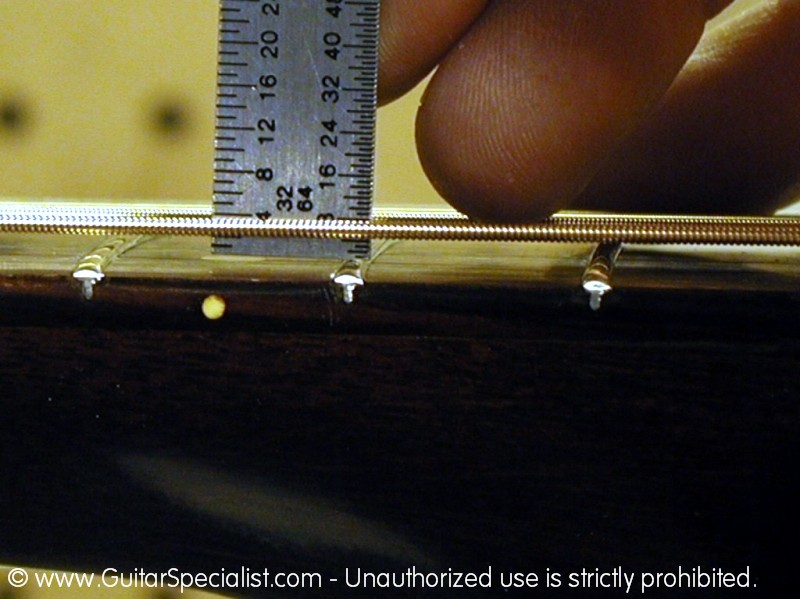
 The neck had a slight gap at the heel as a result of the high heat in the trunk. I could see that the neck angle had become severely under- set as well. |
 I had just enough room to get a needle in the gap of the heel to inject the steam - I didn't have to drill through one of the fret slots to access the dovetail. |
 With the heel mortise cleaned out, it's ready for some final shaping & reattaching to the body. |
Here is a look at the clamping setup - not very elaborate. One cam clamp provides enough pressure to hold a well- shaped dovetail joint in place as the glue dries. |
 The band clamp is more like a security blanket - it gently pulls back on the neck so the cam clamp doesn't have to do all the work. |
 After taking the clamps off, I'll let the guitar sit unstressed for a day or so. |
 It looks pretty good - not even much finish damage to the heel. |
 Re-install the tuners ...
|
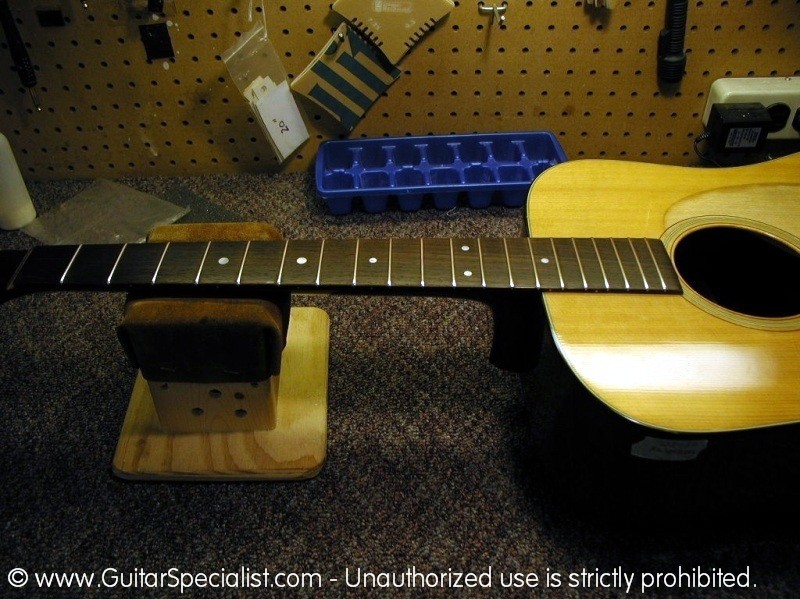
 ... and after a little fret leveling & dressing it's ready for strings. I was lucky - a neck reset usually involves some refretting, but since this guitar was being set back to where it was before the trunk incident, it was'nt necessary.
|
||
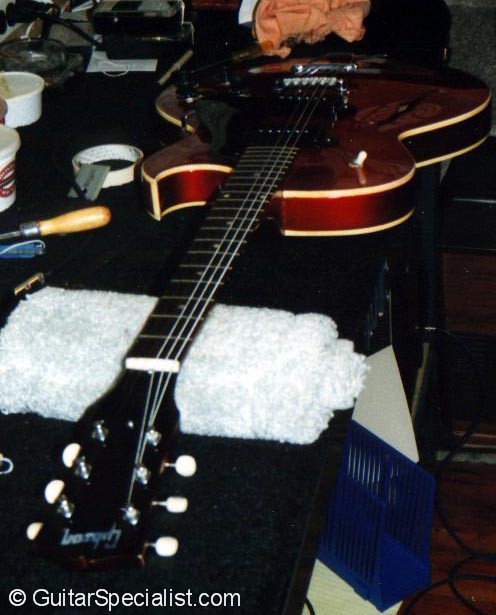 All strung up, set up & ready to go. |
![]()
Here's my case in point about the rush to reset a neck. This instrument, a very nice Ibanez mandolin, came in with the neck sitting half-way out of the neck pocket, courtesy of the work of another local shop, one of those "super- store" type music centers that boast, among other things, "Master Luthier on Premises." Originally, the instrument had a slight gap (.020 inch) at the heel, which the customer noticied and became concerned about. He took it to this place, which shall remain nameless as a professional courtesy (at least until they tick me off enough). A neck reset was immediately recommended (most probably with the image of dollar signs dancing around in his head.) The customer left the instrument to be repaired then had it handed it back to the him with a half-hearted apology. "Sorry this is unrepairable". They failed to even remove the neck (out of haste or inexperience) when all that would have been required would have been a little glue injected into the joint and clamped shut. Look below to find out how
"repairable" this instrument really is. Unfortunately a neck reset is
now unavoidable. |
||
 I steamed out the neck properly (excuse the pun) by drilling a hole though the fret at the dovetail joint and injected steam directly to the glue joint.
|
 The instrument came apart with relative ease. |
 I cleaned out the damp glue before it had a chance to dry again. |
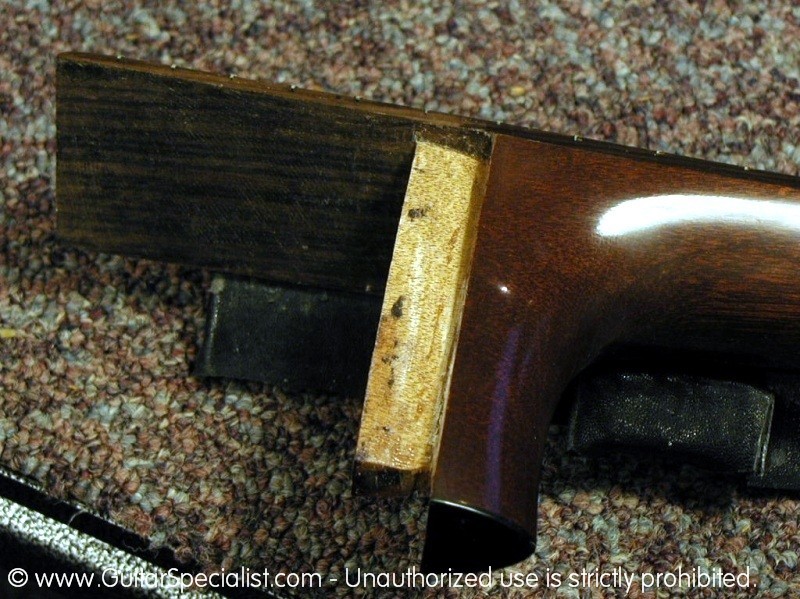
 With the glue cleaned up it's now time to rework the dovetail joint for a good fit & angle. |
 Here I am shaping the wood shim inserts that I glued into the mortise. |
 Mortise I Tenon shaped & ready to be glued up. Here is also a display of the tools involved. |
 Now assembled and in the process of fretting. |
 An instrument back in the kind of shape it should be. |
|
| This whole ordeal could have been easily avoided if some inexperienced luthier exercised a little restraint. Make sure you trust your guitar tech, and if your not sure - get a second opinion! | ||

|
(914) 401-9052 |
|
|
|
� Copyright 1998 - 2019 and beyond |